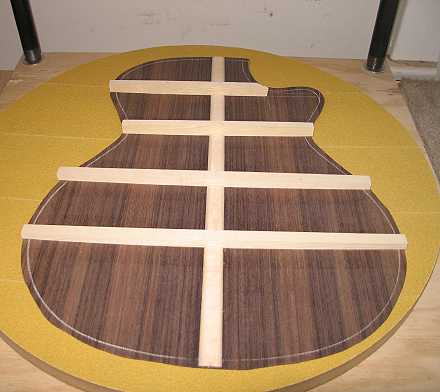
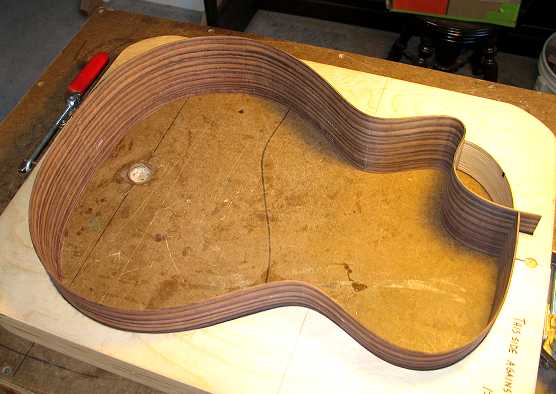
Bracing the Back & Gluing in the Blocks

Tuesday, July 8th, 2008:

Today I braced the back, after sanding the center strip and sanding the back. I used masking tape along both sides of the braces, to more easily deal with glue squeeze-out.


Here's the result. I still need to shape the braces. That will come tomorrow.

[ NOTE: I have since replaced the top brace in this photo with one that extends all the way across the upper bout. Look here for the explanation. ]


INDEX:

Return to HOME PAGE

  1. A Little Detour....A Tour of My Workroom!!!
  2. Joining the Top
  3. Starting to Bend
  4. Bending, Day 2
  5. Bending, Day 3
  6. Neck Block, Center Strip, Cutaway!
  7. Bracing the Back, Gluing in the Blocks
  8. Shape Back Braces, Glue Neck Block, Make Spreaders
  9. Spreader, Rim, Kerfing
  10. Rim-Sanding, Brace-Shaping, Go-Bar Modification, & Obon!!!
  11. Side Strips & Rosette
  12. Beginning the Top Bracing
  13. Bracing, Continued...
  14. Gluing the Back
  15. Gluing the Top
  16. Trimming the Overhang
  17. Routing for Binding : Day 1
  18. Routing for Binding : Day 2
  19. Fitting & Gluing the Bindings
  20. The Soundbox is Done!!!
  21. Truss Rod Slot, Peghead Veneer
  22. Peghead, Start Heel
  23. Threaded Inserts, Neck Trimmed
  24. Fitting the Neck!!!
  25. Truss Rod Cavity, Heel Cap, Fingerboard Trimmed
  26. Finishing and Gluing the Fingerboard / Peghead Inlay
  27. Carving the Neck
  28. I Feel Good....The Basic Building is Done!!! (Now on to the Finishing....)
  29. Pore-Filling
  30. Sealing
  31. Finish Coats
  32. Finishing the Finish!!!
  33. Gluing the Bridge
  34. It's All Done!!!


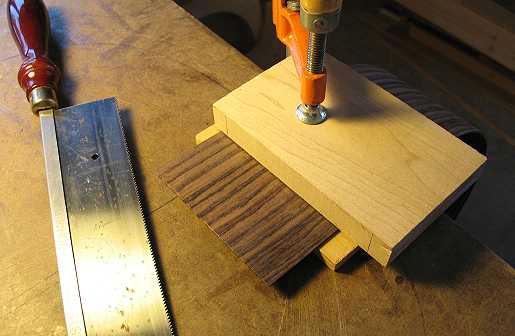
I recently splurged and bought the Frank Finocchio DVD series, and I've found it very, very helpful! In fact, today I used two of the methods he shows on the videos. To the left, I am using his method of clamping the edge of a hardwood block right on the line for the end of the side, and then using a pull-saw (this one is my Stew-Mac fret saw) to cut the end of the side. The block serves as a guide for the saw. This worked SO much better for me than my old method of using a bandsaw and sander to cut the line. I got it perfect the first time!!!


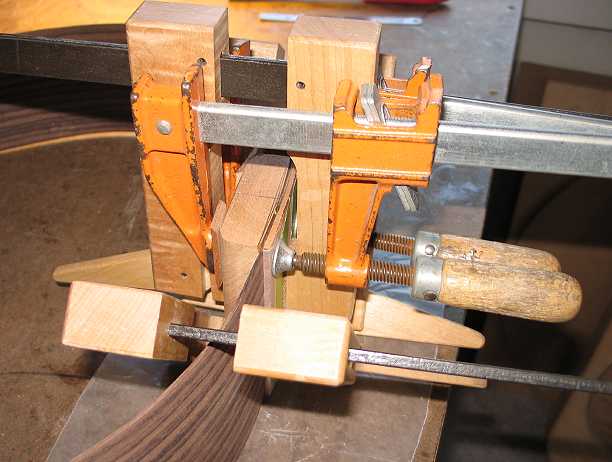
Here's another tip I got from Frank's videos. He uses a thin, flexible piece of mahogany as a clamping caul for gluing the slightly radiused neck and tail blocks. This I found easier than trying to make a caul with the corresponding radius sanded into it.

Here I am gluing the tail block.

TOMORROW:

  • Glue in the neck block and shape it to the cutaway side.
  • Shape the back braces.
  • Make spreaders for the cutaway side.
  • Start work on the rosette.


Previous Page

Next Page