Gluing the Back To the Rim
Monday, July 21st, 2008 Today, I prepared to get everything ready to glue the back onto the rim. Before I did that, however, I tried to make a video so you could hear the nice tap tone of the braced top. Try as I might, I just couldn't seem to get the camera's audio to capture what I was actually hearing with my ear up to the soundboard as I tapped it. All you could hear on the camera's audio was the sharp rap of the tapping, and none of the actual nice lingering ringing sound. I tried holding the top all sorts of ways in relation to the camera's microphone, but nothing worked to convey the true tap sound. Rats! Oh, well...I suppose there is a way to do it, but I couldn't figure out how. At any rate, my top does have a nice, resonant, clear ring to it, so I'm happy. |
|
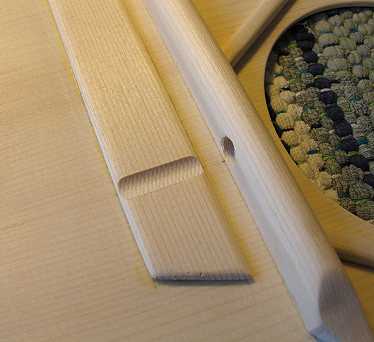
After trying all that, I set about preparing my top and back for gluing. (The top I will do tomorrow.) I used a round file to file a groove in the flat brace above the upper transverse brace, to allow room for a truss rod adjusting wrench.
|
|
|
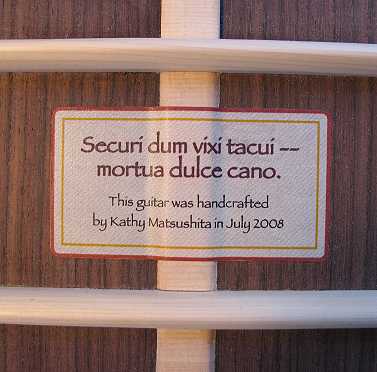
Next, I drilled through the two bolt holes in my neck block, through the rim. I signed my top and also made sure I had a bridge gluing caul that fit (I ended up adapting an old dreadnought caul I had lying around). I then made my label for this guitar. I printed it on some cotton linen paper I had, brushed a couple of layers of thin shellac on the label, and then glued it on:
|
|
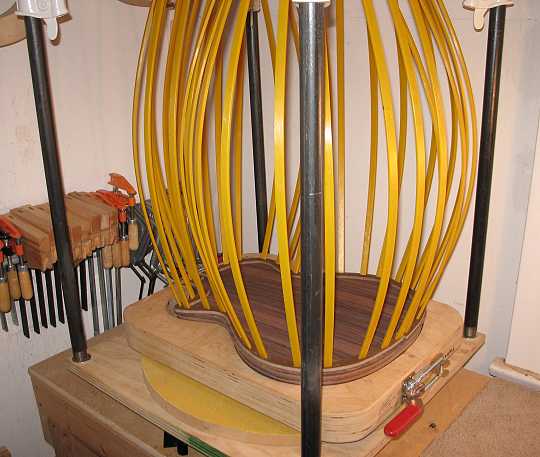
The major part of my day, however, was fitting the back to the rims. I first marked where the back braces met the sides, to find out where the kerfings had to be routed out. I routed out the pockets in the kerfing with my Dremel and a 1/16" bit. I then trimmed my back braces to just fit into those pockets. Finally, I cut the ends of the center strip to butt up against the neck and tail blocks. When it's all done right, the back just kind of "snaps" into place as you press it down. It snapped for me, so that was good! Finally, it was time to glue on the back on, using the go-bar deck. I first laid the back on top of its 15' radius dish, glued up the rim, and laid it on top of the back. That way I could easily see if everything was all lined up right and if there was any major glue squeeze-out to clean up. But then I decided to flip it over, top down, and lay it on top of the 25' radius dish. That way, with the back up, I could more easily see, as I applied the go-bar sticks, whether or not the back was, indeed, clamped tightly to the rim. (With it the other way, I found that all the spreaders kind of got in the way of me seeing everything.) I laid a 1" wide guitar-shaped caul on top of the back before I applied the go-bars. I found the pull-out swivel modification I had made to the go-bar deck really, really made it easy for me to glue this back on. I just kept turning the go-bar deck round and round, as I needed to check the alignment and apply the sticks. No more awkward reaching in and around the deck; all areas are now easily accessible! |
|
|
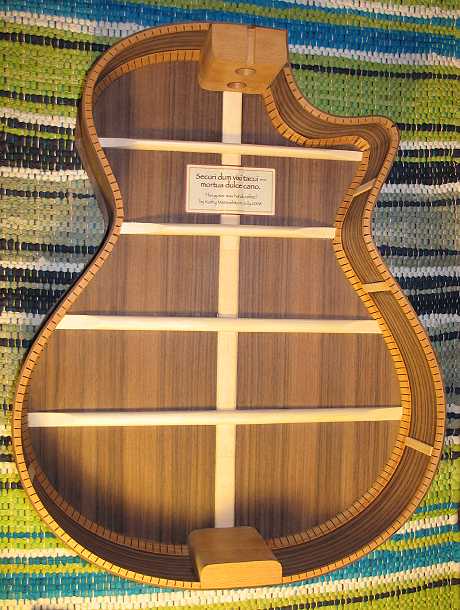
Okay.....After a few hours, I removed the go-bar sticks, and here's the box so far:
|
Tomorrow.....the top!!!! I'm going to put the whole thing back into the mold, re-install the spreaders, and then go through the same process of routing out the pockets in the kerfing for the top braces. Then I'll glue the top onto the rim, and we'll have a box!!!! |
Previous PageNext Page |