Fitting & Gluing the Bindings
Saturday, July 26th, 2008 Only one picture today....I did quite a bit today, but was so busy that I didn't stop to take any photos. Today I started the morning by doing Stage 1 of bending the cutaway side bindings. I did these in the same way I bent the cutaway sides: first in the regular Fox-style bender, then in the little bender I made especially for the cutaway horn. So, this morning I bent the bindings in the regular bender. Then, while that was cooling down, I set about fitting the non-cutaway side bindings I had bent yesterday. I needed to make sure the bindings and purflings all fit the channels without gaps. I also needed to trim the ends to length and miter the purflings. I am mitering the side purflings to the end graft purflings, and also am mitering the side purflings to a vertical strip of binding at the neck end. Would you believe it took me at least three hours total to do the fitting and trimming of just the two pieces of binding (the non-cutaway side bindings of the top and back)? But I wanted to be super-careful and really make this look good. I think I'm getting better at this!!!
|
|
After that was all done, I removed the cutaway bindings from the bender and proceeded to set them in the other bender to bend the cutaway horn. It's sitting there right now, cooling down. Probably later tonight I'll remove them to see how they came out. There's not much more on this soundbox I can do at the moment, until the cutaway bindings are ready to fit to the channels. Oh, yeah...I forgot....one other thing I did today was to brush some shellac on the edges of the top, so that when I later glue on the bindings, it will keep glue from soaking into the top and will help prevent grain tearout when I remove the masking tape. |
|
|
Sunday, July 27th, 2008: I took the cutaway bindings out of the bender, and they came out okay, but I had a little scorching and some tiny beginnings of cracks. I wasn't pleased with that, so I spent some time online trying to find out ways I could prevent the scorching and avoid cracks. What I figured I had probably done was to crank down on the bender (the special cutaway one) a little too soon and/or perhaps a little too quickly. Waiting a bit longer (for the temperature to rise) and cranking the bender down more slowly would probably eliminate the cracking. The scorching problem, I thought perhaps could be remedied by a combination of a thicker kraft paper wrapping (moistened) and placing the heating blanket on top of the spring steel, instead of on top of the wrapped binding sandwich (originally, I had the wrapped bindings, then the blanket, then the spring steel on top). Also, I read on various sites that a lower temperature (275° or so) might be better for bending curly koa. (I had been using the higher temperature that I have used with bending rosewood.) So...I used two more koa binding pieces and just had enough purflings left to bend another couple of bindings. I bent those, using the ideas I had come up with above, and left them in the bender — I couldn't do any more on the guitar that day, because I was going with my sister to see James Taylor at the Greek Theatre in Berkeley that evening!!! (Great, great, great show — this will probably be the fourth time I've seen him in concert!!!!) |
|
Monday, July 28th, 2008: This morning I took the newly-bent cutaway bindings out of the bender, and, by golly, they came out much, much better!!! No scorching, no cracking!!! The only thing that was a little problem was that I had one piece of binding that had been compressed in one 1" section on the cutaway horn, so it was a bit too thin there for my liking. Duh...that was a problem I could have avoided had I been thinking with common sense. (But I don't always use common sense, unfortunately.) I had just put the two pieces of binding taped together in the bender, not realizing that, since the bender is the width of a side, I should have put some more bindings (or wood the same thickness as the bindings) on both sides of the two pieces of binding, to support the bindings. That way, the spring steel wouldn't angle down on one side of the bender (thus compressing one side of the bindings) as I applied the clamps. Makes sense, huh? But lots of times I don't foresee those kinds of problems that can come up..... Well, it is a constant learning process for me, even after all these years of building... That little thinned section of binding worried me, so I set about thinking what to do about that problem! Well, I figured it out....out came my handy-dandy little travel iron and a wet piece of towel to the rescue!!!! I thought that if the wood was just compressed, steaming it might work to bring it back to its original thickness (because I knew you could do that when you get a little dent in your spruce top, for example). I laid the dampened towel piece on top of that compressed section of binding and ran the tip of the travel iron over it a few times. The wood fibers swelled back to their original size and my binding was saved!!! Yay!!! I was relieved. After I dealt with the problem above, I then spent the afternoon fitting the cutaway bindings and purfling and glued them in, completing all the various areas where I had to miter the purflings. I had a little gap at the neck end of the back cutaway binding (at the corner where it meets the non-cutaway binding) — it was weird, because when I did the dry-fitting, everything joined up perfectly — but I guess something shifted in the gluing. But I managed to fix that, too! I made some koa dust, mixed it with epoxy, and dropped the epoxy into the gap. When it cures, I will just scrape it all flush, and, hopefully, it won't be too noticeable. Thank goodness for epoxy, travel irons, and wet towels!!! I think a large part of the building experience (for me, anyway) is figuring out ways to get out of the messes you make for yourself. It's a never-ending journey of problem-solving! So, that's it for today. Right now it's around 5 p.m. My soundbox is now sitting with the cutaway bindings all taped up (I had removed the tape from the non-cutaway bindings yesterday). Tomorrow....we'll see how it all came out, when I scrape it all down. |
|
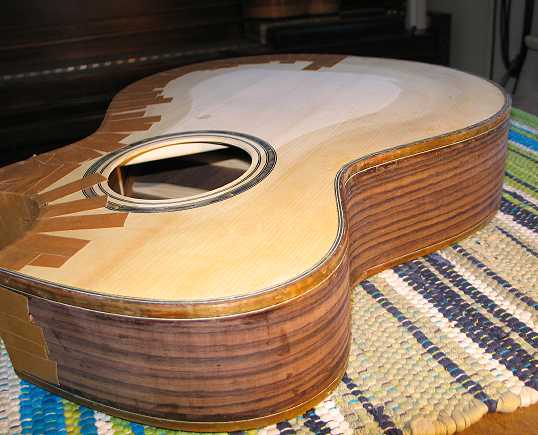
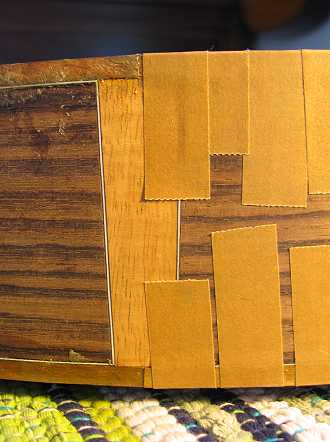
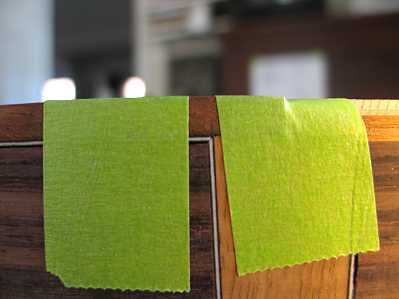
Just a couple of pictures of the messy bindings at the moment:
|
|
|
Previous PageNext Page |