Heel Cap, Truss Rod Cavity, Fingerboard Trimmed


The next things I did were really easy, in comparison to fitting the neck. I superglued a koa heel cap to the end of the heel, after trimming the heel. To glue it on, I first placed Saran wrap on the soundbox where glue might contact it, bolted the neck to the body, put superglue on the heel cap, and then placed the heel cap onto the heel and against the soundbox.


Using an Exacto knife and a 1/4" chisel, I cut out the slot in the top for the truss rod:


INDEX:

Return to HOME PAGE

  1. A Little Detour....A Tour of My Workroom!!!
  2. Joining the Top
  3. Starting to Bend
  4. Bending, Day 2
  5. Bending, Day 3
  6. Neck Block, Center Strip, Cutaway!
  7. Bracing the Back, Gluing in the Blocks
  8. Shape Back Braces, Glue Neck Block, Make Spreaders
  9. Spreader, Rim, Kerfing
  10. Rim-Sanding, Brace-Shaping, Go-Bar Modification, & Obon!!!
  11. Side Strips & Rosette
  12. Beginning the Top Bracing
  13. Bracing, Continued...
  14. Gluing the Back
  15. Gluing the Top
  16. Trimming the Overhang
  17. Routing for Binding : Day 1
  18. Routing for Binding : Day 2
  19. Fitting & Gluing the Bindings
  20. The Soundbox is Done!!!
  21. Truss Rod Slot, Peghead Veneer
  22. Peghead, Start Heel
  23. Threaded Inserts, Neck Trimmed
  24. Fitting the Neck!!!
  25. Truss Rod Cavity, Heel Cap, Fingerboard Trimmed
  26. Finishing and Gluing the Fingerboard / Peghead Inlay
  27. Carving the Neck
  28. I Feel Good....The Basic Building is Done!!! (Now on to the Finishing....)
  29. Pore-Filling
  30. Sealing
  31. Finish Coats
  32. Finishing the Finish!!!
  33. Gluing the Bridge
  34. It's All Done!!!


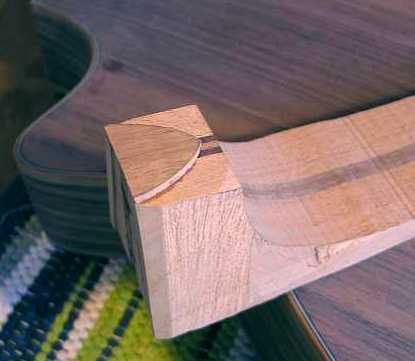
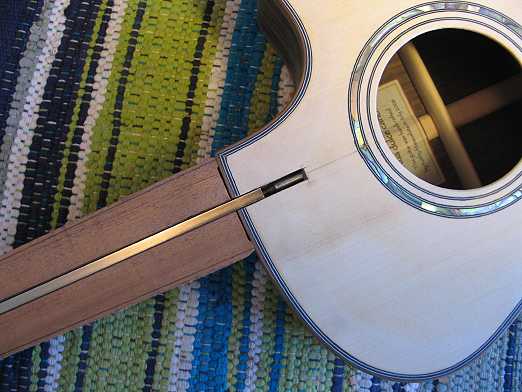
Finally, I trimmed the end of the fingerboard by bolting on the neck, marking where I wanted the fingerboard to end, and using the lid from a large jar to mark the curve on the end. I cut it close with my bandsaw and then finished it off on my disc sander.


The end is coming into sight!!! I really don't think I'll finish this guitar before school starts in less than four weeks. I still have a lot to do (I made this list up this morning, so my mind would be less scattered):

  1. Install fingerboard dots
  2. Fret fingerboard & clamp it straight
  3. Fingerboard side dots
  4. Peghead inlay
  5. Install truss rod with filler strip
  6. Level the filler strip
  7. Glue on fingerboard
  8. Carve neck
  9. Check neck fit again
  10. Grain-raise and final sanding
  11. Pore filling
  12. Shellac
  13. Finish coats
  14. WAIT...WAIT...WAIT...then level & rub out the finish
  15. Determine bridge location
  16. Remove finish at fingerboard extension and bridge
  17. Bolt and glue on neck and bridge
  18. Level frets, recrown, file fret ends, polish frets
  19. Lemon-oil fingerboard and bridge
  20. Make and fit nut and saddle
  21. Install tail end peg
  22. Install strap peg on heel
  23. Install tuners
  24. String it up
  25. File nut slots & set action
  26. Saddle compensation
  27. CELEBRATE!!!
  28. PLAY THE THING!!!

(I'm probably forgetting something....but you get the idea....)


Previous Page

Next Page