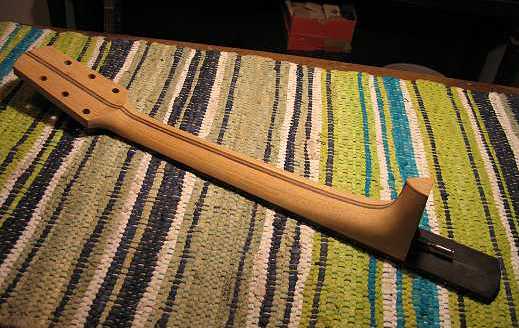
Carving the Neck


Tuesday, August 5th, 2008:

I carved the neck today. Not many photos, but here's basically how I did it: When I carve a neck, I do the initial carving with my mini-drawknives. Then I switch over to the micro-rasps — I primarily use the double-handled one with the long, straight blade (it's kind of like using a drawknife). When I do the curved areas, such as under the volute and at the heel, I use the half-round one. These both cut very well and fairly smoothly. Finally, I kind of clean things up with a scraper and sandpaper.

Before I did the carving, however, I used my belt sander to shape the bottom of the peghead, at the volute:


Here's the result of the carving:


INDEX:

Return to HOME PAGE

  1. A Little Detour....A Tour of My Workroom!!!
  2. Joining the Top
  3. Starting to Bend
  4. Bending, Day 2
  5. Bending, Day 3
  6. Neck Block, Center Strip, Cutaway!
  7. Bracing the Back, Gluing in the Blocks
  8. Shape Back Braces, Glue Neck Block, Make Spreaders
  9. Spreader, Rim, Kerfing
  10. Rim-Sanding, Brace-Shaping, Go-Bar Modification, & Obon!!!
  11. Side Strips & Rosette
  12. Beginning the Top Bracing
  13. Bracing, Continued...
  14. Gluing the Back
  15. Gluing the Top
  16. Trimming the Overhang
  17. Routing for Binding : Day 1
  18. Routing for Binding : Day 2
  19. Fitting & Gluing the Bindings
  20. The Soundbox is Done!!!
  21. Truss Rod Slot, Peghead Veneer
  22. Peghead, Start Heel
  23. Threaded Inserts, Neck Trimmed
  24. Fitting the Neck!!!
  25. Truss Rod Cavity, Heel Cap, Fingerboard Trimmed
  26. Finishing and Gluing the Fingerboard / Peghead Inlay
  27. Carving the Neck
  28. I Feel Good....The Basic Building is Done!!! (Now on to the Finishing....)
  29. Pore-Filling
  30. Sealing
  31. Finish Coats
  32. Finishing the Finish!!!
  33. Gluing the Bridge
  34. It's All Done!!!


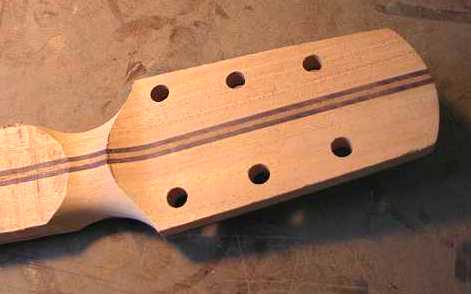
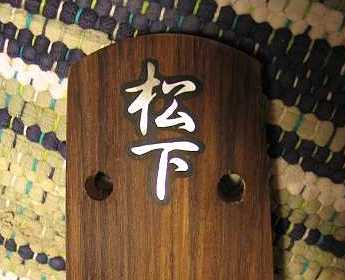
I also scraped away the epoxy from the peghead inlay that I did yesterday. On the first scraping, I found I had a few tiny pits (from bubbles), so I applied another thin coat of epoxy. After I was done with the neck carving, I scraped this away. I think it came out nicely!!! (I've wiped some water on it, so you can see it better.)


Finally, a little comic relief. While I was busy carving the neck, Emily decided to come in to visit me, after she'd just taken her daily shower.

(Actually, she did come in to visit me, and had brought me the shower cap as a present. She's weird like that — she'll often bring me presents throughout the day — things like a tree branch, a sock from my closet, a rock from the garden, and even a huge clump of dirt....She has such good taste!)


SO....the guitar is basically built!!!! Now I shall turn my attention to the final grain-raising, sanding, pore-filling, finishing, etc.....

Before I start on all that, though, I'm going to do one last neck-fitting session, to make sure everything's hunky-dory.


Previous Page

Next Page