Sealing


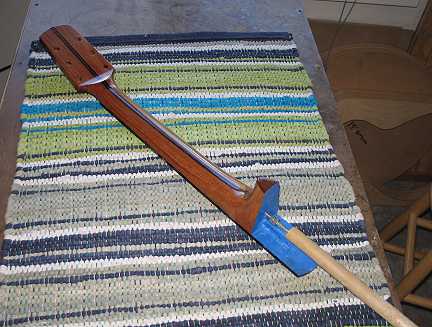
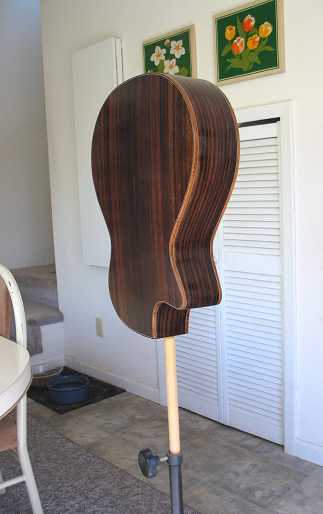
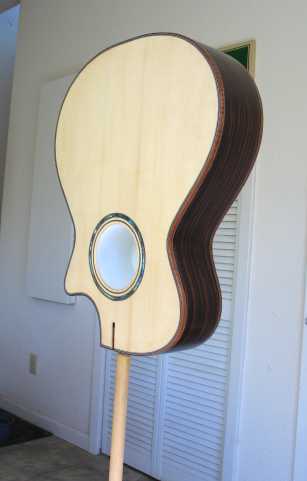
Sunday, August 10th, 2008:

On Saturday I let the 3rd coat of Z-poxy on the back and sides sit for a while before I finally leveled it all down and put on a thinned coat.

Today the first thing I did was to spray two coats of shellac (an hour apart) on the neck, which had been all leveled yesterday, as it had only needed two coats of the Z-poxy.

Then I leveled the shellac seal coat on the top, and prepared everything for spraying the shellac seal coat. I attached a handle to the soundbox through one of the bolt holes. Then I found a margarine tub that was just the right size to fit snugly underneath the soundhole, to protect the insides from the spraying.

Then I sprayed the soundbox with 2-lb. cut shellac (Zinsser Seal Coat), using a PreVal sprayer. (I did it this way because it's an easy way to do it and not have to pull out my compressor and spraygun until I was ready for the finish coats.)

I sprayed outside, of course, but brought the guitar indoors afterwards (fewer bugs and all that way). When I spray, I hold the guitar by the handle and do what I can holding the soundbox horizontally. Then I place the handle in the bottom part of my roller stand, and I can spray it that way, as well.


INDEX:

Return to HOME PAGE


  1. A Little Detour....A Tour of My Workroom!!!
  2. Joining the Top
  3. Starting to Bend
  4. Bending, Day 2
  5. Bending, Day 3
  6. Neck Block, Center Strip, Cutaway!
  7. Bracing the Back, Gluing in the Blocks
  8. Shape Back Braces, Glue Neck Block, Make Spreaders
  9. Spreader, Rim, Kerfing
  10. Rim-Sanding, Brace-Shaping, Go-Bar Modification, & Obon!!!
  11. Side Strips & Rosette
  12. Beginning the Top Bracing
  13. Bracing, Continued...
  14. Gluing the Back
  15. Gluing the Top
  16. Trimming the Overhang
  17. Routing for Binding : Day 1
  18. Routing for Binding : Day 2
  19. Fitting & Gluing the Bindings
  20. The Soundbox is Done!!!
  21. Truss Rod Slot, Peghead Veneer
  22. Peghead, Start Heel
  23. Threaded Inserts, Neck Trimmed
  24. Fitting the Neck!!!
  25. Truss Rod Cavity, Heel Cap, Fingerboard Trimmed
  26. Finishing and Gluing the Fingerboard / Peghead Inlay
  27. Carving the Neck
  28. I Feel Good....The Basic Building is Done!!! (Now on to the Finishing....)
  29. Pore-Filling
  30. Sealing
  31. Finish Coats
  32. Finishing the Finish!!!
  33. Gluing the Bridge
  34. It's All Done!!!


Previous Page

Next Page