Starting to Bend . . .
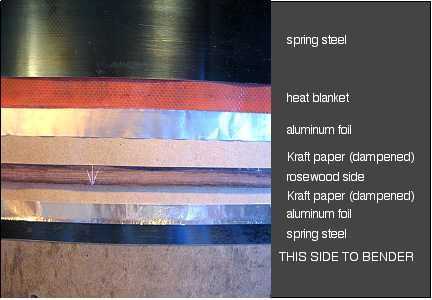
Friday, July 4th, 2008 (Happy Fourth of July!!!!): Well, since I have my sides profiled, it's time to start the bending process. I'm going to do the non-cutaway side first, as I have some things to do on my cutaway bending form, to make it easier to use. The first thing I did was to lay out my bending "sandwich". From a tip on the OLF forum, I bought a handy 6" roll of Kraft paper from a place called U-Line. It's handy because my spring steel slats and heating blanket are 6" wide. I cut out 2 pieces of the Kraft paper the same size as the slats. I also cut out 2 pieces of 6" aluminum foil. I dampened the Kraft paper, squeegeed out the excess water, and put together my bending sandwich:
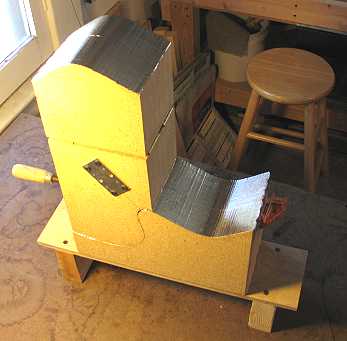
BENDING: After putting together the sandwich, I used my bender to bend the non-cutaway side. I placed the sandwich into the bender, flush against the front edge of the bender, lining up the waist (marked with a thin strip of tape) with the vertical slot of the bender. I put some spring clamps on the ends of the sandwich to hold everything together. I cranked down slightly on the waist caul, just enough to hold the sandwich in its proper position. I slipped a thermometer in between the wood and the heat blanket and plugged in the blanket. Now I was ready to bend. When the temperature reached about 225°, steam started to appear, and it was time to start the bend. I slowly cranked down the waist caul, stopping about 1/2" before reaching the waist. Then I slowly bent the lower bout. Next, I bent the upper bout (which is much harder to do, as the spring tension feels much tighter). Finally, I finished cranking down on the waist. By the time I was done with the bending, the temperature had reached around 310° or so. I unplugged the blanket at that point. |
After letting the blanket cool down a bit (down to around 220°), I plugged it in again, letting it heat up again to around 300° or so. When it did, I unplugged it again. I did this process one more time, until I could no longer see any steam escaping the sandwich. I am going to let the side sit in the bender until tomorrow, to make sure the side is really "set" into its shape.
Emily making a fashion statement. |
|
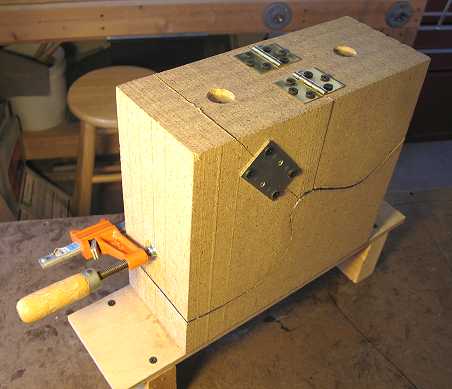 |
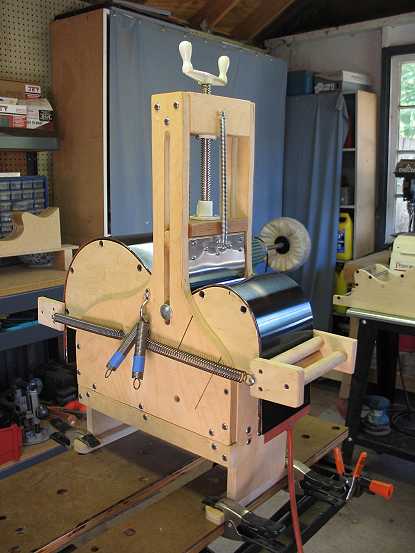
While the bender was in use, I now needed to turn my attention to the cutaway bending form I'm going to use tomorrow. I made this form back in 2006, when I built the first Taylor-style cutaway, because I was having problems bending the sharp cutaway on this guitar. What I do is first bend the lower bout and waist (up to the tip of the cutaway horn) on the regular bender. Then, after that is cooled down, I remove the side from the form and use this bending form to complete the cutaway bend. (Today I drilled some holes with a Forstner bit, so that it would be easier to keep the clamp in place, instead of slipping around as I clamp down. I have my form lined with aluminum tape, as well.) When I use it, I make up the sandwich again and start the bending process. (I have a shorter heat blanket to use for this bender.) I place the already-bent waist into the bottom half of the form. I clamp the top section of the bender over the waist (the left-hand part is hinged, so it sits on top of the waist section). Then I plug in the heat blanket. As the temperature reaches around 225° and steam rises, I start to push down on the left-hand section of the bender as the wood relaxes. When I can, I place the long Jorgensen clamp vertically on that section and slowly crank down on it, clamping the cutaway horn section of the side. When it is all the way down, I then use a third clamp horizontally, to secure it in that direction. |
Previous PageNext Page |