I Feel Good...Na na na na na na na...
Wednesday, August 6th, 2008: It's only about 10:30 a.m., but I am feeling so good right now, that I just had to post a few pictures!!! When I got up today, the first thing I did was to check out my carved neck again, just to make sure I was satisfied with it. It felt a little bit thick, especially at the first fret — more like a "C" shape profile, rather than the profile I prefer (between a "C" profile and a "V" profile, which makes using my thumb occasionally to fret the low E string more comfortable). So, I did a little more shaping of the neck, using the micro-rasp and sandpaper. Here's the profile I ended up with:
It felt much better to my hand!!!!
|
|
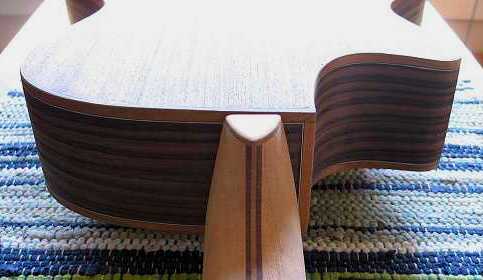
That done, I then bolted the neck to the body and checked to see if I had to do any adjustments to the neck angle and centering of the neck. I didn't!!! Yay!!! Everything was perfect!!!! It had stayed centered, and the straightedge, when placed on top of the fretted fingerboard, was a little less than 1/16" above the bridge. I am really a happy camper right now. What a relief! (This is the first time I've had things go so well in this area.) Here are some photos of what the guitar will look like:
|
|
|
|
|
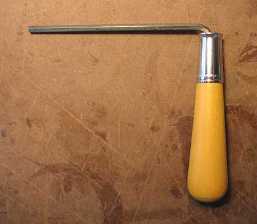
One other thing before I go..... Here's something I did yesterday to make my truss rod wrench (just one of those little "L" type allen wrenches, which aren't the easiest to turn by the little angled end):
I just hammered the little end of the wrench into the handle, and it makes turning the truss rod nut SO much easier!!!
|
Now I'm going to do the grain-raising and final sanding of the guitar, in preparation for the Z-poxy pore-filling that I'm going to try for the first time.... See you soon....
Previous PageNext Page |