Bending, Day 3

Sunday, July 6th, 2008:

Okay, so I have a little bit of time before church, so I'll take the first bend of the cutaway side out of the bender. Here it is:


INDEX:

Return to HOME PAGE

  1. A Little Detour....A Tour of My Workroom!!!
  2. Joining the Top
  3. Starting to Bend
  4. Bending, Day 2
  5. Bending, Day 3
  6. Neck Block, Center Strip, Cutaway!
  7. Bracing the Back, Gluing in the Blocks
  8. Shape Back Braces, Glue Neck Block, Make Spreaders
  9. Spreader, Rim, Kerfing
  10. Rim-Sanding, Brace-Shaping, Go-Bar Modification, & Obon!!!
  11. Side Strips & Rosette
  12. Beginning the Top Bracing
  13. Bracing, Continued...
  14. Gluing the Back
  15. Gluing the Top
  16. Trimming the Overhang
  17. Routing for Binding : Day 1
  18. Routing for Binding : Day 2
  19. Fitting & Gluing the Bindings
  20. The Soundbox is Done!!!
  21. Truss Rod Slot, Peghead Veneer
  22. Peghead, Start Heel
  23. Threaded Inserts, Neck Trimmed
  24. Fitting the Neck!!!
  25. Truss Rod Cavity, Heel Cap, Fingerboard Trimmed
  26. Finishing and Gluing the Fingerboard / Peghead Inlay
  27. Carving the Neck
  28. I Feel Good....The Basic Building is Done!!! (Now on to the Finishing....)
  29. Pore-Filling
  30. Sealing
  31. Finish Coats
  32. Finishing the Finish!!!
  33. Gluing the Bridge
  34. It's All Done!!!


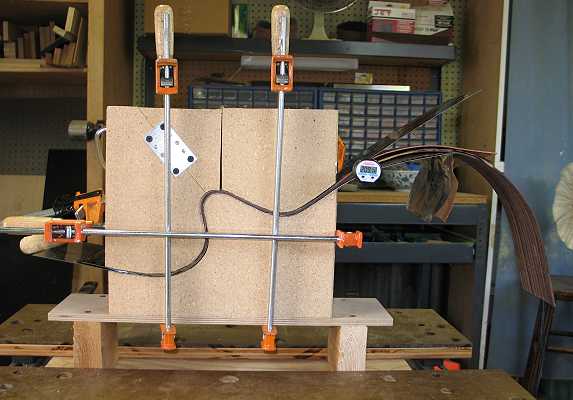
To the left is a photo of how I will begin the bending of the cutaway horn.

When I do the actual bending, I will have everything wrapped in its "sandwich" again. The waist will be clamped down first. When the steam starts to appear, I will slowly push down on the left-hand section, adding a second clamp when possible (notice how I have added a handle --- which I will reverse, to make it more user-friendly --- when I screwed it in yesterday, I wasn't thinking of which side I would actually be working from). I will clamp down on that section, then add a third clamp horizontally to snug it all up.

I'll do all this after I return from church.


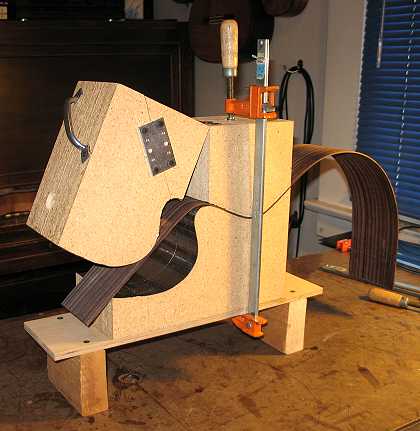
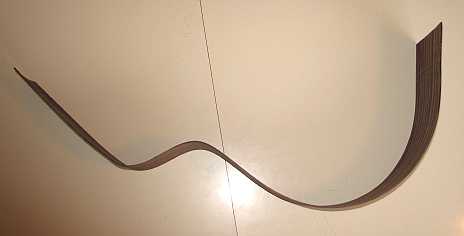
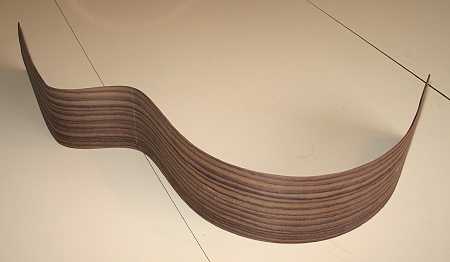
Okay, here's the cutaway side in the bender, after I've gone through the process described above. Just as I did on the regular bender, I went through about 3 cycles of heating up to around 310°, unplugging the blanket, and plugging it in again.


It looks good, as far as I can tell. I didn't hear anything cracking --- but it's hard to tell exactly what's going on, when you can't really see inside that sandwich. I'm keeping my fingers crossed....oh, the constant suspense of guitarmaking!!!


Previous Page

Next Page