Threaded Inserts, Trim Neck


Now it was time to install the threaded inserts. I first placed tracing paper over my soundbox where the neck will meet the box. I marked the centerline and did a pencil rubbing of the bolt holes. (Yes, they are a bit out of line with each other, but that's okay — just so they match up with the heel inserts!)

Then I flipped the paper over, taped it to the heel, matching the centerlines, and used it to mark the centerpoints of the two holes. These are where I would install the threaded inserts in the heel.


I love this dowel jig!!! You clamp it onto your workpiece, lining up a notch that corresponds to the location of the holes in the jig, and then slide the hole-thingy so the hole you need is positioned where you need to drill the hole. The hole-thingy ensures that you are drilling the hole perpendicular to your workpiece.


INDEX:

Return to HOME PAGE

  1. A Little Detour....A Tour of My Workroom!!!
  2. Joining the Top
  3. Starting to Bend
  4. Bending, Day 2
  5. Bending, Day 3
  6. Neck Block, Center Strip, Cutaway!
  7. Bracing the Back, Gluing in the Blocks
  8. Shape Back Braces, Glue Neck Block, Make Spreaders
  9. Spreader, Rim, Kerfing
  10. Rim-Sanding, Brace-Shaping, Go-Bar Modification, & Obon!!!
  11. Side Strips & Rosette
  12. Beginning the Top Bracing
  13. Bracing, Continued...
  14. Gluing the Back
  15. Gluing the Top
  16. Trimming the Overhang
  17. Routing for Binding : Day 1
  18. Routing for Binding : Day 2
  19. Fitting & Gluing the Bindings
  20. The Soundbox is Done!!!
  21. Truss Rod Slot, Peghead Veneer
  22. Peghead, Start Heel
  23. Threaded Inserts, Neck Trimmed
  24. Fitting the Neck!!!
  25. Truss Rod Cavity, Heel Cap, Fingerboard Trimmed
  26. Finishing and Gluing the Fingerboard / Peghead Inlay
  27. Carving the Neck
  28. I Feel Good....The Basic Building is Done!!! (Now on to the Finishing....)
  29. Pore-Filling
  30. Sealing
  31. Finish Coats
  32. Finishing the Finish!!!
  33. Gluing the Bridge
  34. It's All Done!!!


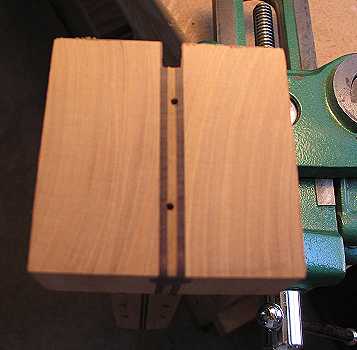
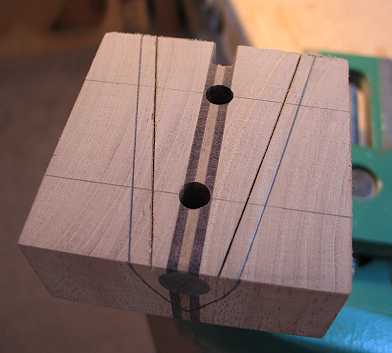
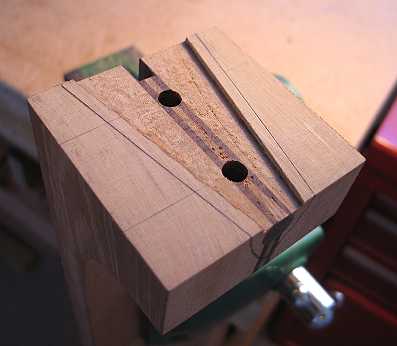
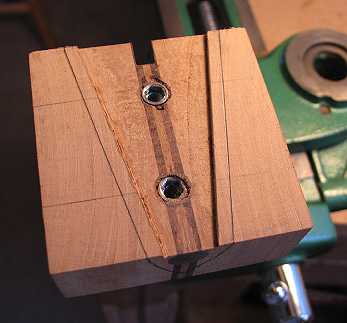
After the 5/16" holes for the inserts were drilled, I scribed two lines 3/16" inside the edges of the heel. I used my Dremel with the router base to rout out a 1/16" deep inner area. That way, the only part of the heel that will meet the soundbox will be those two 3/16" edges, making it easier to do the final fitting of the neck to the body.


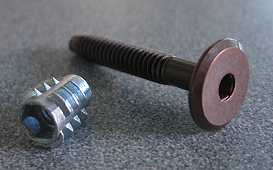
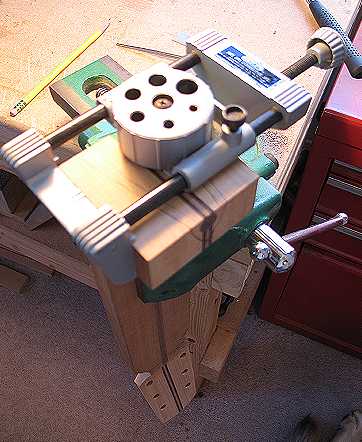
These are the inserts and bolts I use:

They are readily available at any Ace Hardware store. The threaded insert accepts a 1/4-20 bolt; it is 1/2" long and is inserted into a 5/16" hole. It can be inserted with either an allen wrench (I forget at the moment which size) or this T-wrench (which has 1/4-20 threads).

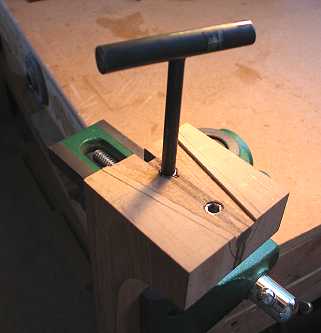
I first used the T-wrench to install the threaded insert. Then, I used the allen wrench to carefully remove the insert, being careful not to disturb the threads in the wood. I dripped some superglue on the sides of the hole and then re-installed the inserts.


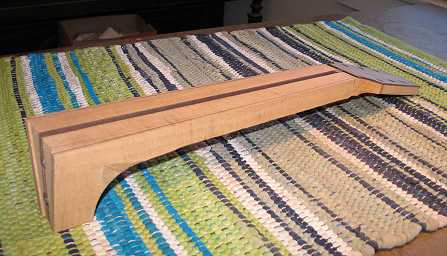
The final thing I did today was to trim the neck blank to around 1/8" outside the fingerboard and heel lines already marked.


Tomorrow, I will take a little break from this neck and will start work on the fingerboard — inlaying the position and side dots, fretting the fingerboard, and trimming the end of the fingerboard.

Then will come doing the inlay on the peghead and carving the neck!!!


Previous Page

Next Page