A Little Detour...A Tour of My Workroom!!!
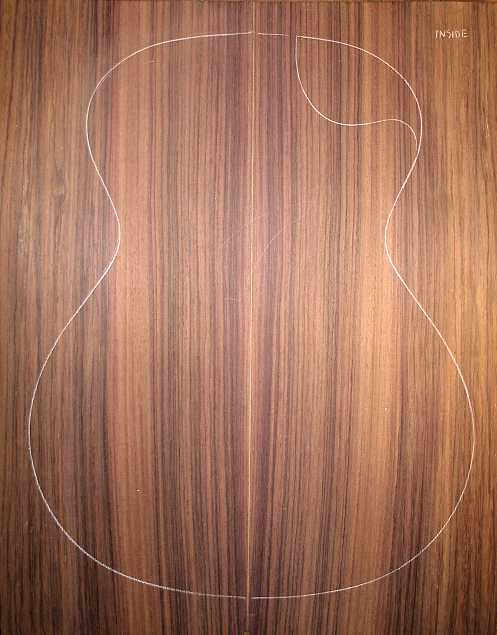
Friday, June 27, 2008: In the past few days, I haven't done too much on the guitar, as I am waiting for some supplies to arrive. I have, however, thickness-sanded the top and back. At the moment, I am debating whether or not to inlay a koa backstrip into the East Indian rosewood back, as the back has some really nice striping to it. Take a look (this is the inside surface of the back). What do you think???
|
Another reason I haven't gotten much done on the guitar lately is that I was busy doing various little odds-and-ends around the house. I fixed a bunch of little things I'd been putting off for the longest time — really glamorous tasks — like fixing a broken handle on Emily's (my dog's) pooper-scooper, fixing the hinge on a bathroom medicine chest door that wouldn't open, buying a new toilet seat (the cheapie plastic hinge was broken, so I went and splurged on a whole new seat with a brushed nickel hinge to match my brushed nickel sink faucet — funny how a simple thing like a new toilet seat can make you happy!), patching a hole in my bedroom wall that Emily had, for some odd reason, decided to gnaw out....and other such tasks. BUT the main new thing I did was to continue playing around with my camcorder (which I've had for a few years, but hadn't really learned to use). Today I decided to film a video tour of my guitar workroom!!! I know, when I'm on the web, I always like to see how other people organize their workspaces. SO, I thought I'd make a video of my own guitarmaking workroom, to show how much stuff you can manage to cram into one little space, yet still have it be functional. (I also wanted to try making a QuickTime video, as its quality is better than the YouTube flash video.) WARNING....it's kind of long (about 20 minutes!!)....Hope you enjoy it!!! Welcome to my workspace!!!
You need a QuickTime Player to view this video. For a free download of QuickTime:
|
Previous Page
Next Page |