Beginning the Top Bracing


Thursday, July 17th, 2008:

Today I didn't do too much, as I was going see Ed Gerhard at the Freight and Salvage in Berkeley that evening. (Wonderful show!!!)

However, I did manage to scrape and sand down the rosette I installed yesterday.....


After I did that, I sanded the top to its final thickness, about 3.1mm (around 1/8"), and cut out the soundhole. Looking good.... It has a nice tap tone; it thumps to about a B-flat right now....


INDEX:

Return to HOME PAGE

  1. A Little Detour....A Tour of My Workroom!!!
  2. Joining the Top
  3. Starting to Bend
  4. Bending, Day 2
  5. Bending, Day 3
  6. Neck Block, Center Strip, Cutaway!
  7. Bracing the Back, Gluing in the Blocks
  8. Shape Back Braces, Glue Neck Block, Make Spreaders
  9. Spreader, Rim, Kerfing
  10. Rim-Sanding, Brace-Shaping, Go-Bar Modification, & Obon!!!
  11. Side Strips & Rosette
  12. Beginning the Top Bracing
  13. Bracing, Continued...
  14. Gluing the Back
  15. Gluing the Top
  16. Trimming the Overhang
  17. Routing for Binding : Day 1
  18. Routing for Binding : Day 2
  19. Fitting & Gluing the Bindings
  20. The Soundbox is Done!!!
  21. Truss Rod Slot, Peghead Veneer
  22. Peghead, Start Heel
  23. Threaded Inserts, Neck Trimmed
  24. Fitting the Neck!!!
  25. Truss Rod Cavity, Heel Cap, Fingerboard Trimmed
  26. Finishing and Gluing the Fingerboard / Peghead Inlay
  27. Carving the Neck
  28. I Feel Good....The Basic Building is Done!!! (Now on to the Finishing....)
  29. Pore-Filling
  30. Sealing
  31. Finish Coats
  32. Finishing the Finish!!!
  33. Gluing the Bridge
  34. It's All Done!!!


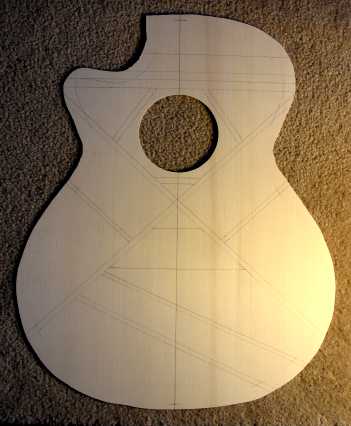
Friday, July 18th, 2008:

Today I laid out the bracing plan on the top.


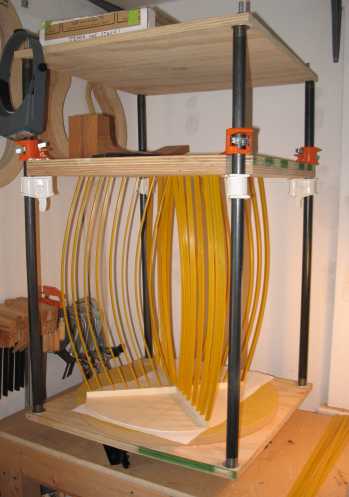
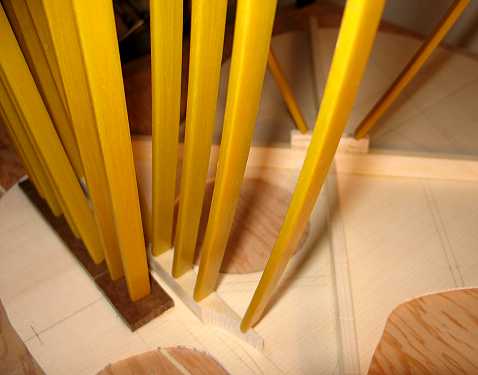
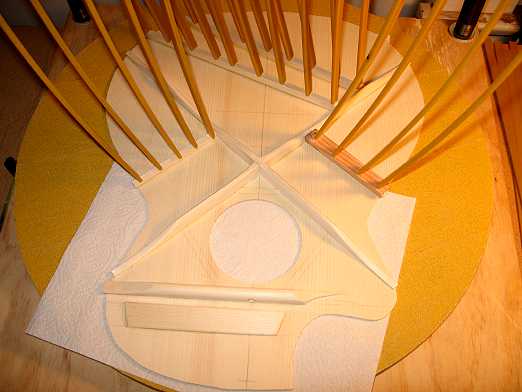
Then I started on the bracing. I first cut the lap joint on the x-braces and glued them down. This was the first time using my swivel go-bar deck, and it was wonderful!!! It made it SO much easier to apply the go-bar sticks to the different legs of the x-brace, and it was also much easier to get at the glue squeeze-out. All I had to do was turn the deck around to get at the different areas.


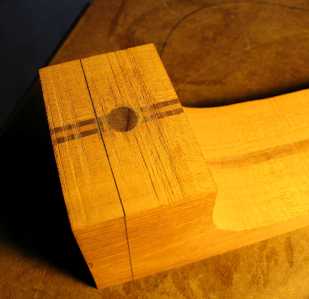
While that was in the go-bar deck, I decided to do a little bit on the neck blank. I drilled the hole for the 1/2" dowel in the heel (to give the threaded inserts for my bolt-on neck something to bite into other than end grain). Then I glued in the dowel.

I also cut the taper on my ebony fingerboard (1-3/4" at the nut end and 2-1/8" at the 12th fret), using my fingerboard taper jig .


Next, I glued a piece of spruce on top of the x-brace lap joint area, which I will carve later when I carve the x-braces.

I also glued in the upper transverse brace and the brace above that (I always forget what it's called). These two braces I glue flat, whereas the x-brace and tone bars I glue with the 25' radius on the gluing surface.


The last thing I did for the day was to shape the x-braces and the upper transverse brace, and then to glue the two tone bars and finger braces (I think that's what they're called). Tomorrow I will shape those.

Then it will be time to make and glue in the bridge patch and soundhole braces. At that point, the top bracing will be finished!!!


Previous Page

Next Page