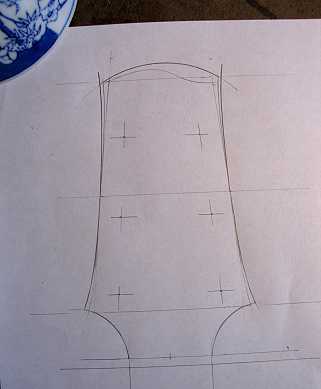
Tuesday, July 14, 2009: Lots of photos today — I did a lot of little things today and made a lot of progress on the neck. The very first thing I did today was to plan out my peghead design. I wanted something somewhat different. I like my pegheads to be narrower on the top than at the bottom, because the strings then lie nicely and don't run into each other. But I also wanted something different from what I usually do, which is just a simple tapered shape; I put a slight curve on the sides. So, here's what I came up with:
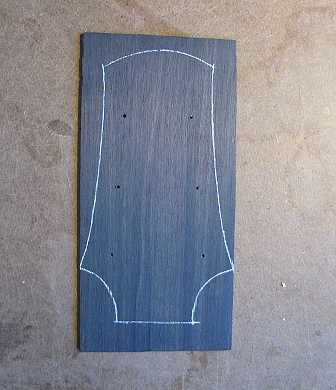
That blue and white ricebowl you see in the upper left-hand corner is what I traced to draw the rounded top. Here's a photo of the carbon fiber rod that has been glued in with epoxy and scraped down.
|
Here's the shape traced onto a piece of ebony overlay. I have punched the holes for the tuners.
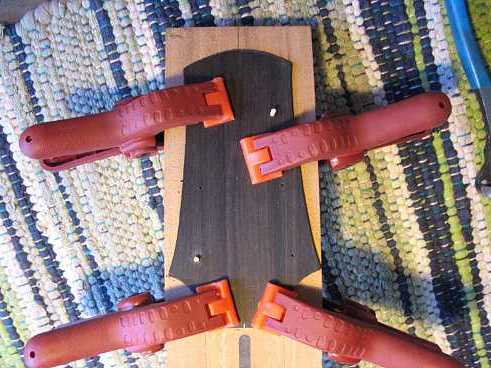
Here I have placed the peghead overlay in its final position and drilled two holes for some tiny dowels. This will hold the peghead in place when I later glue it on.
|
|||||
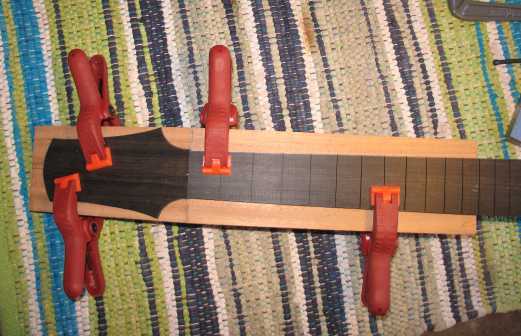
A little preview of how the peghead will look with the fingerboard:
|
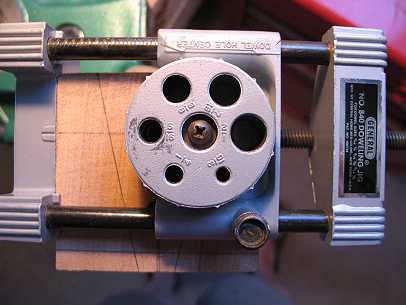
The next thing I did was to drill the holes for the threaded inserts. I use threaded inserts that require a 5/16" hole. One reason I drill the holes for the inserts now, before I cut out the neck blank, is that I can easily use this dowel jig to drill the holes. I just line up the indicator line on the left and the left edge of the middle part of the jig with the two lines intersecting the hole I need to drill. The jig keeps the drill bit perpendicular.
|
|||||
|
|
|