Monday, July 6th, 2009: Yes, I know . . . . . I've been gone a long time, huh???!!! Sorry 'bout that!!!! Well, other stuff this week got in the way of the building — I spent a couple of days removing an old kitchen faucet and installing a new one — for me, plumbing jobs ALWAYS take much, much longer than they probably should take!!! Then, there were lots of other things that came up along the way, and I just couldn't get back to this. But I'm thankfully back now, so here we go!!! Sometime in this past week, I had, however, managed to make and glue in the tail block. My tail block is 3/4" thick and overhangs the top and back of the sides a tiny bit (for later sanding to the arch of the back and top). I first sanded the slight radius on the gluing surface of the block, as the tail end of the body is slightly radiused. Then I glued it on with a couple of cauls and Titebond.
|
|
||||||
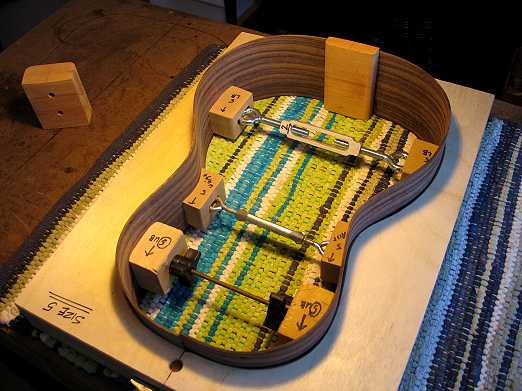
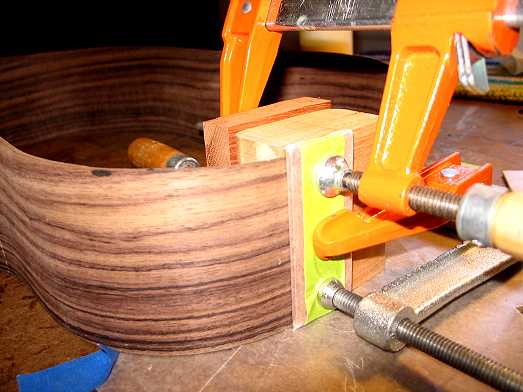
GLUING THE NECK BLOCK: Here I am gluing one side, so that the end of the side meets the centerline I've marked on the neck block. I've just found it easier to do it this way, than to try and wrestle with a slipping, sliding pair of sides at once. I hold the side to the line a little while, till the glue kind of sets a little. Then I clamp it up. When that is dry, I will remove the clamps and do the same thing with the other side. Because the first side is set, it is easy to just butt the second side right up against it at the centerline. Then I know everything is centered up accurately. Previously, when I'd try to glue both sides at once, sometimes the whole thing would shift slightly, and it would be off-center. This way works better for me.
|
THE OTHER DISTRACTION: Okay, now here's a little sample of something else that took me away from the guitar a bit this week . . . I went and bought myself the new iPhone!!! It's fast, has a 3-megapixel camera and video, too. SO....I spent a few days first researching it before I decided to buy it, and then a few days after that playing around with it (of course!). Anyway, I decided it would be a perfect thing to take with me to the Healdsburg Guitar Festival this coming August 14-16!!! Click on the video below (taken with my new iPhone!):
Well, after making this video, I think, as far as using it at the Healdsburg Festival, the best thing would be to take the videos, then use the iPhone's capability to send it directly to my YouTube account. (If I want to put it on this page, I have to take my laptop computer along with me to format it for the webpage, and upload my webpage to the server, etc., a process that would be just too tedious and time-consuming while I'm up there.) SO...the easiest thing would be for me to have a link to my YouTube channel, where all the videos I might take will be sent. (The only video I've put on YouTube so far is the "Easy Jointer" video.) |
||||||
|
|