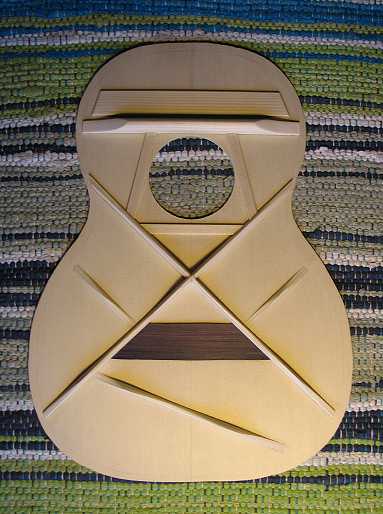
Here is the top, after I have sanded it all:
|
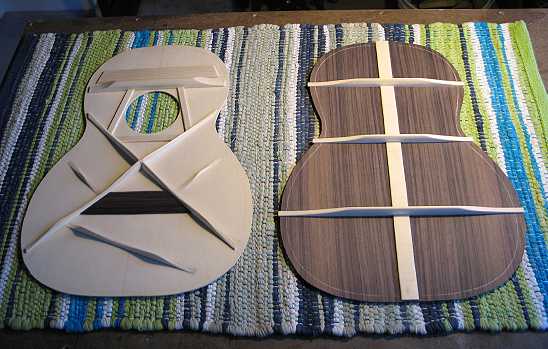
The finished top and back — the product of these last two weeks of work:
Now, it's on to the sides!!! |
|||
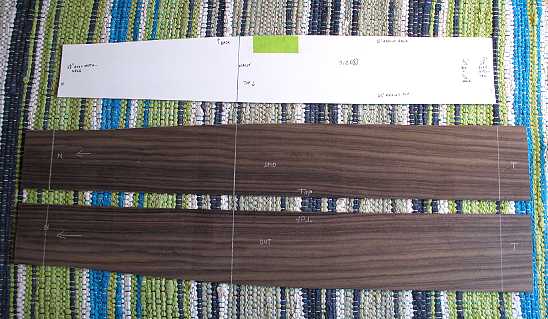
Tuesday, June 30th, 2009: Once again using Colin Symonds's great, simple method of figuring out the profile for your sides, I made a template for my sides and have cut out the sides here, leaving a little extra at the ends. I have left the top edge flat at this point, to make it easier to align it properly in the side bender — later, after I've bent the sides and glued on the neck and tail blocks, I will use a small plane to shape the top edge into its 25' radius profile.
|
I have wrapped the side in a "sandwich" of aluminum foil and dampened kraft paper, and have placed it this way (from bender form, out): spring steel slat /wood "sandwich" / heat blanket / spring steel slat. I place the whole shebang atop the bending form, center the waist mark on the wood to the bender slot, and crank down slightly so it will stay put. I turn on the heat blanket and, as it starts to steam (around 225°), I slowly crank the waist down almost all the way. Then, I bend the lower bout and, after that, the upper bout. When the two bouts are clamped, I crank the waist down all the way. When the temperature has reached around 310°, I unplug the heat blanket and let it cool down a bit. After a bit, I plug in the blanket again, let the temperature rise again to around 300°, then unplug it again. I let it cool down. I will come back to it later to remove the bent side and do the other side.
|
|||