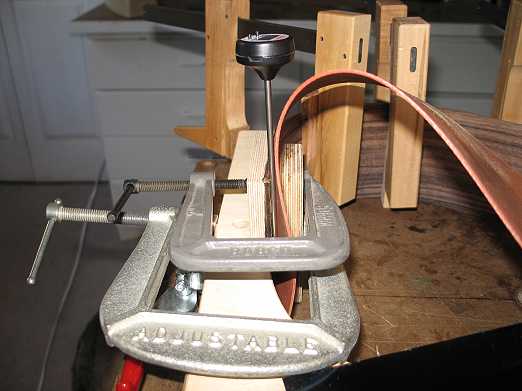
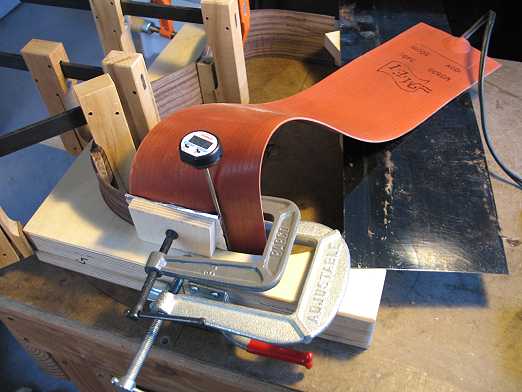
SIDE CUPPING!!!! Oh, no!!! OKAY. . .my first real mishap on this guitar . . . After I took the first side out of the bender, what I discovered was that about 3 inches of the lower bout end of the side had cupped. I think it was not able to contact the heating blanket fully, and the moisture made the wood cup. It was too big of a cupping to just press it back to shape. After thinking about it a while, I decided to try using the heating blanket, with the side clamped in the body mold, to make it conform to the mold. I wrapped the wood with some dampened Kraft paper and foil, laid the heating blanket on the inner side, and clamped it against the mold, with another clamping caul for the portion sticking up above the mold. Then I turned on the heating blanket and cycled it on and off a couple of times. It seems to have worked! When I removed the heating blanket, after it had cooled completely down, I saw that the cupping was gone. I'm leaving it in the mold till tomorrow, just to make sure it really sets. SPREADERS AND CAULS While the second side was in the bender, I used the time to make some spreaders for the mold. I found I had an old one that would work for the upper bout. I ended up making one for the waist and one for the lower bout. I also scrounged around to see if I had any of my old clamping cauls for gluing up the bridge and the fingerboard extension. (I wanted to make sure I didn't forget to make these before I closed up the soundbox! I did that once and had to make the cauls just going by the blueprint, hoping it would fit properly in the end!) I did find them, and cut them down a bit, to make it easier to get them in and out of the small soundhole of this guitar. |
|
||||||
|
|