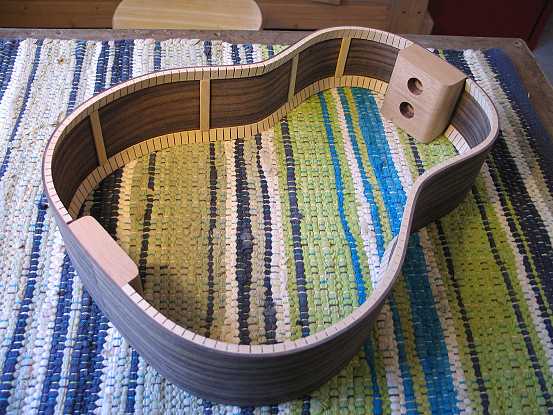
Wednesday, July 8th, 2009: I didn't take many pictures today, as I was too busy doing a bunch of stuff, in preparation for gluing on the back. Yesterday I had glued in all the kerfing and side reinforcements. Today, the first thing I did was to sand the kerfing in the radius dishes, to make it radiused and flush with the profiled sides. Below is the result:
The next thing I did was to make a new spreader for the upper bout (I wasn't too happy with the scrounged-up one I was using, as it was a bit large, and I'm concerned about how easy it will be to pull up out of the soundhole later, once the box is closed up.). Then I sanded the inside surfaces of the side set, one last time before the box is closed up. The next thing to do was to make my label for the back (I forgot to take a photo of it — you'll see it later!) and glue it in.
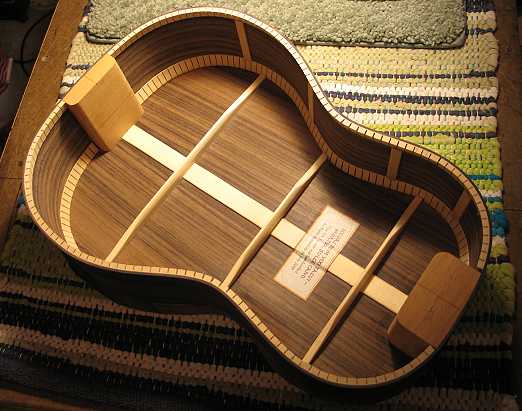
Well, it's been a few hours . . . . and here's the glued back (below). Tomorrow I may trim the overhang a little bit (I'll do the final trimming with the router and a flushcut bit after the soundbox is complete) before I fit and glue on the top. |
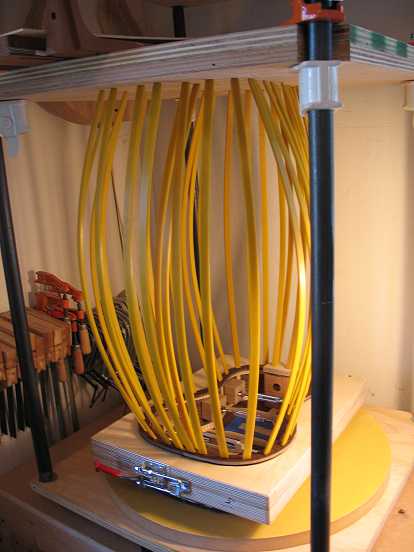
Now it was time to fit the back to the sides. To do that, I had to mark where the 3 braces will meet the sides, and also mark where I should cut off the brace ends (to tuck into the kerfing). Then I had to notch out the kerfing for the brace ends. I've done this at times with the Dremel and router base, but this time I just decided to do it the old way, with a razor saw and chisel. Oh, yeah, and I also had to cut the center reinforcement strip where it meets the neck and tail blocks. If you've done all that correctly, the back will just "click" into place snugly, for a good fit. It worked well for me (thank goodness) this time — in the past, sometimes I've had to rework some of the notches or brace ends, to make it fit. This time it came out right on the first try! After that was all done, I took a deep breath, put glue on the kerfing and blocks, and clamped it up in the go-bar deck. Oh, yeah — I forgot to mention — another thing I did just before this was to make a clamping caul strip of hardboard to set upon the kerfing. I like clamping it up this way, with the back laid on the radius dish, and the side set on top of that. Doing it this way, I can easily see if it's all lined up and fitting correctly, and I can easily get to any major glue squeeze-out that might occur. That is one of the things that makes me a little nervous — exactly how much glue to spread on the kerfing and blocks, so that it's not too much and not too little. If it's too much, you've got a mess to clean up, and if it's too little, the glue joint might not be as good. One thing I've always done that has helped is to run my thumb and index finger along the kerfing, to kind of focus the glue more to the center of the kerfing, so it doesn't end up dripping down the sides. On the blocks, I run my finger along the edge, so the glue isn't running right up to the edge.
|
||||||
|
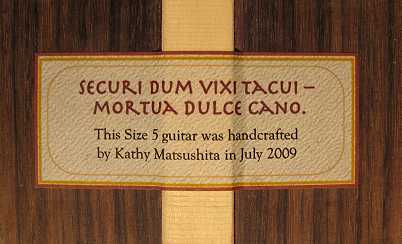
Oh, and here's the label:
For the label, I just printed it out on some linen paper on my inkjet printer, put a thin coat or two of shellac over it, and, when it was dry, glued it on with thinned Titebond. |
||||||
|
|
|