Tuesday, June 23rd, 2009:

BELOW AND TO THE RIGHT: the carved, finished back braces


INDEX:

Return to HOME PAGE

  1. Planning
  2. A Little Change in Plans...
  3. Back Braces
  4. Carving the Back Braces & Cutting the Top Braces
  5. The Rosette / Tapering the Fingerboard
  6. Bracing the Top
  7. Carving the Braces / Gluing the Soundhole Braces & Bridge Plate
  8. The Finished Top and Back!!! / Cutting and Bending the Sides
  9. Fixing Cupped Sides / Making Spreaders & Clamping Cauls
  10. Neck and Tail Blocks
  11. Sanding the Radius into the Sides / Gluing the Kerfing Strips / Side Reinforcements
  12. Fitting & Gluing the Back
  13. Fitting & Gluing the Top
  14. We Have a Soundbox Now!!!
  15. Bending and Routing for Bindings
  16. Gluing the End Wedge & Bindings
  17. Scraping the Bindings
  18. Beginning the Neck
  19. The Neck, Continued!!!
  20. The Neck, Day 3
  21. Peghead, Tuners, Dots, & Frets!!
  22. Peghead Inlay
  23. Backstrap & Gluing the Fingerboard
  24. Carving the Neck / A "Duh!" Moment / Side Dots / Preparing for Finish
  25. Pore-Filling and Sealing
  26. Spraying the Top Coats
  27. Finishing the Finish / Gluing on the Neck
  28. Gluing on the Bridge
  29. Set-Up / It's All Done!


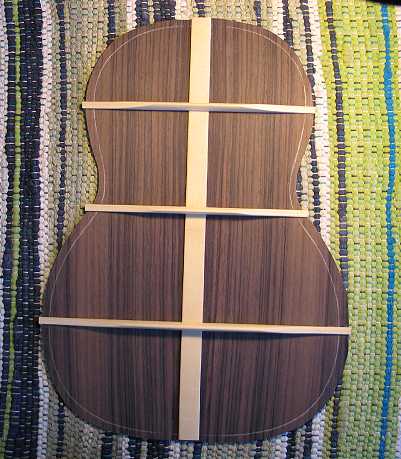
The next thing I did today was to sketch out the bracing plan on my top, stupidly forgetting that it will be all sanded away later, after I put the rosette in and thickness-sand the top to its final thickness!!! (I've made this mistake before.) Oh, well — no big, big deal, as it still gave me something to check my braces against.

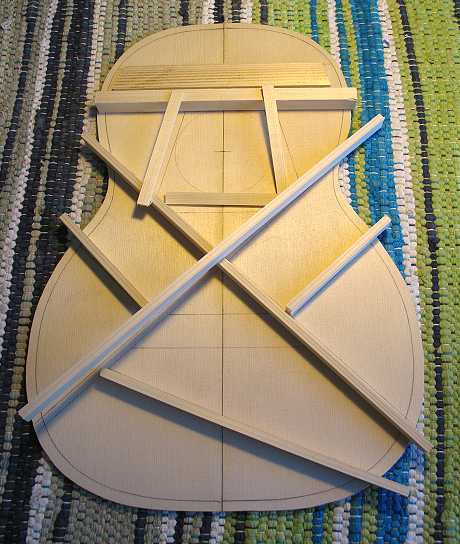
I cut my brace stock today from some Carpathian spruce I had on hand. Here are the dimensions of the braces:

  • X-braces, tone bar, finger braces — 1/4" wide, 1/2" tall
  • Upper face brace — 1/2" wide, 5/8" tall
  • soundhole braces — 3/8" wide, 1/8" tall
  • Upper transverse graft — 1" wide, 1/8" tall


That's it for today. I'm still waiting on the Zip-Flex strips. So....if they don't come tomorrow in the mail, I guess I'll get started on the sides.