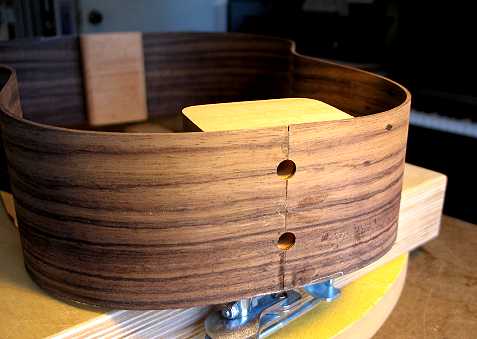
Tuesday, July 7th, 2009: It's around noon right now, and, while I wait for the kerfing I just glued on the top edge of the sides to dry, I will let you know what I've done so far this morning. Below you can see I've drilled the bolt holes through the sides (drilling from the inside of the block). This is the easiest time to do this.
|
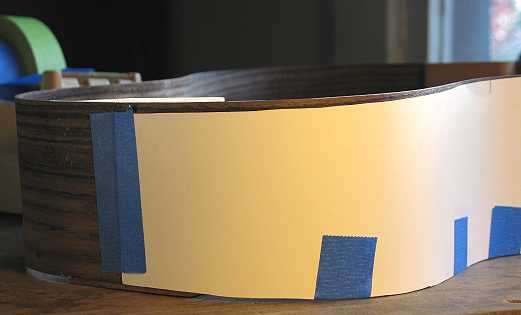
Next, I took my template for the sides and lined up the back edge of the template to the side's back edge (I had sawn the back to its final profile). Since I had kept the top edge flat (to make it easier to properly line it up in the bender), now I needed to mark the top's profile on the wood. I just marked it with a white China marker. Then I used the belt sander to get the neck and tail block areas close, and used a little block plane to trim the rest of the profile.
|
||||||
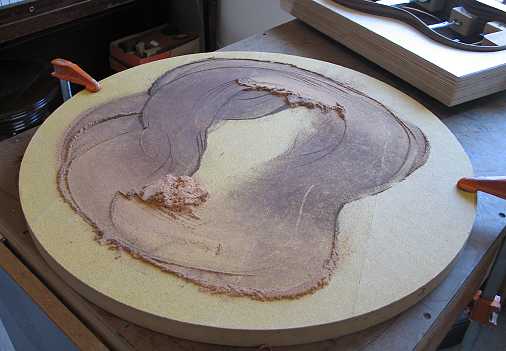
Now for the messy part — sanding the top radius into the sides. I put the side set into the mold and, holding the mold, sanded the side set on the 25' radius dish, after marking the edges and blocks with pencil. Once the pencil marks were gone, the side set matched the radius of the dish perfectly. I did the same for the back edge. Here's the mess it makes:
|
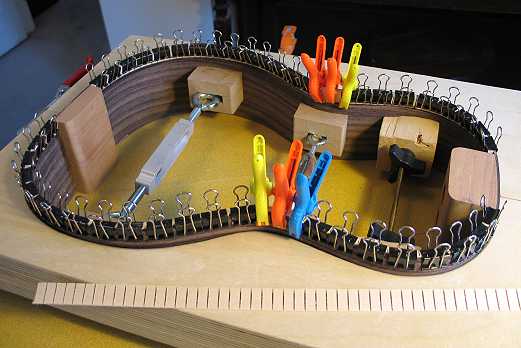
Finally, I glued the kerfing (I'm using basswood kerfing) to the top edge of the sides. In a little while, I will be able to do the other edge. I leave the kerfing about 1/32" proud. After all the kerfing is glued and set, I will be sanding the kerfing to match the proper radius.
|
||||||
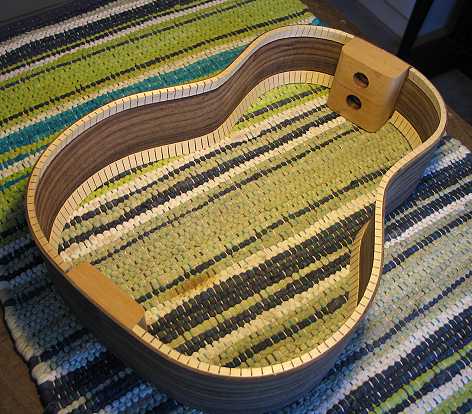
Well, time for lunch now . . . I'll be back later . . . . OK . . . I'm back!!! Here is the side set, with the kerfing strips all installed.
|
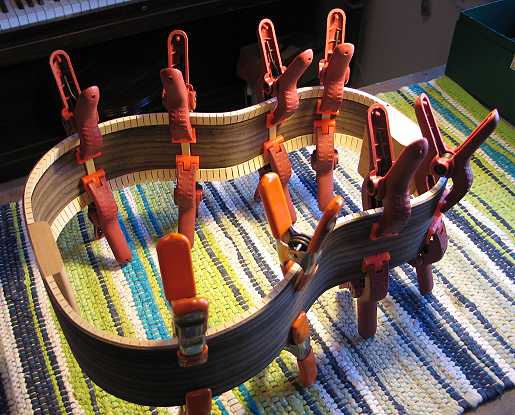
The final task for today is to make and glue in the side reinforcement strips. I have always just used popsicle sticks (which you can buy in a huge box at any hobby store)!!! I cut them to fit, round the top edges a little, and glue them on, clamping them with spring clamps, as you see below. TOMORROW . . . . sanding the top and back radius onto the kerfing. After that, I can attend to fitting the top and back to the sides (cutting the notches in the kerfing for the brace ends that will be set into the kerfing). And after that . . . gluing on the top and back (and we'll finally have a SOUNDBOX that I can thump on!!! YAY!!!!).
|
|