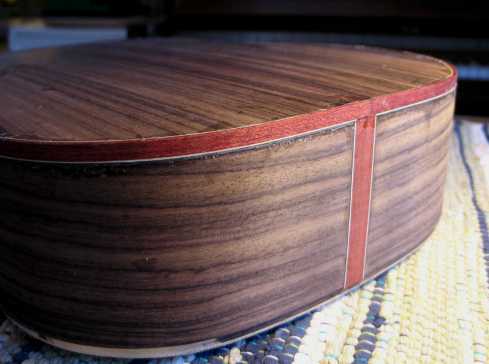
Saturday, July 11th, 2009: Not many photos today — doing the binding kept me way too busy to stop and take photos! Today I spent about four hours in the morning and three this evening making, fitting, and gluing in the end wedge and the binding. (I took a break in the afternoon to go see a movie with a friend.) I made the end wedge (actually not a wedge) by just gluing two pieces of the binding (with side purfling) together. I measured for the slot it would fit into, scribed the lines on both sides with an Exacto knife, and routed the slot out with my Dremel. I then glued the wedge in with Titebond and mitered the ends of the purfling. I then spent quite a bit of time fitting the binding for the back — lots of taping and retaping the binding, fitting the end that would miter into the end wedge first, chiseling and rechiseling little by little until it fit, and then moving on to fitting the neck end of the binding. I then cut the BWB purfling to fit. When one side of the bindings was all fitted properly, I glued it all (binding and purfling at the same time) with Titebond, securing it with the Stew-Mac brown binding tape (I love this tape — it's super strong). I did this process for each piece of binding. In the morning I was able to finish gluing the bindings on the back; this evening I did the top bindings. I think it came out well. Tomorrow I will remove the tape from the top and start scraping and sanding it all down to see what I've got!
|