Pegheads


Wednesday, June 27th, 2012:

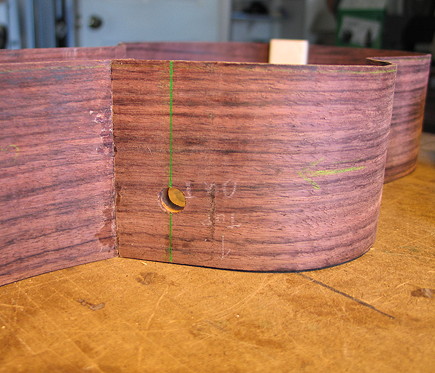
The first thing I did this morning (so I wouldn't forget to do it later, when it would be a bit more difficult to do) was to drill the bolt hole in the neck block all the way through the side.


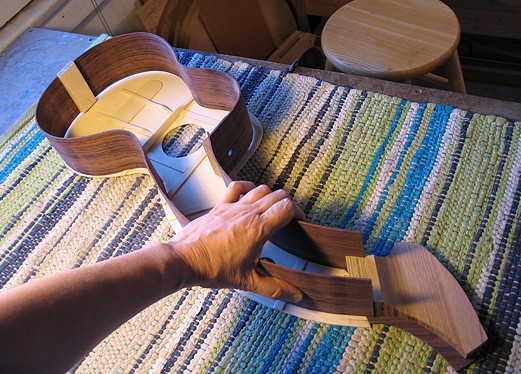
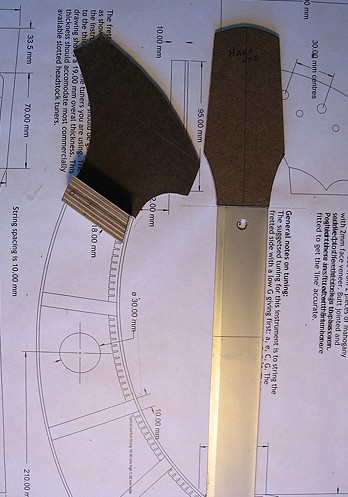
Next, I spent quite a bit of time (an hour or two) just fiddling around with the neck peghead shape --- I wanted to be sure it harmonized smoothly with the harpbox peghead shape. Also, I wanted to make sure that the strings on the peghead would not run into each other; making the peghead narrower at the top helps accomplish that. I did end up shortening the right side of the harpbox peghead a little bit, to better enable me to end up with that neck peghead shape. (By the way, when I took this photo, I had already torn up and thrown away the tracing paper sketch of the fingerboard, so I substituted my straightedge in its place! Not quite the same, but close...) I find that, as the years pass, I go for simpler and simpler designs in my building.


INDEX:

Return to HOME PAGE

  1. Working on the Top and Back
  2. Finishing the Rosette, Harpbox Peghead Veneer
  3. Bracing
  4. Carving the Braces
  5. Bending the Sides
  6. Neck and Tail Blocks
  7. Pegheads & Top Kerfing
  8. Profiling the Sides for the Back
  9. Soundport and Side Reinforcements
  10. Gluing on the Top
  11. Gluing on the Back
  12. Trimming Overhang & Harpbox Peghead
  13. Routing for Binding
  14. End Wedge & Binding
  15. Scraping the Binding, Binding the Harpbox Peghead
  16. The Box is Done --- On to the Neck!!!
  17. Working on the Neck & Fingerboard
  18. The Neck is Finished!!! Now to the Bridge!!!
  19. Peghead Inlay, Final Sanding & Pore-Filling
  20. Shellac Seal Coats and Finishing!!!
  21. Finishing the Finish!!!
  22. The Final Steps
  23. It is Finished!!!


On my previous harp ukulele, I had made the harpbox peghead by gluing two 3/4" pieces of mahogany together and then spending a LOT of time using the belt sander to scoop out the bottom of the peghead shape. This time, I used a single block of mahogany cut off from a 3" by 4" by 30" neck blank; I will use part of it to bandsaw out my entire neck blank, and the leftover piece I am using here.


I traced the peghead shape on top, and then traced the scoop on the side of the block. I will bandsaw out the scoop, and then cut out the peghead shape.


The bandsawing method worked great! Here I have glued and screwed the harpbox peghead to the harpbox end block I had made yesterday. The block is flush to the peghead on both the top and back, and there is a side's width on each side of the block.


Here I have placed (not glued yet!) the peghead upon the top, to illustrate how it will later be glued.


Here is how the harpbox sides (to be trimmed WAY down later to meet the end block) will later be glued onto the block.


Another view of how it will all go together later....