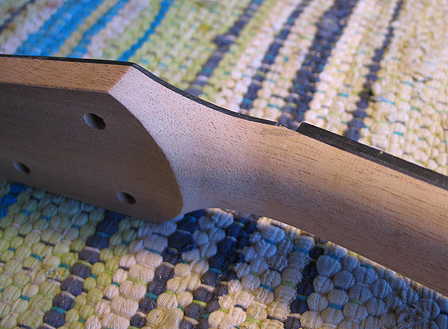
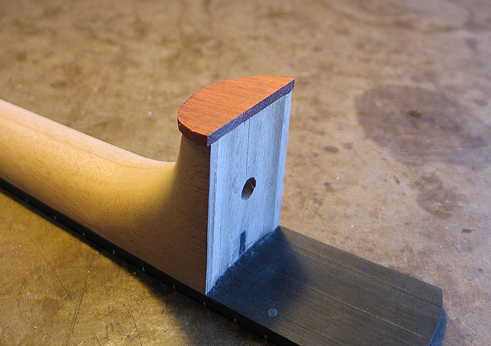
Here's another shot of the heelcap (still not trimmed down yet):
Tomorrow, I will start making the bridge!! (I needed to wait until I could see what my final neck angle would be, before I could determine the thickness of the bridge.)
|
|
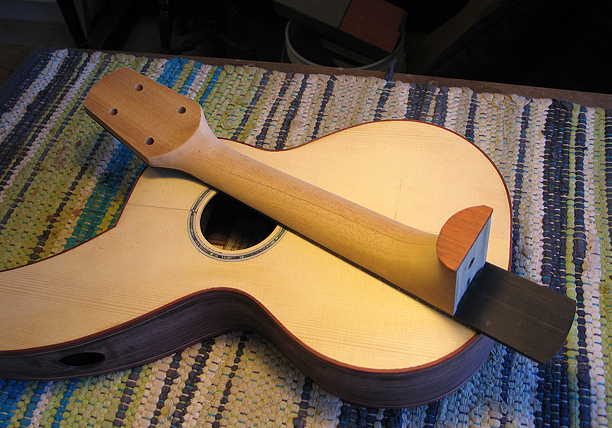
Here are some shots of the uke with the ncck bolted on. I re-checked the neck angle and centering with the soundbox, and ended up having to sand the bass side of the heel a little more.
Oh, yeah....and below you can see the heel cap is all trimmed and fits the body nicely.
|
|
Friday, July 20, 2012:
Well, it's about 5:30 p.m., and I have just completed making the bridge. It took me all day, would you believe it?
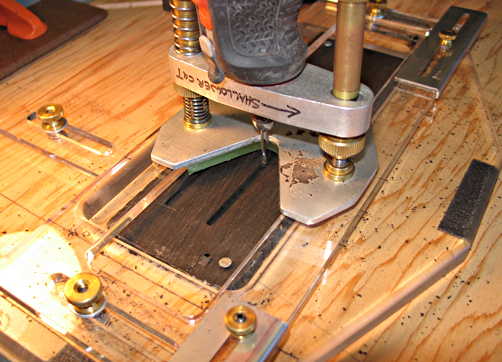
But, before I begin, let me give credit to John Parchem, for his helpful method of making the bridge, using a template for nearly the entire operation. (I didn't do that the last time.) It made the bridge much more accurate to the plans. He is building his harp ukulele from Pete's plans right now, too, and his blog has been quite helpful to me! Here's his blog: John Parchem's Harp Ukulele Build. Check it out --- his harp ukulele is coming out beautifully!!!
Anyway, the first thing I did today was to measure for the space between the straightedge and the top, at the saddle location, when I placed the straightedge on top of the bolted, fretted neck. It turned out to be about 6.5mm. Pete Howlett had advised me to add 1mm to that measurement, to determine what thickness I needed to make my bridge. So, I thicknessed the ebony bridge blank to about 7.5mm.
Then I used my Stew-Mac saddle slotting jig to rout the 1/8" saddle slot. You can barely see it, but that first slot to the left didn't come out so well. It came out straight on the right side, but jaggedy on the other. It turned out that what I had to do was to make sure to slide the router base guide tightly against the right-hand wall of the jig; that made the slot more consistent and straight.
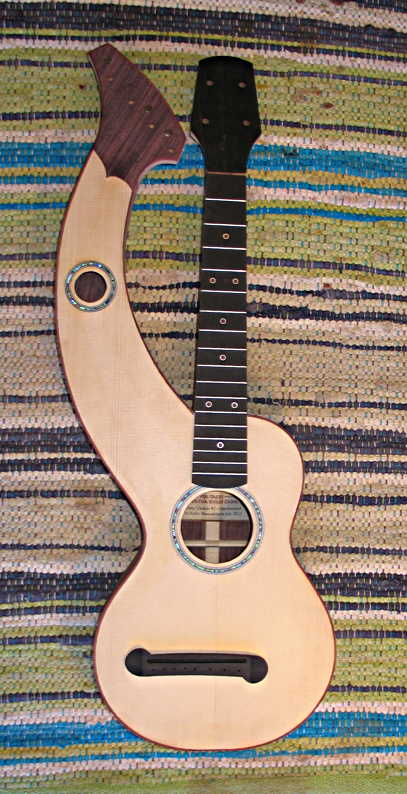
The next (and last) thing I need to do, before beginning the process of pore-filling and putting the finish on this instrument, is to make an inlay for the peghead. I'm thinking of just doing the same simple "KM" inlay I did on my Size 5. |
|
After the slot was routed, I made a hardboard template of the bridge, by gluing the plan onto the hardboard. Then, as John did with his bridge, I drilled two 1/8" holes through the template, at the ends of the slot, and used two 1/8" drill bits to position the template onto the bridge blank, with some double-stick tape on the bottom of the template.
I then used the bandsaw to cut close to the template outline, following that with the disc sander and files to finish up the bridge. With the template still stuck to the bridge, I then used it to drill the eight 1/16" string holes.
Finally, I used that belt sander thicknessing jig I made last week, to sand the ramps on the ends of the bridge.
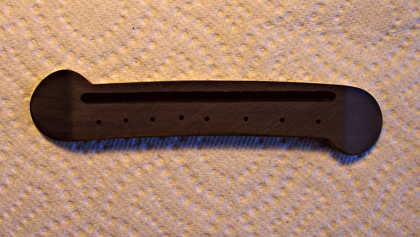
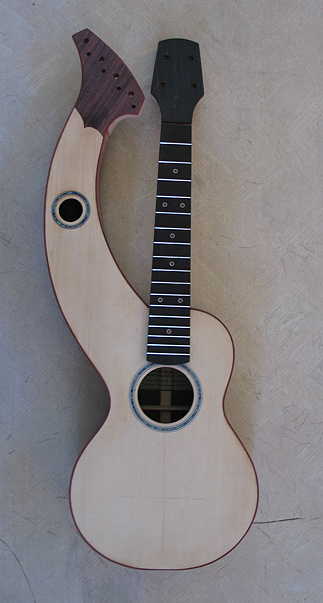
Here's what the bridge looks like, positioned on the harp uke. (Kind of looks like a quizzical or befuddled look on a face, doesn't it? I always seem to see faces on my instruments...)
|
|