Wednesday, July 18th, 2012:

This has nothing to do with the harp ukulele build, but Hannah (she's now almost a year-and-a-half old!) wanted to say "Hi!" When I'm building, she starts to feel a little neglected, so I thought I'd let her in on it all:


Yesterday I spent a bit of time doing some preliminary neck-fitting. The main thing I wanted to do was to get the neck centered and in line with the soundbox centerline. It was a little off, so I needed to sand a little off the bass side of the heel. (I had already coved out the heel face, leaving about 1/8" of a margin on the left and right edges of the heel face, so all I had to do was to sand that narrow 1/8" ledge.) Here I have laid out how the neck and fingerboard will be positioned.


INDEX:

Return to HOME PAGE

  1. Working on the Top and Back
  2. Finishing the Rosette, Harpbox Peghead Veneer
  3. Bracing
  4. Carving the Braces
  5. Bending the Sides
  6. Neck and Tail Blocks
  7. Pegheads & Top Kerfing
  8. Profiling the Sides for the Back
  9. Soundport and Side Reinforcements
  10. Gluing on the Top
  11. Gluing on the Back
  12. Trimming Overhang & Harpbox Peghead
  13. Routing for Binding
  14. End Wedge & Binding
  15. Scraping the Binding, Binding the Harpbox Peghead
  16. The Box is Done --- On to the Neck!!!
  17. Working on the Neck & Fingerboard
  18. The Neck is Finished!!! Now to the Bridge!!!
  19. Peghead Inlay, Final Sanding & Pore-Filling
  20. Shellac Seal Coats and Finishing!!!
  21. Finishing the Finish!!!
  22. The Final Steps
  23. It is Finished!!!

Then it was time to install the frets. I had a bit of trouble here, with lots of chipping of the fingerboard surface, at several spots along the fret slots. Even though I had beveled the tops of the slots slightly, and had put a slight bend into the fretwire, for some reason the frets just didn't want to seat and stay put, and I ended up with lots of chipping.

So, I made some ebony dust, packed it into the chips, and dropped on some superglue. After that was done, I clamped the back-bowed fingerboard in the middle, letting it rest on a couple of 1/4" blocks at the two ends, to set the board straight again.


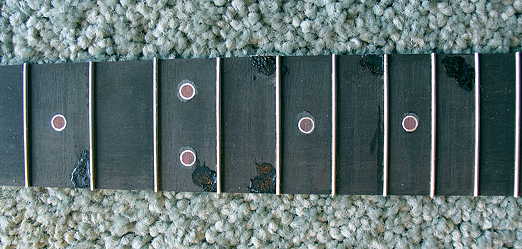
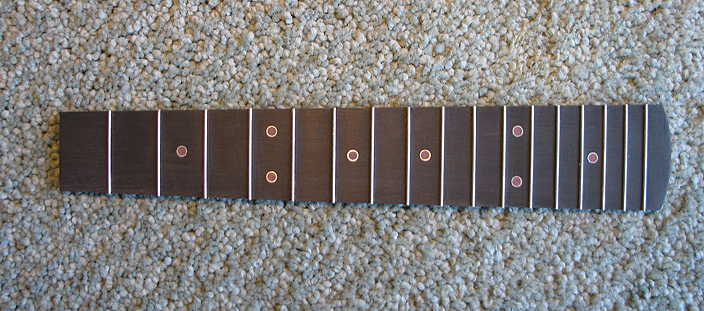
This morning I spent quite a bit of time sanding down the superglued patches, and here's what it looks like now --- back to normal! (Oh, yeah --- and I also filed the edges flush to the fingerboard sides and beveled the ends of the frets. Full dressing and polishing of the frets will come later...)


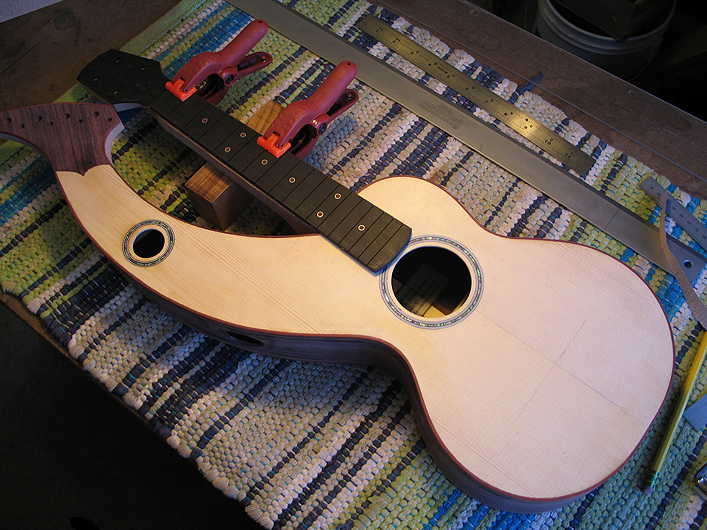
The final thing I did today was to glue the fingerboard to the neck. (I found that I could re-use my Kasha baritone uke fingerboard caul, by placing it over the fingerboard at the 3rd fret.)


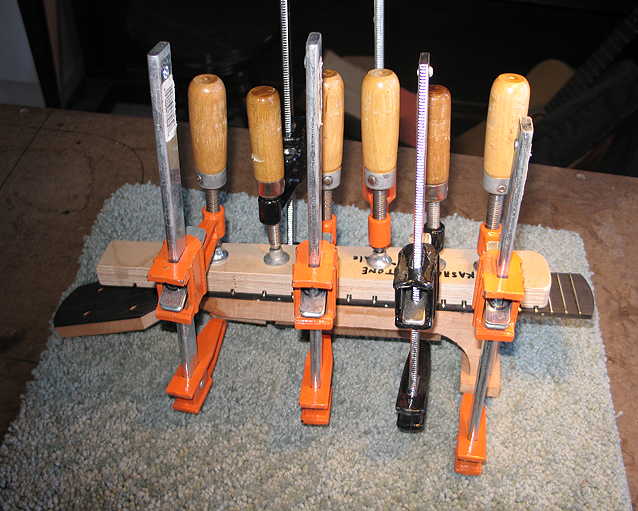
Later tonight, I will probably start carving the neck!!!


Go to Previous Page


Go to Next Page