Bending the Sides


Saturday, June 23rd, 2012:

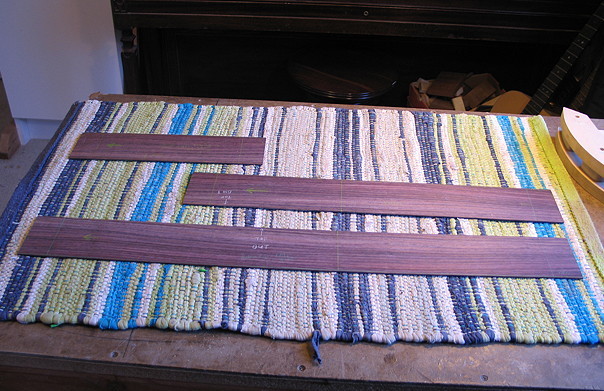
Now it was time to bend the sides! The first thing I did was to figure out all the dimensions of the three side pieces --- the long harpbox side (25-3/4" long) on the bass side of the uke, the treble side (18" long) that runs past the neck block to the harpbox, and the short right-hand side of the harpbox (9" long).

I decided this time not to profile (taper) the sides until later, after I have glued the sides to the neck and tail blocks and have glued on the top. The reason for this is, because of the somewhat weird geometry and extra harpbox of this instrument, I had a little bit of trouble, on the last harp uke, fitting and gluing on the back; my profiling of the sides before I had bent them somehow wasn't quite right for this instrument, and I had to do some adjusting and reshaping of the sides to make the back lie solidly on the sides.

Anyway, here are the sides, after I have cut them out. I have cut them all 73mm wide (the height of the side at the tail end of the uke).


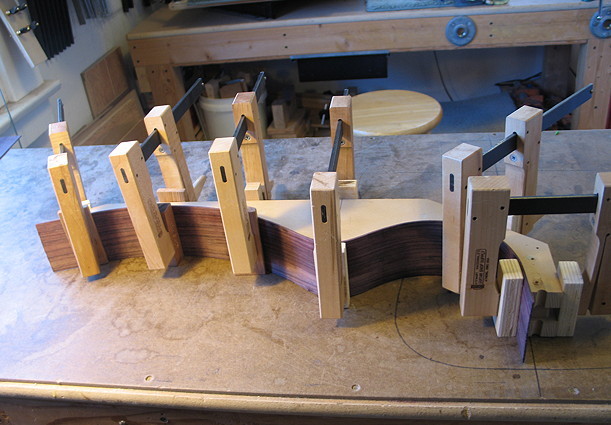
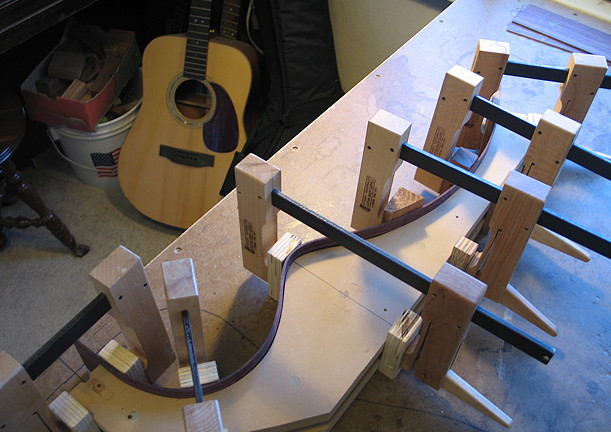
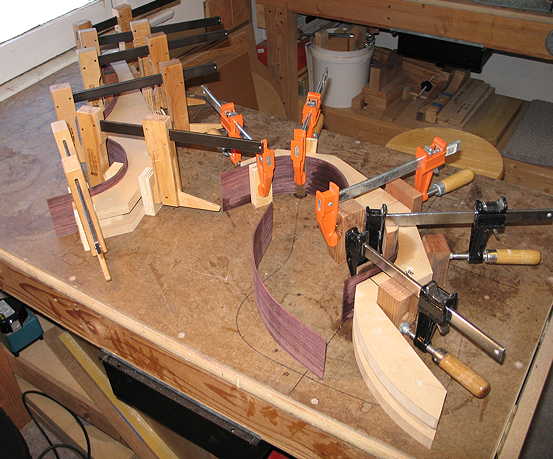
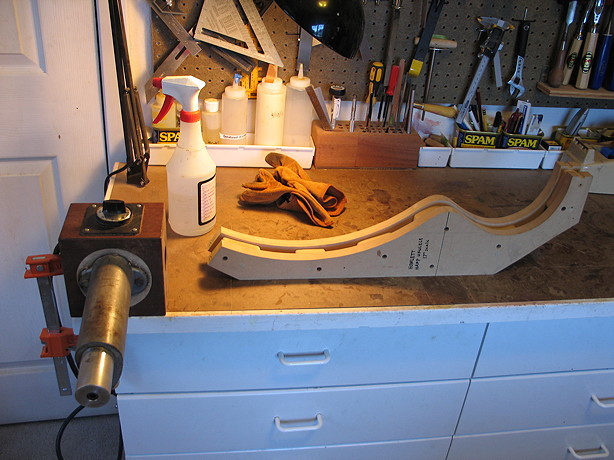
Another thing I decided to do differently this time was to do the bending by hand, on my electric bending iron. Since, on the last uke, quite a bit of the bending had to be done by hand, anyway, even when I used the side bender, I thought I might as well do it all by hand this time. (And, anyway, it is a little less nerve-wracking and involved than using the side bender --- I don't have to do all the wrapping and careful timing and worrying about possibly scorching the 2mm thin sides in the side bender --- all that's needed is the bending iron, a spray bottle of water, and a form to check the bends against.) Also, it's easy to see and control what you're doing when you're doing it by hand, and it's kind of a satisfying feeling to be more "hands-on" with the bending.

Below is my simple set-up:

INDEX:

Return to HOME PAGE

  1. Working on the Top and Back
  2. Finishing the Rosette, Harpbox Peghead Veneer
  3. Bracing
  4. Carving the Braces
  5. Bending the Sides
  6. Neck and Tail Blocks
  7. Pegheads & Top Kerfing
  8. Profiling the Sides for the Back
  9. Soundport and Side Reinforcements
  10. Gluing on the Top
  11. Gluing on the Back
  12. Trimming Overhang & Harpbox Peghead
  13. Routing for Binding
  14. End Wedge & Binding
  15. Scraping the Binding, Binding the Harpbox Peghead
  16. The Box is Done --- On to the Neck!!!
  17. Working on the Neck & Fingerboard
  18. The Neck is Finished!!! Now to the Bridge!!!
  19. Peghead Inlay, Final Sanding & Pore-Filling
  20. Shellac Seal Coats and Finishing!!!
  21. Finishing the Finish!!!
  22. The Final Steps
  23. It is Finished!!!


Below you see I have bent the long side on the bass side of the harpbox. To do the bending, all I did was spritz water on the side that would contact the bending iron, and then slowly move and rock the side back and forth until I had the proper bends, starting with the waist, and adjusting the bends as I went along, checking it with the mold (which I have separated). After I had it bent properly, I lightly spritzed the side on both sides and clamped it into the mold; when it's all dry, the shape would be set.


To the left, you see all the sides have been bent and are clamped into the mold. (The short side is not clamped because the treble side juts into its space.)

Bending all by hand was fun --- I hadn't done that in a while. It took me about two hours to do it all. I had no scorching and no cracking at all; Indian rosewood is actually pretty easy to bend.

Tomorrow I will probably make the neck and tail blocks, trim the ends of the sides, and glue up the blocks.