Wednesday, July 11th, 2012:
It's now about 3:45 p.m., and I just got back from watching "To Rome With Love" with some friends. Now it's back to the uke!
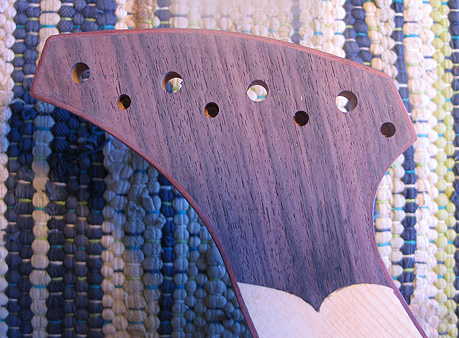
The first thing I did was to drill the harpbox peghead tuner holes and the holes for the string nuts. I used a 9/32" drill bit for the tuner holes and a 13/64" bit for the string nut holes (drilled only about 1/4" down into the peghead). I will use white bone bridge pins, with a slot sawn on the top, for the string nuts.
Thursday, July 12th, 2012:
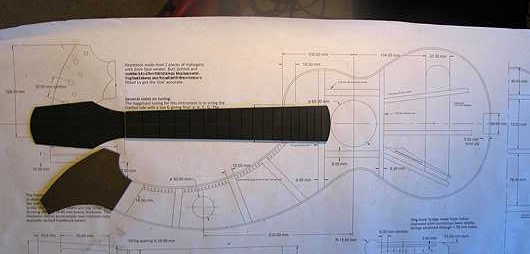
(1) The first thing I did today was to slightly redesign the peghead, so its lower left curved section coordinated better with the curve of the top of the harpbox peghead.
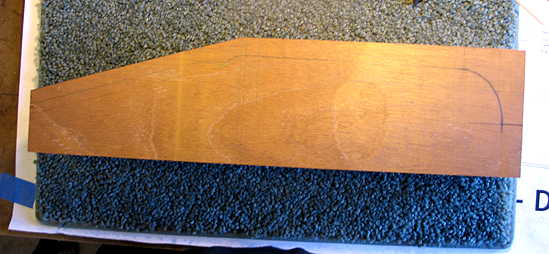
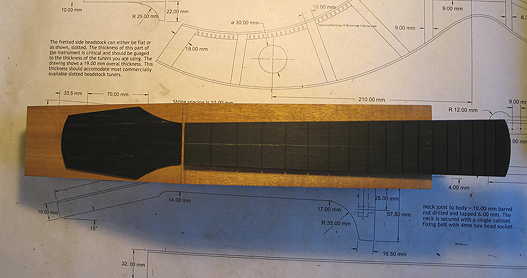
I also, as you can see here, cut the fingerboard taper (using this on my tablesaw) and rounded the end slightly.
(3) I then traced the fingerboard outline onto the top of the neck blank.
|
|
So that's it ---- the soundbox is complete!!!!
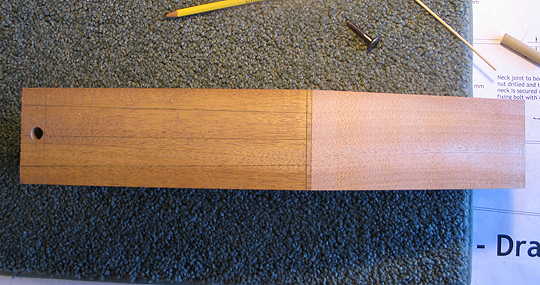
Now it's on to the neck. Below is the mahogany neck blank I will use for the neck. All I have to do is cut and carve away everything that is not a neck. . . .

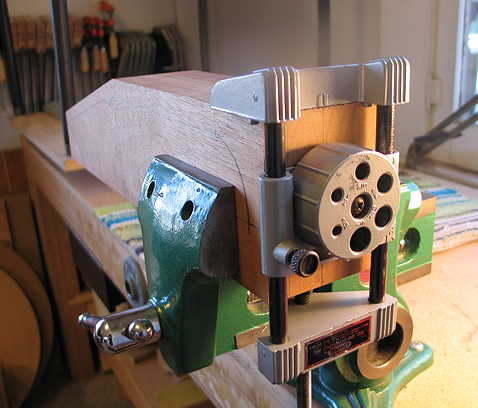
(2) Next, I traced the neck shape on the side of the neck blank, bandsawed (just outside the line) the peghead face (15° angle), and then trued up the peghead face on my jointer.
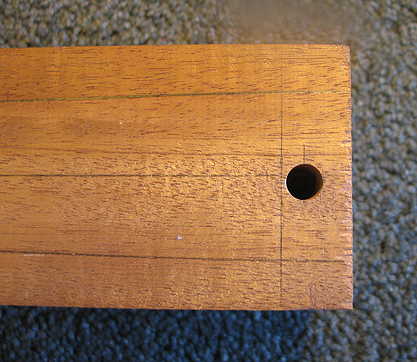
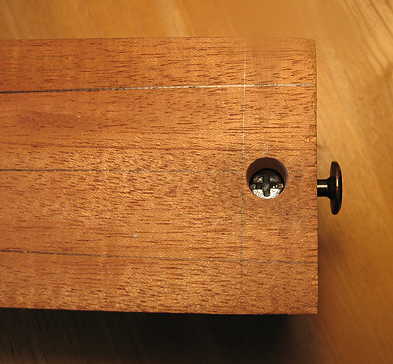
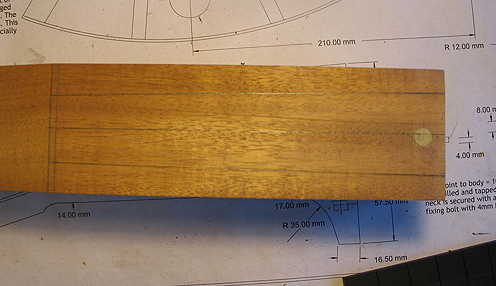
(4) I also spent a lot of time today just doing a bunch of calculating --- figuring out exactly where to drill the 25/64" vertical hole for the barrel nut I will be using (for my bolt-on neck attachment). In the photo below, you can see that the barrel nut hole is not quite on the centerline --- that was intentional, as my neck block bolt hole didn't land exactly on the centerline of the soundbox. Thus, I needed to match up the bolt hole (and thus, also, the barrel nut hole) with the position of the neck block bolt hole.
This part took a lot of figuring, because I had to figure out exactly how far from the end of the neck I had to place the barrel nut, based on how far out of the soundbox the bolt would extend. I also had to figure out exactly how deep to drill the barrel nut hole, so it would sit at just the right position to meet the bolt.
|
|