Monday, July 16th, 2012:
Didn't take any photos yesterday, but here's what happened:
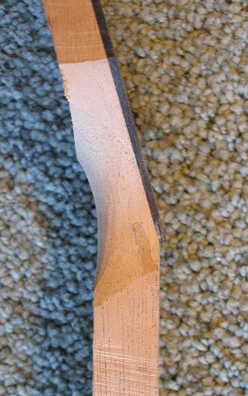
The first thing I did yesterday was to thin the peghead to 1/2" and use the belt-sander jig I had made Friday to shape the volute ramp. Then I trimmed the peghead (bandsawing first, close to the veneer edges, and then using the Robo-sander to sand it flush to the peghead veneer, using the veneer as the template). So far, so good. HOWEVER, as I was cutting along the fingerboard line (about 1/16" or so outside the line) towards the peghead, I forgot about how the bandsaw blade can grab the wood towards the end of the cut (as the heel approaches the end of the bandsaw table), and it sliced a tiny bit (about 1/4") into the neck and peghead veneer. So, there was a slice the width of the bandsaw blade, cutting into the bottom of the veneer. Yikes!
At first I thought, "Oh, no...I'll have to re-do the neck up to this point!" But then I thought, "I don't really want to do that --- maybe I can patch it and it won't be too noticeable." (And, anyway, this one is for me, so a little flaw won't kill me.) So, I cut some mahogany shavings and glued them into the gap as far as I could, and filled the blade cut in the peghead veneer (luckily, it's ebony, so it's easy to fill and be fairly unnoticeable) with Titebond and ebony dust.
I let it sit overnight. Then, this morning, I sanded the volute to its rounded shape on the belt sander, to see if the patch would look okay. (If it wasn't going to look okay, I was resigned to making another neck --- to prepare for that possibility, last night I went to my local hardwoods store to see if they had any large mahogany blanks I could use --- they didn't, so I ended up ordering a neck blank from LMI. I could have made a new neck from 3/4" boards, but I really didn't want to have a stacked heel and scarf jointed neck this time.)
Anyway, I think it's not going to be too noticeable, so I think I'll keep it and move on with the build.
Here's what the patch looks like right now, after I had partially shaped the volute on the belt sander this morning:
|
|
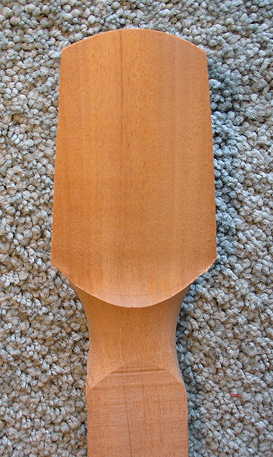
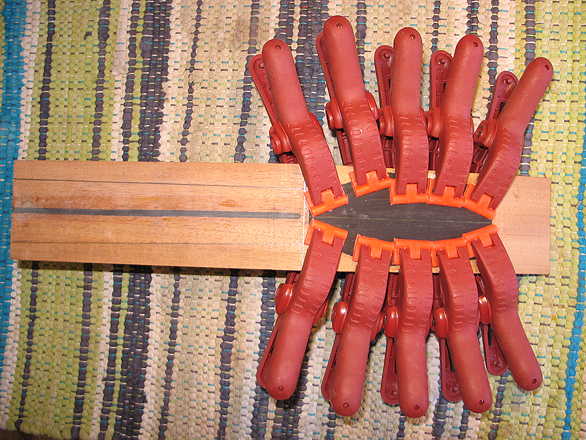
Here's the belt-sanded volute. I found that it's easiest for me to control and see exactly what I'm doing if I set the belt sander table vertically, like this. I'm always afraid of sanding too far into the fingerboard/nut edge, so I'm able to see it better this way, rather than having to kneel down with the belt-sander table in its normal horizontal position.
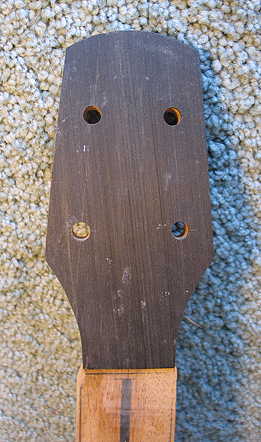
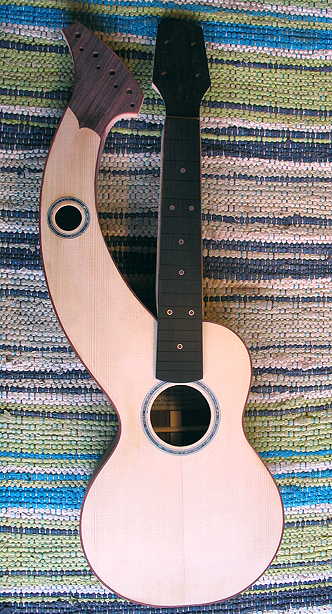
And here are the tuner holes drilled, 1/2" from the edges, and 1-3/4" apart, vertically.
|
|
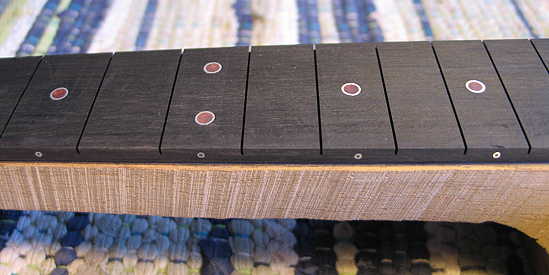
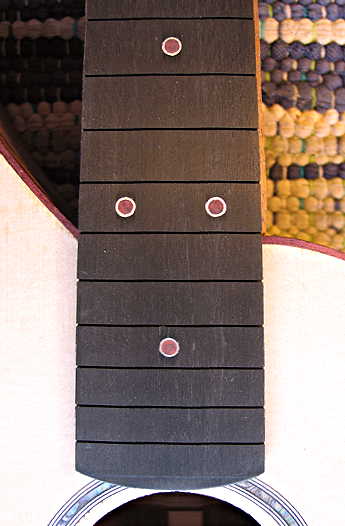
What I also did today was to start work on the fingerboard. I took out my stash of abalone fingerboard dots, and found I only had 1/4" ones, which looked too big for this ukulele. Then I thought, maybe I will try what I've always wanted to try, ever since I first saw it --- using aluminum or brass tubing for the dots, filled with colored epoxy. So, off I went to my local hobby store for the tubing. While there, I found some metallic-pearlescent dye powder, in a color called "Super Russet," which I thought would nicely complement the bloodwood binding scheme of this instrument.
So, I got some 3/16" aluminum tubing, put a 1/8" dowel inside to support it as I sawed the little pieces (about 1/8" or so tall) of tubing, and drilled the 3/16" diameter holes in the fingerboard. (Oh, yeah, I thinned the fingerboard to about 3/16" , also.) I inserted the tubing into the holes, hammered them down a little to seat them solidly, then filed them almost flush to the fingerboard. I mixed up epoxy and the reddish dye, and filled the tubing with the epoxy. Tomorrow I will scrape/sand it down.
Here are the side dots (1/16" aluminum tubing, with just ebony & superglue in the center of the tubing --- I tried dropping some more of the reddish color in there, but it didn't really show up in such a tiny hole):
|
|
Tuesday, July 17th, 2012:
Just a couple of quick photos before I launch into today's work. Here are the fingerboard dots sanded down. I also plan to put little 1/16" aluminum tube dots on the side of the fingerboard.
Here's a YouTube video that helped clarify how to do it: Making Fingerboard Dots with Aluminum Tubing
|
|
