Brace Yourself!!!


Sunday, June 17th, 2012:

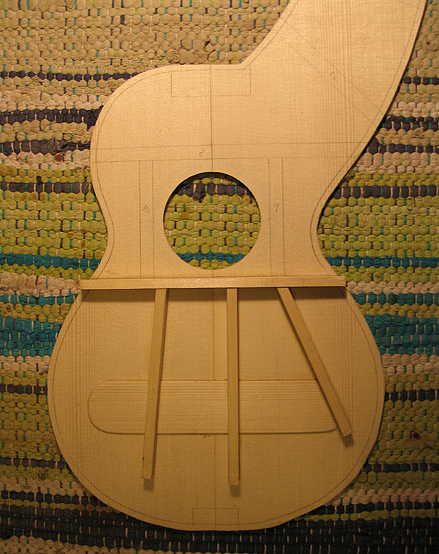
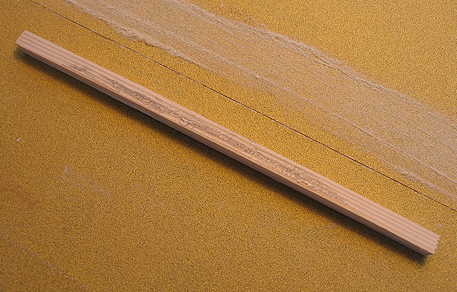
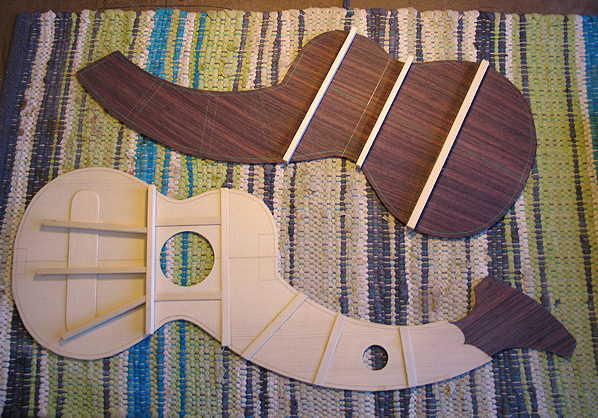
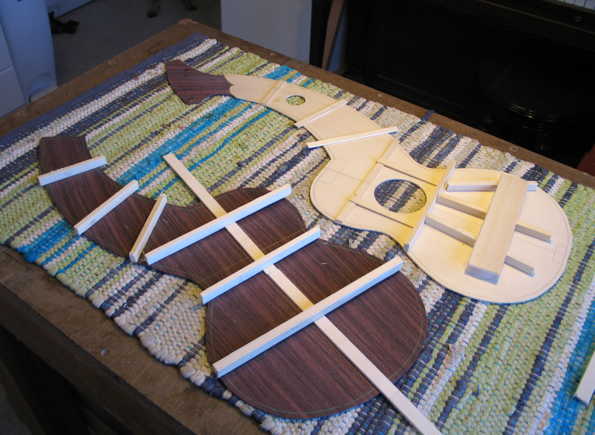
Today after church, and after playing a few games of "Words with Friends" with my sister and nephew, I got around to cutting out the braces for the top and back. Would you believe that it took close to 4 hours (!!!) just to measure and cut all the braces you see in the photo below???? Actually, it involved a bit of work --- the braces are all different widths and heights, so a lot of time was spent at the bandsaw and thickness sander, before finally cutting them to length.

Anyway, they're all done now, so tomorrow I'll start the actual gluing of the braces. Stay tuned.


Monday, June 18th, 2012:

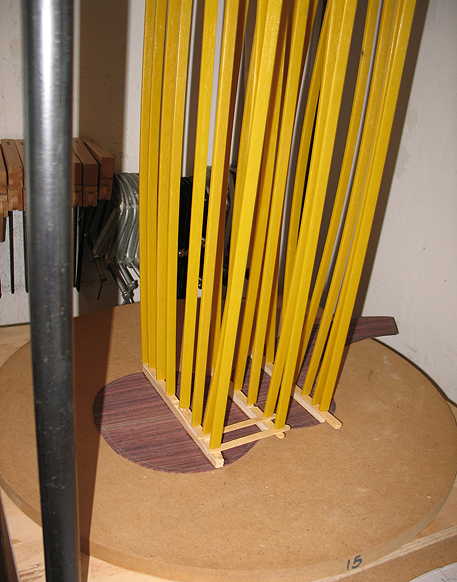
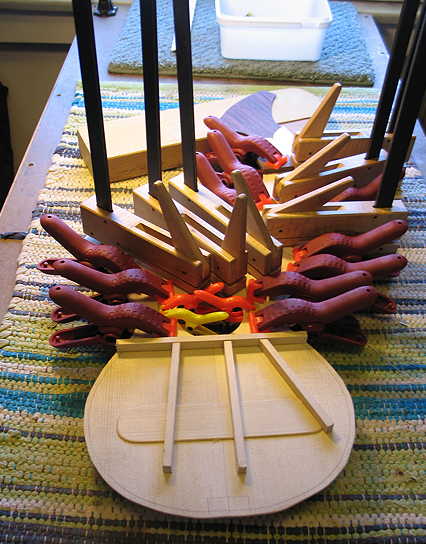
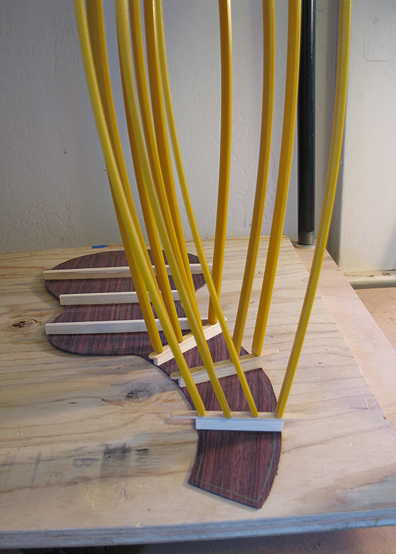
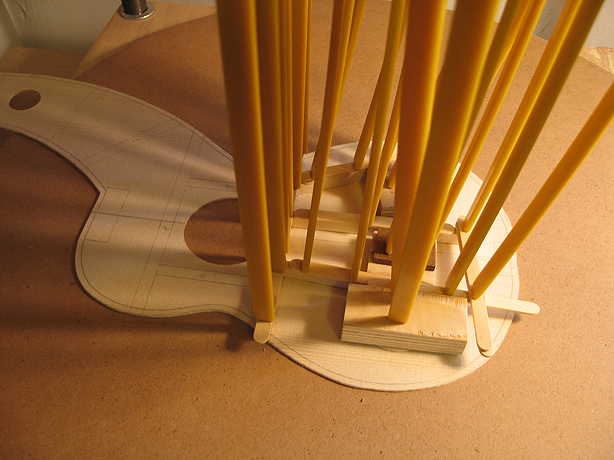
Okay, so today after doing some errands, I got around to gluing the 25' radiused braces on the top. First, I sanded the radius on the bottom of the braces. Next, I trimmed the ends to their proper lengths and angles. Finally, I notched the bottoms of the two left tone bars, to fit over the bridge patch. After all that was finished, I glued them all at once laid on top of the radius dish, in the go-bar deck, using a variety of scraps as clamping cauls atop the braces.

Tomorrow, I'll glue the back braces in the go-bar deck, at the same time as I glue the remaining flat braces on the top.


INDEX:

Return to HOME PAGE

  1. Working on the Top and Back
  2. Finishing the Rosette, Harpbox Peghead Veneer
  3. Bracing
  4. Carving the Braces
  5. Bending the Sides
  6. Neck and Tail Blocks
  7. Pegheads & Top Kerfing
  8. Profiling the Sides for the Back
  9. Soundport and Side Reinforcements
  10. Gluing on the Top
  11. Gluing on the Back
  12. Trimming Overhang & Harpbox Peghead
  13. Routing for Binding
  14. End Wedge & Binding
  15. Scraping the Binding, Binding the Harpbox Peghead
  16. The Box is Done --- On to the Neck!!!
  17. Working on the Neck & Fingerboard
  18. The Neck is Finished!!! Now to the Bridge!!!
  19. Peghead Inlay, Final Sanding & Pore-Filling
  20. Shellac Seal Coats and Finishing!!!
  21. Finishing the Finish!!!
  22. The Final Steps
  23. It is Finished!!!


It's Monday evening, and I have just removed the go-bars. So far, so good. I'll be glad when this top is all braced, because it (being only around 2mm thick) feels so fragile unbraced, and I have to be super-careful whenever I'm handling it (especially with an exuberant Hannah around), so as not to crack anything...Once it's braced, it's nice and solid. (But I still have to be careful with the glued-on harpbox peghead veneer.)


Tuesday, June 19th, 2012:

THE TOP PHOTO ON THE RIGHT: Here's how I sand the radius (25' for the top, 15' for the back) onto those braces that will be arched. I first scribble pencil on the bottom of the brace, and, as I sand, I can tell when the entire brace bottom has contacted the sandpaper (stick-it sandpaper placed on the radius dish). When all the pencil marks are gone, it's done.

THE BOTTOM PHOTO ON THE RIGHT: Here I am gluing on the three arched back braces. I'm using popsicle sticks as cauls, so as not to damage the soft spruce.


Underneath all those various clamps up above are the six flat braces for the top. As the go-bar deck was in use gluing the back braces, I had to do it this way.


TO THE RIGHT: I removed the clamps and go-bar sticks. The braces are almost all glued! All that's left are the three flat back braces (shown in the go-bar deck in the photo below).

Tomorrow I will carve the braces!

I always enjoy doing the top and back and their bracing; these tasks are relatively simpler than what will come next --- bending the sides . . .