The End Wedge and Binding


Still Friday, July 6th, around 7:30 p.m. :

Last photos of the day --- I made and glued the end wedge.

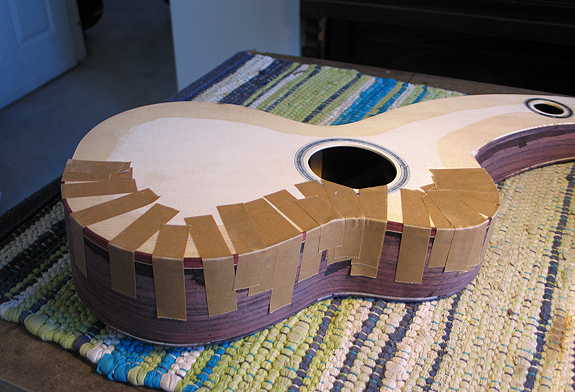
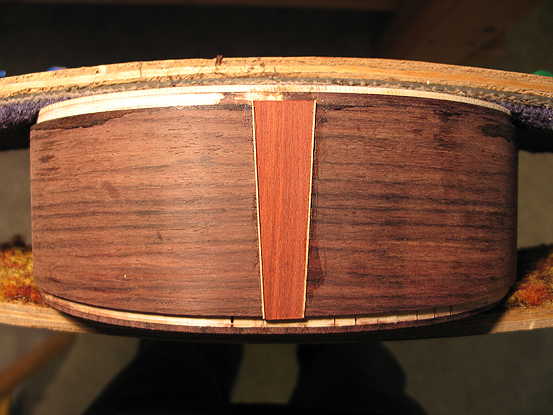
First I cut the slot for the end wedge, using an Exacto knife (with a metal ruler as a guide) to scribe the edges, and then a chisel to remove the wood.


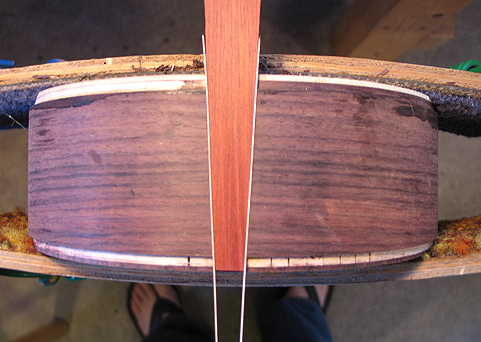
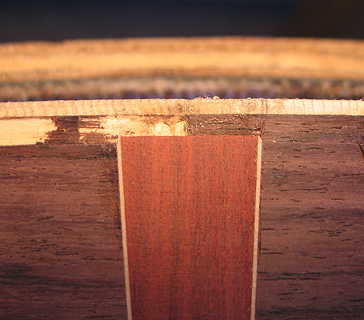
Next I cut and sanded the bloodwood wedge until the taper was right. Here I am checking its fit with the two white purfling lines on the sides.


Once I had the fit right, I carefully cut the wedge, so that it stands above and below the slot by the width of a purfling line. Then I glued it all in the slot with Titebond.

Tomorrow I will scrape it down and miter the ends of the white purfling line. When I install the binding in this section, I will need to cut the binding to fit this, so that the white lines will be mitered to each other.


I would say this is enough work for today. I am thankful it all went well!!!

Tomorrow....bending the binding!!! (I'm going to do it by hand.)


Saturday, July 7th, 2012:

This morning the first thing I did was to scrape down the end wedge and its purfling. Then I mitered the ends of the purfling lines:


INDEX:

Return to HOME PAGE

  1. Working on the Top and Back
  2. Finishing the Rosette, Harpbox Peghead Veneer
  3. Bracing
  4. Carving the Braces
  5. Bending the Sides
  6. Neck and Tail Blocks
  7. Pegheads & Top Kerfing
  8. Profiling the Sides for the Back
  9. Soundport and Side Reinforcements
  10. Gluing on the Top
  11. Gluing on the Back
  12. Trimming Overhang & Harpbox Peghead
  13. Routing for Binding
  14. End Wedge & Binding
  15. Scraping the Binding, Binding the Harpbox Peghead
  16. The Box is Done --- On to the Neck!!!
  17. Working on the Neck & Fingerboard
  18. The Neck is Finished!!! Now to the Bridge!!!
  19. Peghead Inlay, Final Sanding & Pore-Filling
  20. Shellac Seal Coats and Finishing!!!
  21. Finishing the Finish!!!
  22. The Final Steps
  23. It is Finished!!!


Now it was time to begin bending and gluing the bindings. I started at the end wedge point of the top. I removed the purfling line where the binding would sit upon the top of the end wedge, then mitered the end of the binding purfling, so it would meet the purfling on the sides of the end wedge.

Once that was done, I just started bending the treble side of the top binding, from the end wedge up to the centerline of the top. I did it all with the electric bender, checking and rechecking the bends with the binding channel. Here it is, bent completely.


Here I have glued that binding strip on.

I then bent the little piece of binding that goes from the top centerline to the corner (where the top and the harpbox meet), mitered the corner end, and glued that in. The next piece to bend was the inside edge of the harp box; after it was bent, I had to miter one end and miter the end which will meet the short strip of binding that will join the two harpbox inside bindings. I glued that one in.

The final piece of binding I worked on today was that short strip at the end of the harp box. It had to be mitered on both ends.

I think it's time to stop for today. It has gone well so far, but, still, binding is a nerve-wracking job for me!


Go to Previous Page


Go to Next Page