Later that evening . . . .
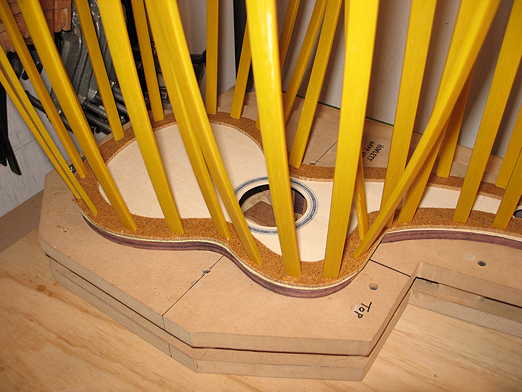
After about four hours, I removed the go-bar sticks and clamps. Everything came out well. The top is flush to the sides, and I had very little glue squeeze-out to deal with. I guess I'm getting better at knowing just how much glue to apply to the rims --- not too much, and not too little.
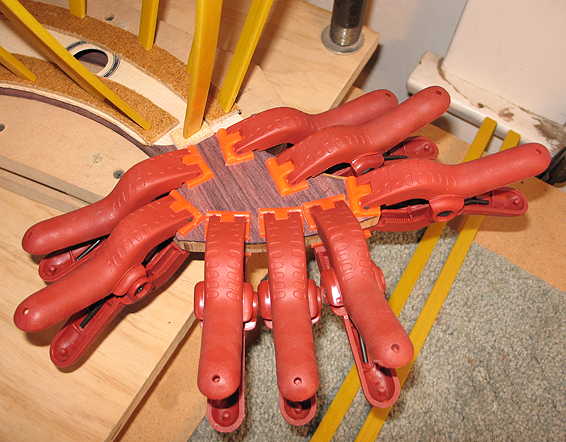
Those stationery clamps you see in on a small section of the kerfing (upper left part of photo) are there because a few of the kerfed blocks developed a tiny crack along the side, I think because the block I had supporting it did not fully contact the side, and the pressure from the go-bars caused the kerfing to crack. However, all I had to do was to slide a tiny bit of glue inside the crack with an Exacto knife and clamp it together again.
|
|
TOMORROW:
I will wait until tomorrow, when the glue is fully cured, to trim the top overhang flush to the sides. Then it will be time to work on fitting the back. Here are my next steps:
-
Make the label for the back.
-
Recheck the radius sanded onto the back kerfing.
-
Fit the back to the sides, cut the back center reinforcement strip ends for neck and tail blocks, and chisel out notches for braces.
-
Sand the back and glue on label.
-
Glue the back to the sides in the go-bar deck.
|
|