My Summer 2001 Project: Building A Violin

  1. The Book and Templates
  2. The Mold
  3. Carving Turntable
  4. Corner Blocks, Dowels
  5. The supplies have arrived!
  6. Preparing the Blocks
  7. Bending and Gluing the Rims
  8. The Neck
  9. Carving the Plates
  10. The Linings
  11. Purfling
  12. Hollowing the Plates, Part I
  13. Making a Hollowing Table
  14. Hollowing the Back
  15. Hollowing the Top
  16. Carving the Scroll: Day 1
  17. Carving the Scroll (& Pegbox): Day 2
  18. Grooves and Chamfers: Day 3
  19. The Finished Scroll: Days 4-5
  20. Carving the Soundholes
  21. Bass Bar, Label, Gluing the Back
  22. Gluing the Top, Fingerboard Work
  23. The Soundbox!!!!
  24. Attaching the Neck
  25. Button Carving and Hole Reaming
  26. The Yellow Violin!
  27. Varnishing
  28. And Even More Varnishing!!!
  29. It's Finally Finished!!!

Friday, April 20, 2001 . . .

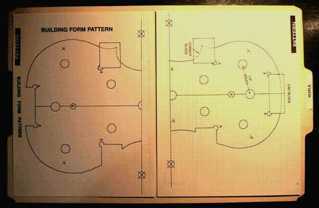
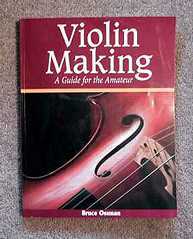
This is the book I will be using: Violin Making: A Guide for the Amateur. It is by Bruce Ossman and provides very detailed, step-by-step directions on how to build a violin.

The book has templates in the back, which need to be photocopied and joined, as the author wanted to retain the 8-1/2" by 11" size of the pages, for ease of photocopying.

I will also be using Henry Strobel's book Violin Making Step by Step as another resource.


Saturday, April 21, 2001 . . .

Well, I built the mold today. It's an inside mold, quite different from the kind of mold I use for building a guitar. It's made in two layers: the back (bottom) layer a 5/8" thick piece of plywood, the belly (top) layer a 3/4" thick piece of Douglas fir, planed down to approximately 1-1/4" thick at the tail end, to 1-3/16" thick at the neck end.


The two layers are not glued together; they're simply held together with six 1" screws. The eleven 1/2" holes drilled all the way through both layers are for dowels, which will be used later when it comes time to glue the ribs (sides) to the corner and end blocks. Rubber bands will be strung around the dowels, on the inside and the outside of the mold, to clamp down the ribs. Later, the top layer of the mold will be removed, to allow access to the ribs for gluing on the linings. The squared-off sections cut into the mold are for the four corner blocks and the two end blocks (you can see the way the end and corner blocks are inset in the template photo above).


 Next Page


Return to Projects Home Page