The Linings

Monday, June 25th, 2001

Now it's time to glue in the linings. First I removed the six screws holding the top half of the mold to the bottom half. I slipped a thin putty knife blade in between the mold and the corner and end blocks, freeing the blocks from the mold (I had only spot-glued them at the lower half of the mold). Finally, I screwed the two machine bolts you see in the photo to the right into the tap-threaded holes, and the top half of the mold easily separated from the bottom.

Oh, yeah....I forgot....Before I did this, I had sawed out the mortise for the neck in the upper block. (You can kind of see the mortise in the photo.) I also had drilled the tailpin hole in the bottom block.


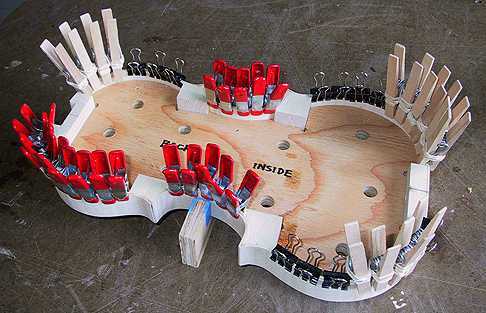
Now the rim is only held by the lower mold piece. To ensure that the C-bouts are still held closely to the mold, I cut out a piece of plywood to hold the C-bouts tightly to the mold.


Finally, I bent and glued on the top linings. The willow linings are about 7mm wide and 2mm thick. After the top linings are set, I will remove the bottom mold, using the plywood clamp to hold in the waist area, and glue in the bottom linings.


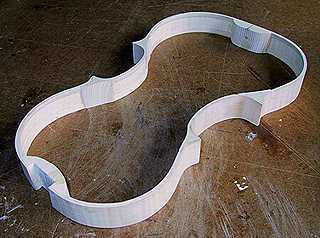
Tuesday, June 26th, 2001

Below is the finished rim, with all the blocks trimmed and the linings beveled.

 Now, back to working on the plates . . .


Go back to Violin-Building Menu

Return to Projects Home Page