|
Well, in the days since my last update, I worked on a lot
of things:
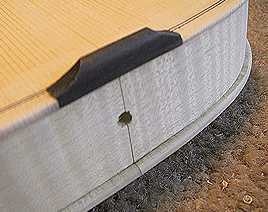
(1) Having completed the soundbox, I then cut out a section
in the bottom of the top plate in which to insert the saddle.
I didn't shape this saddle; I just purchased it already shaped.
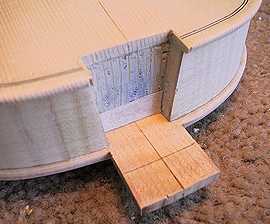
(2) I spent about six hours or so yesterday fitting the
neck to the body!!!! As you can see below, I ended up having
to glue a couple of pieces of paper into the bottom of the mortise
to make the neck angle just right. I also had to glue in a couple
of tiny slivers of spruce on the top sides of the mortise, since
somehow I had ended up with that part of the mortise too wide,
so there was a little gap. Unless you look closely, it won't
be too noticeable (hopefully), especially with the varnish applied.
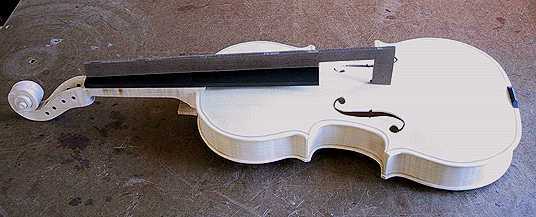
(3) This morning I bevelled and then rounded the edges
of the top and bottom plates.
(4) I then shaped the neck and heel. What I found worked
the best in carving the neck was my little mini-drawknife
and my two micro-rasps
(kind of like cheese graters!). I didn't find this neck difficult
to shape, since I've done quite a few guitar necks by now, and
a tiny violin neck seems like nothing compared to those! I forgot
to take photos of carving the neck, though....sorry!!!! (You'll
see it later.)
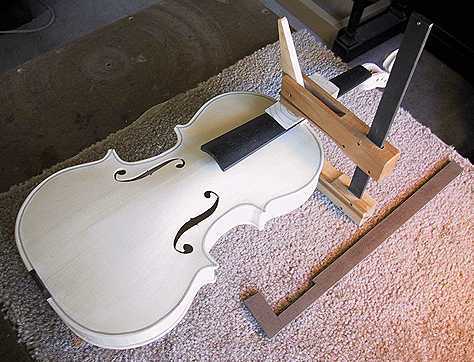
(5) FINALLY....yikes!!!!.....I glued the neck into the
body!
|