Button Carving and Hole Reaming

August 4, 2001

Well, the neck-gluing operation was a success! Below you see the solidly-glued-in neck.

As you can see, also, I have adopted a brand new style of heel and end button . . . . NOT!!! What you see below is actually my first major boo-boo. (I knew I couldn't get away without at least one stupid mistake in this project!!!) When I measured the 13mm height for the end button, I mistakenly measured it from the bottom edge of the neck heel button area and then carved the neck heel (before gluing in the neck), instead of measuring the 13mm from the portion above the line where the heel protrudes from the rim. It was only after the neck was glued in that I discovered my mistake. I ended up, thus, with a very, very short end button and a heel that angles towards the body (and not parallel to the rim). Ah, well...I'll just call it my own new style and tell people I meant it to be that way.


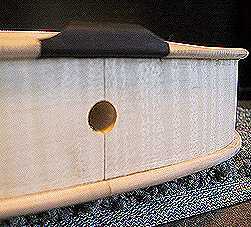
Here's what the end button now looks like:


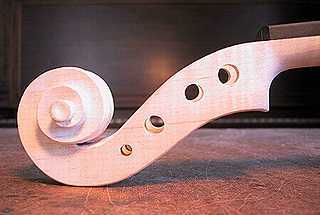
Below are a couple of pictures of what I did after my end button mishap. I reamed the holes for the tuner pegs (I've left one unreamed so you can see how much larger I had to ream the holes), angling the reaming slightly towards the body. I reamed them so the tuner pegs just protrude a millimeter or two past the other side of the pegbox. I then reamed the hole for the ebony tailpin, for a tight fit. The tailpiece will be anchored to this tailpin.


  Next

Go back to Violin-Building Menu 

Return to Projects Home Page