The Yellow Violin!August 5-7, 2001 |
In the past few days, I experimented on scrap wood with a few different methods of finishing for my violin. I tried out padding on a finish with Qualasole, a padding lacquer; I liked the process and results, but found it was too easy to rub away previous layers of finish and end up with a blotchy finish. I also tried out a method suggested to me by another Internet friend, a spirit varnish formulation of shellac with a tiny bit of castor oil; I liked this one more than the padding method, but found it a little difficult to brush without streaks. Finally, I decided to try an oil varnish, using a kit (with all necessary materials and very clear instructions) purchased from International Luthier Supply; this is the one I have decided to use. Once the method was decided upon, I set about preparing my violin for the finishing:
|
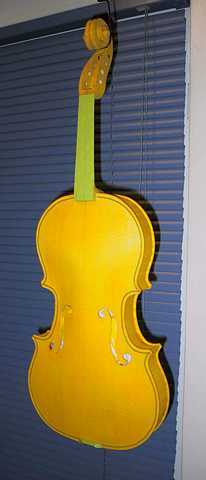
The first step was to apply a "ground" coat of water-soluble stain, as a kind of underlying base of color for the violin. The varnishing kit came with yellow dye powder, which I mixed with hot water (1/2 oz. powder to 8 oz. water). Then I diluted some of the stain with more water until I ended up with a light golden yellow tint. I applied the stain to the surfaces with a cloth, using a 1/2" sable filbert brush in the smaller areas, such as the scroll. I also made sure to apply stain to the edges of the f-holes. In these photos, it looks really, really yellow and a bit blotchy --- that's because it is still a bit damp. I just went back to check on the violin, and it has all evened out nicely (no more blotchiness) and is a less intense yellow. So far, so good...... Tomorrow I will apply the sealer (or "sizing") coats. |
 |
 |
|
Go back to Violin-Building Menu |