|
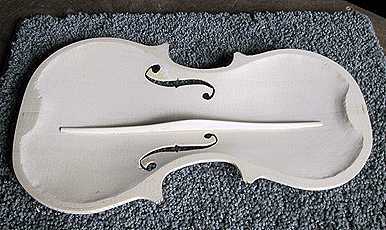
Here are the results of the work I did a couple of days ago --- the back is now glued to the rim, and the bass bar has been glued and shaped. The little Ibex fingerplanes really made shaping the bar easy! |
|
|
|
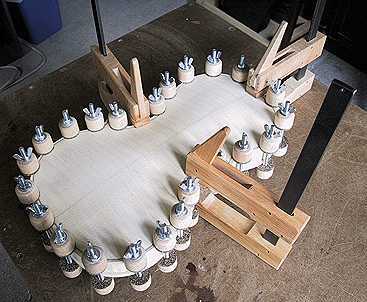
Now it was time to close up the soundbox. I did it differently from the way I glued the back to the rim. I found I really didn't like that other method of using the palette knife to remelt the already dried hide glue. With the clamps holding the back to the rim, I found it was kind of difficult to slide the palette knife in between the rim and the back, so I was never really sure if I was getting to all the glue with the knife. Luckily for me, I only had a few spots where the glue hadn't melted; I simply went in there again with the knife (though it was still difficult) and remelted the glue. So, although it made me nervous, I decided to glue the top by spreading the glue all at once and immediately applying the clamps. What I was nervous about was that I wouldn't have time to get it all clamped up before the hide glue gelled. (I'm totally new to hide glue.) But I gathered up my courage and began. First, I did a dry-run by clamping it all up, so that all my spool clamps would be opened up large enough to just fit (so I wouldn't have to be fumbling around loosening the clamps while my hide glue was sitting there gelling!). I determined the exact order in which I was going to apply the clamps (and how many clamps would go in each section). I also had drawn a light pencil outline around the rim onto the top, so I would know exactly where to position the rim on the top. Once I felt as if I knew what I was doing, I took a deep breath, took my little brush, and quickly spread the hide glue on the rim and blocks, putting a little extra on the blocks. Then I got right to work putting on all those clamps!!! After I did that (and I went lightning-fast!), I wiped away any oozed-out glue. I think it worked all right.....tomorrow I will remove the clamps and see!!! |
|
|
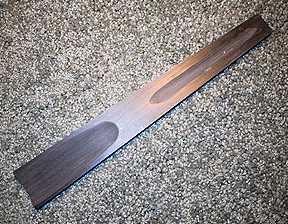
Here's what else I did today. I worked on the fingerboard. It came oversized, so I first had to make it narrower, to fit the width of my neck. Then I made it thinner, by using the belt sander. Finally, I hollowed out a thin, shallow channel at the top of the underside, to reduce some of the weight. I also slightly deepened the lower hollow area (already sent that way), to make the lower end a bit thinner. |
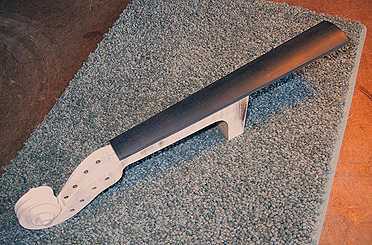
Don't worry --- it's not really glued yet!!! I still need to fit the neck to the body... |