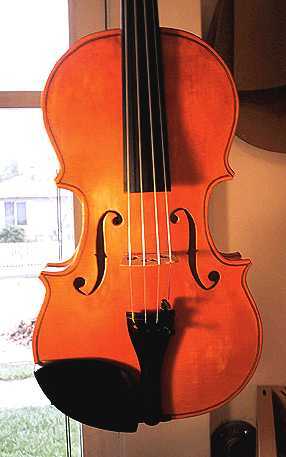
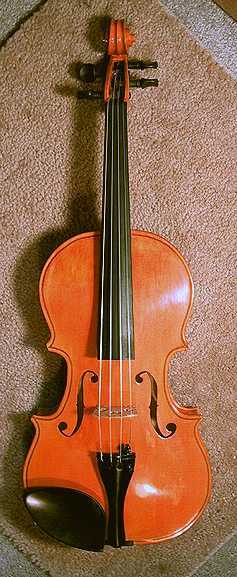
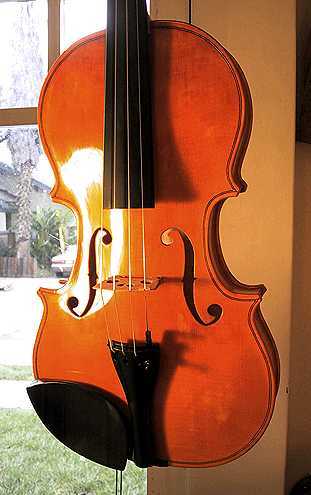
It's Finally Finished!!!November 24th, 2001 |
For those of you who have emailed me recently, wondering how the violin came out . . . . . I haven't forgotten you!!!! I haven't updated the violin pages since August for a few reasons. First, since school started, I haven't really had much time to get back to the violin (grading papers, etc., takes up a lot of my time). Then September 11th happened, and I really didn't feel like doing much of anything because of that. When I finally did get around to working on the violin again, I ran into a few snags. In rubbing down the varnish coats, I had managed to rub through the color coats in a few spots, and consequently had to try to touch those up (which is no easy task). I didn't succeed in that, so I ended up with a few blotchy spots. The more I tried to fix those spots, the worse it became, so I finally decided to live with those boo-boos. Then I put a few more clear coats of varnish on, and, after I had rubbed those out, I ended up with what they call "witness lines" or "mapping". This I had never encountered before, in using waterbase urethanes and lacquers. This happens often, apparently, with varnishing, when you rub through various coats of the varnish (they don't melt together like lacquer or the waterbases) and you see fine lines (kind of like a topographical map) from previous coats. It is very ugly! I didn't want to run into that again, so what I finally decided to do was to just do French polishing to put on my final coats of clear finish, using Behlen's Qualasole padding lacquer (which is, I think, basically shellac and some lacquers). I thought I'd have more control that way, just using a piece of t-shirt balled up in a pad and putting on thin coats by hand. I figured it'd go on much more smoothly than with a brush (as I had had to use with the varnish) and I wouldn't have to do much rubbing out later, thus lessening the possibility of rubbing through previous coats and getting those "witness lines" again. Anyway . . . . it came out well and I finally finished the violin!!!! Here are the things I did to finish up the violin:
|