Back Braces and Side Bending
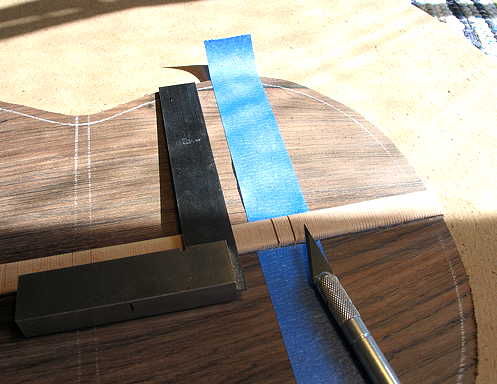
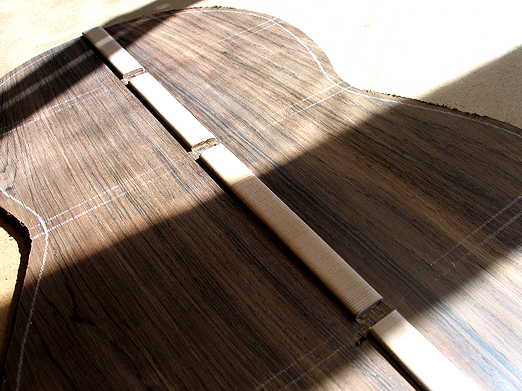
Wednesday, July 14th, 2010: It's about 1:15 p.m. right now. So far, here's what I've done today. Below, I am notching the back center reinforcement strip for the back braces. I first score the notch with an Exacto knife, and then I chisel it out with a 1/4" chisel and clean up the slot.
|
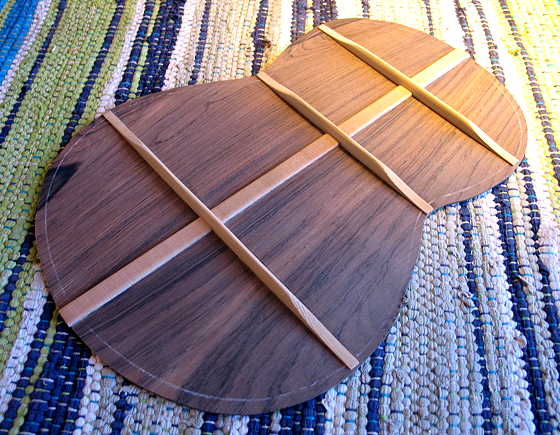
Here I have all the back brace notches cut out.
|
|
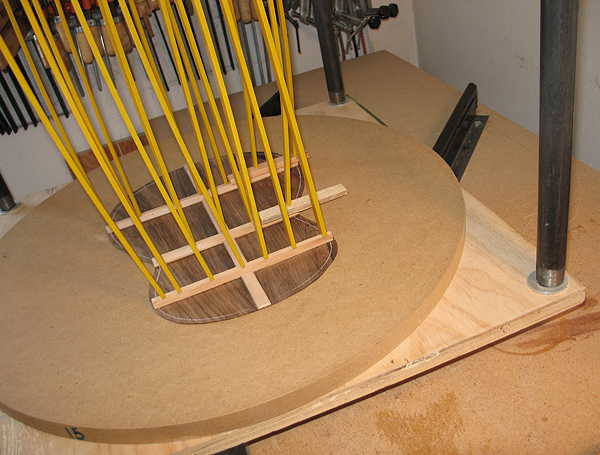
Since I had already sanded the 15' radius into the bottom of the back braces, I can now glue them onto the back, using my go-bar deck. Here you can see how I can pull out and swivel my go-bar deck to make it super-easy to get to all the sides of the braces to clean up the glue squeeze-out.
While I'm waiting for that side to cool down, I can start working on the neck and tail blocks so they'll be ready once I get both of the sides bent. I still can't work on the top yet, as my bloodwood for the soundhole ring hasn't arrived yet..... |
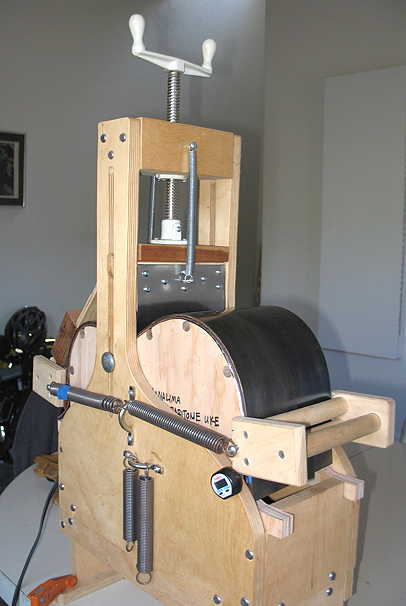
And here I have one of my sides in the side-bender. Before I did this, I had cut the sides out, using the Hanalima plans, encased the sides in moistened Kraft paper and some aluminum foil, and laid them in the bender. From the bender on out, it's the spring steel slat, then the heating blanket, then the wood, then another spring steel slat. At the neck end of the bender, you can see I've used a couple of blocks of wood to make sure the clamping caul doesn't creep up towards the waist, as my slat is a tad longer than the bottom ledge of the form.
|
|
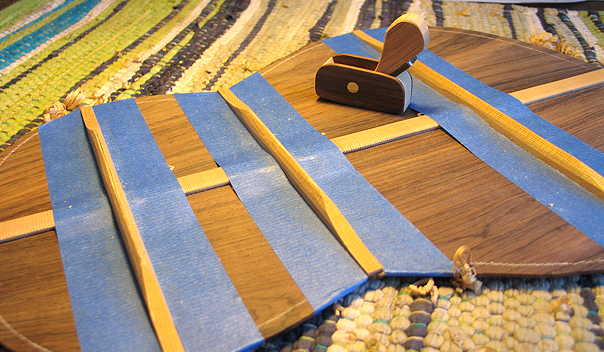
I took the back out of the go-bar deck. Here I am using, for the first time, a wonderful little mini-plane made by Stephen Boone (and sold on Tracy Leveque's "Luthier Suppliers" site). I scalloped the ends of the braces with a 1/2" chisel, and then used this little plane to taper the braces' sides. It works like a dream!!!! To the right, you see the finished back. When I tapped it, it had a "D" tone to it. I always LOVE it when I get the back (or top) finally braced — it feels so solid and real now..... |
 |
|
Previous Page |
|