The Neck, Day 3
Wednesday, July 28th, 2010: Okay, here's what I had left to do from my list I made yesterday. Right now, it's around 6 p.m., and I'm waiting on my peghead ears to dry (that sounds weird, doesn't it?), before I can move on. Here's what I've accomplished so far today:
|
|
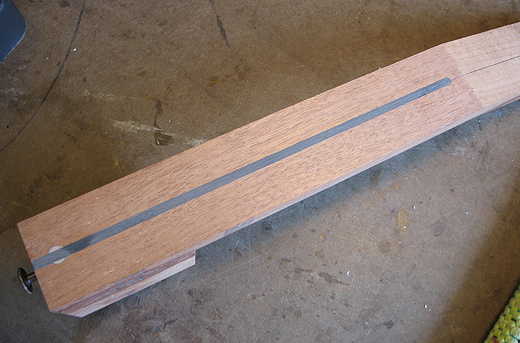
The first thing I did this morning was to scrape down the epoxy that I used to glue in the carbon fiber rod.
|
Now it was time to turn my attention to fretting the fingerboard. Here I am using my homemade fret bender to curve the fretwire to my 16" radius that I put on the fingerboard. The tang of the fretwire fits between two washers in the uppermost screw, and the crown of the fretwire rides on the rollers I have fastened with the two outer screws. I just set the tang in between the two washers, place the crown on the two rollers, and pull the fretwire through. The height of the top screw determines how much the wire will curve.
|
|
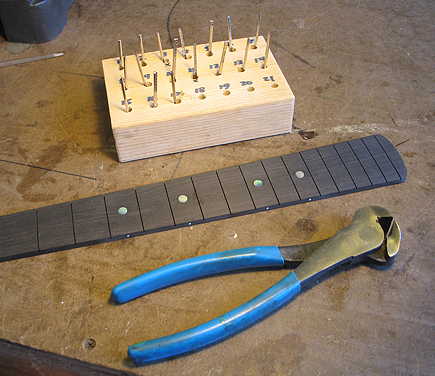
Here I have clipped the fretwire to the lengths needed for all the frets. I have also slightly beveled each fret slot with a triangular file, to make the fret installation easier.
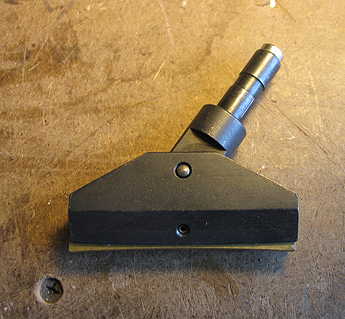
Here's the fret press caul I've used for years. What's different now is that there is a little magnet stuck to the top of the caul. It's there because I'm not going to be using my drill press anymore to press the frets in; instead, I'll be using the arbor press you see to the right.
|
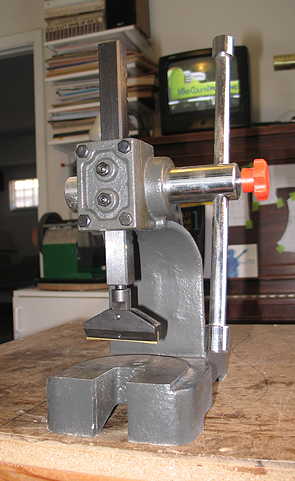
I got this arbor press for $56 on Amazon.com; it's a Palmgren. The magnet on the top of the fret press caul holds the caul in the arbor. I like using this arbor press because it works more solidly than using the caul in the drill press did; with the drill press, it felt more "squishy" when I'd press the fret in. I guess the drill press table would move with the downward pressure. What I do when I press the frets in is first run a thin bead of Titebond on both sides of the fret tang, then lightly tap the fret ends into the fret slot with a deadblow hammer. Then I press the fret in with the fret press caul. I lightly tap the ends of the frets a little, and clean up the glue squeeze-out with a dampened rag and paper towel.
|
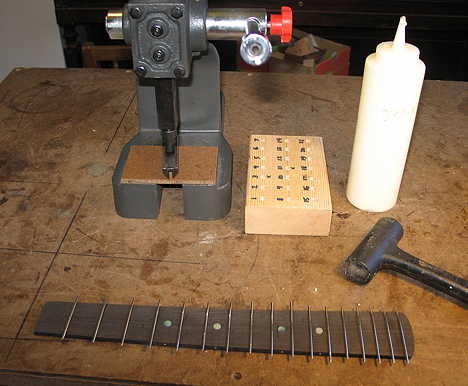
Here are the frets all installed.
|
||
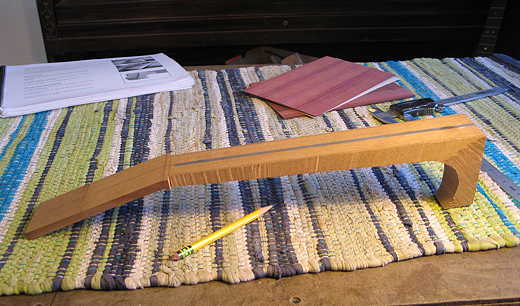
I have clipped the ends of the fretwire flush to the fingerboard edge, and drawn the neck profile onto the side of the neck blank. I also drew the fingerboard taper onto the top surface of the neck blank.
|
Here I have used the bandsaw to cut out the neck profile and fingerboard taper (staying about 1/16" or so outside the fingerboard line). I have also thinned the peghead back side to account for the bloodwood overlay I will use on the back, to cover the scarf joint line. I will have a bloodwood back and bloodwood top overlay (with a thin maple veneer underneath).
|
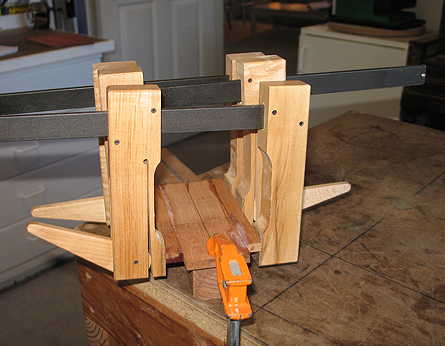
Finally, after thinning the peghead ears to the same thickness as the thinned peghead, I am gluing on the ears, making sure to keep the top of the ears flush with the top surface.
|
||
Well, I think I can go back to the peghead now. The last thing I will do today is to glue on the peghead overlays. Tomorrow I'll cut out the peghead shape and drill the tuner holes. Then it will be time to do the preliminary neck-setting (which takes me the longest time!).
|
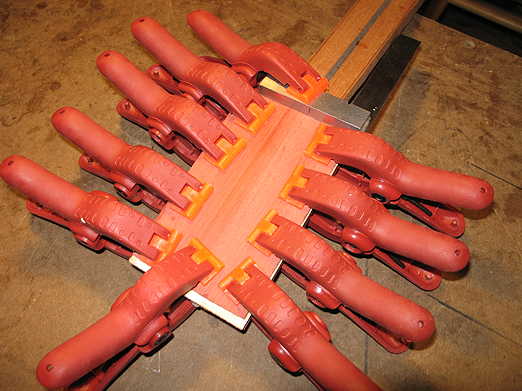
Okay, here are the peghead overlays being glued. I have clamped my little square to the neck, so the top overlay (into which I had to sand an angle, to make its edge perpendicular to the neck surface) will butt up against it.
|
|
||
Previous Page |
Next Page |