I'm Back!!!!! Paraffin Oil Polishing & Finishing It All Up!!!
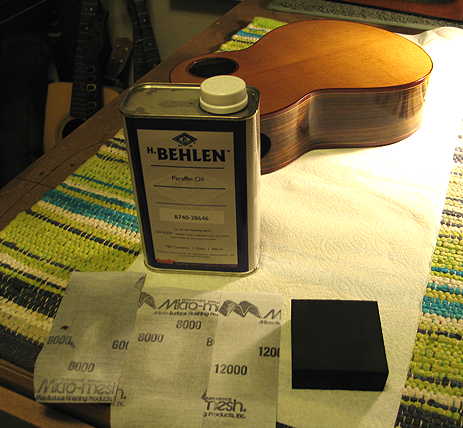
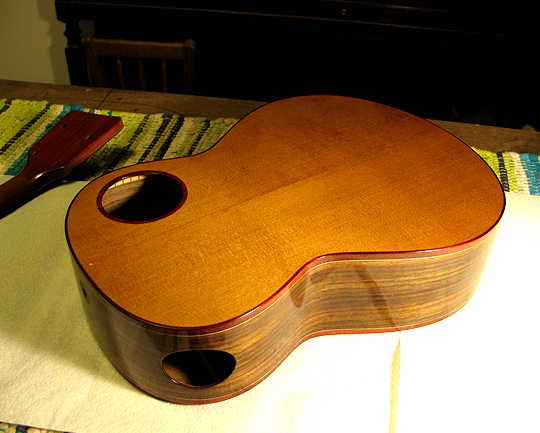
Monday, September 6th, 2010: Well, I'm back!!!! The three long weeks of waiting is over, and I had a chance to do a tiny bit of the next steps. My Labor Day weekend was busier than I thought it would be, what with schoolwork and a family get-together. But I did manage to do the final polishing of the Tru-Oil finish this morning. I really didn't end up having to do much at all, actually. The Tru-Oil finish was so shiny and smooth just as it was, that I almost didn't need to really do any polishing. In fact, I've heard that some people don't even polish it after applying it! I had a total of 15 very thin coats of the Tru-Oil on the uke. I ended up following the LMI instructions, with a little addition I'd read about on the Kit Guitar Forum. I used the 6000, 8000, and 12000 grits of Micromesh. But instead of my usual water with a few drops of dishwashing liquid as the lubricating agent, I decided to try Bill Cory's tip of using paraffin oil as the lubricant. I just squirted a few drops of the paraffin oil onto the Micromesh (wrapped around a foam block) and polished with that. It worked wonderfully!!!! I don't think I'll be using the soap and water method anymore. The paraffin oil just makes the Micromesh glide effortlessly over the wood, and it doesn't create the sludgy mess that the soap and water does. I got the Behlen's Paraffin Oil at a local Woodcraft store.
|
|
Check my site out again after next weekend. I'm hoping I won't have much schoolwork then and will have some time to do the next steps — attaching the neck (after removing the finish under the fingerboard extension), determining the bridge location, removing the finish under the bridge, and then the trickiest part, figuring out how to clamp the bridge to glue it! Then all that will be left will be making the nut and saddle, attaching the tuners, and stringing it up!!!! I can't wait to hear how this is going to sound! |
|
|
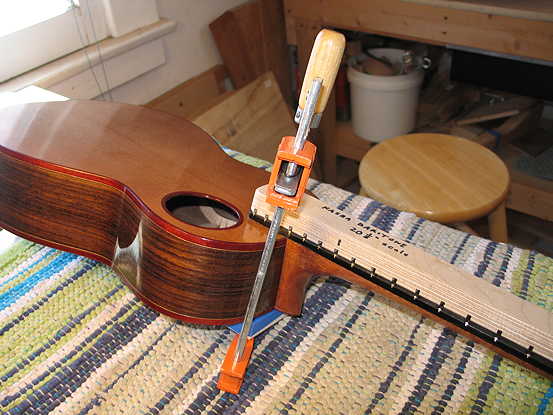
Saturday, September 11th, 2010: It's about 10:45 a.m. right now. I just finished gluing on the bolt-on neck to the soundbox. What I did first this morning, after finishing the polishing-up of the neck, was to finish it all off with Meguiar's #9 (Swirl Remover) and #7 (Show Car Glaze). Then I bolted the neck to the body and put masking tape around the fingerboard extension. I removed the neck and scribed just inside the masking tape with an Exacto knife; that way, when I glue the fingerboard extension, it will overlap the finish a tiny bit. I used some orange oil "Safe Stripper" to remove the finish inside the scribed line, scraping it off carefully with a 3/8" chisel. After scraping the finish off, I wiped the area with a paper towel slightly dampened with water, to neutralize any remaining stripper residue. I let that dry, applied glue to the fingerboard extension, and bolted it up. Here it is, below:
The next step will be to determine the bridge location, and figure out how I am going to clamp that bridge!!! Stay tuned. |
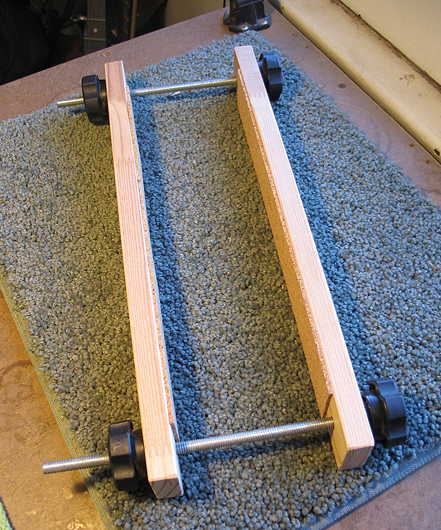
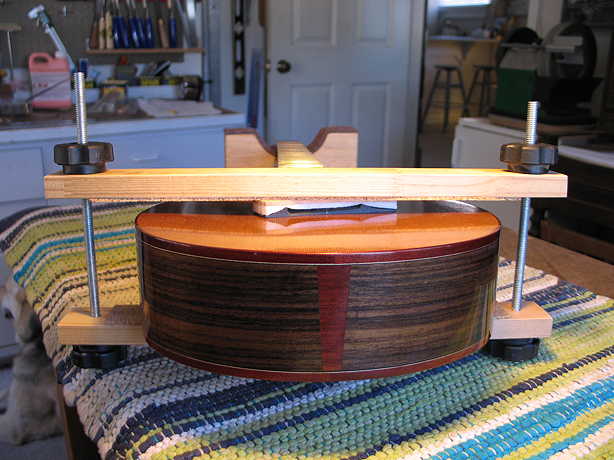
Later, Saturday afternoon, around 4:30 p.m. . . . . While I've been trying to find out exactly what the correct placement is for the bridge (there seem to be conflicting measurements between the Kasha plans and Stew-Mac's fret calculator, so I've put out a few queries on a few forums), I have done a few more things. I finally decided, after fiddling around with my clamps and cauls and such, to try out the simple clamping method suggested in the Hanalima uke-building book. I just made this, and did a test clamping, to see how it would work. It's just two cork-lined wood strips, with threaded rods.
|
|
||
 |
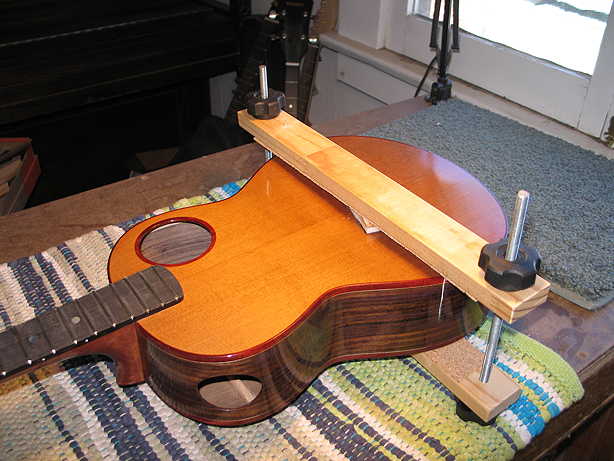
To the left is a clamping caul I made for the top of the bridge with Friendly Plastic. I have smashed a wood strip on top of it to make a solid, flat contact for the bridge clamp. I think the bridge clamp will work well. It really doesn't take much pressure to glue on the bridge, which has already been sanded on the bottom to fit the radius of the top. And I don't have to awkwardly fiddle around with various clamps or gadgets (like the tuner jig I was considering). OR (I just thought of this)....I could set the uke back down in its radius dish, and then clamp (with cam clamps) the board on the top....OR put a couple of holes near the edges of the radius dish for the threaded rods I'm using on the clamps above.....Lots of possibilities! |
 |
||
Previous Page |
Next Page |