A Baritone Ukulele!!!
Here are a couple of videos that I made, prior to getting started on this summer's instrument: |
SUMMER 2010 PROJECT UPDATE:
|
UPDATE TO MY UPDATE:
|
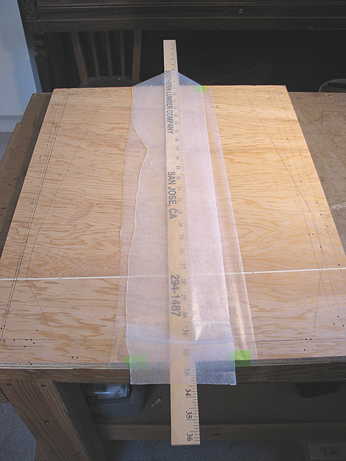
Saturday, July 3rd, 2010: Well, I've finally started this summer's project! (It's about time.) In the past few days, as I was looking up baritone uke plans, I saw Hanalima's plan for a Kasha-styled baritone. Now I know absolutely nothing about the Kasha technique of bracing, but, of course, the novelty of my trying such a different kind of instrument instantly appealed to me, and I decided to give it a go! I have no idea how it will turn out, or how (or if) it will sound different from a traditionally-braced uke, but I really felt like doing something different, just for the fun of it. I sent in an order to Hanalima for their baritone plan and am now waiting on that to arrive. Once the plan arrives, I can go about making a mold. But one thing I can do now is to begin to prepare my top and back. I am going to be using some Brazilian rosewood, which John Hall of Blues Creek Guitars sent me, for the back and sides, and some cedar (given to me by Kevin Pettit) for the top. Today I jointed and joined the top and back. The picture below shows how I begin to set up for joining the top/back halves. I lay the two halves on top of this yardstick (it makes the two halves "tent" up) and trace the outline of the outer edges of the wood pieces. I then pound nails along the traced outlines; these nails will support the wood when it's clamped. I place glue (Titebond) along the jointed edges of the top/back, center the jointed edges atop the yardstick, and then remove the yardstick. With the yardstick removed, the two halves will now clamp tightly together. I place waxed paper over the joint and clamp it down with a long wood strip. I also clamp another wood strip across the first strip, to make sure there is even pressure along the entire joint.
|
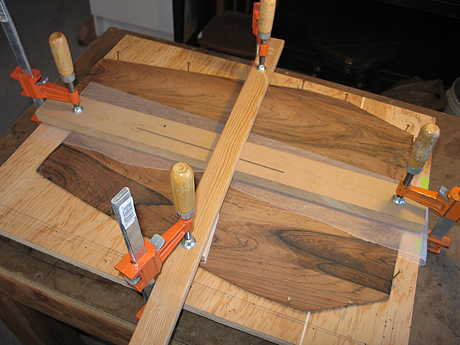
When I joined the top, I discovered I didn't have a second workboard wide enough to be able to support the top on all sides. So, I set it up the other way, as you see below, with a wood strip supporting the overhanging section underneath. It looks kind of weird, but it will work.
|
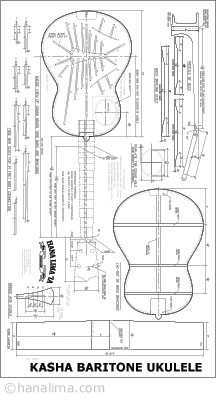
Here's the plan I will be using:
|
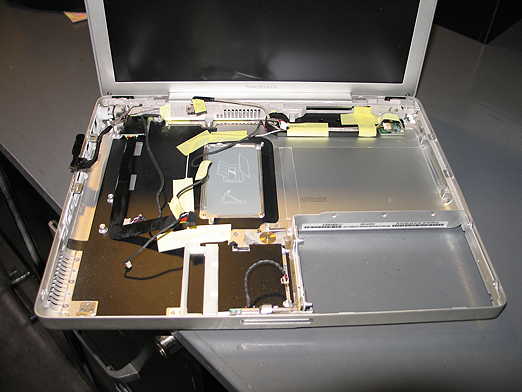
Tuesday morning, July 6th, 2010: A Litte Detour As I was waiting for my Kasha baritone plan from Hanalima to arrive, I tackled something very interesting that I've never done before — I took apart my old Powerbook 12" laptop, in preparation for replacing the old, non-functioning optical drive. I went online, ordered a new drive, and downloaded instructions for doing the replacement. Even though the drive hasn't arrived yet, I thought, since I had nothing to do until my Kasha uke plan came, I might as well learn how to take apart my laptop... Would you believe, it took around 50 or so steps to be able to remove the drive???? The only way to remove the drive was to remove just about everything else!!! Luckily for me, the instructions were very step-by-step and included a printout for organizing (taping onto the paper) all the zillions of teeny-tiny screws that you have to remove. So....here's what my Powerbook looks like now (gulp!) — she's just a shell of her former self!!!! Tuesday afternoon, July 6th, 2010: My Hanalima supplies have arrived!!! Go to the next page to see a couple of photos. |
 |
|