Shaping the Bridge and Fitting the Neck
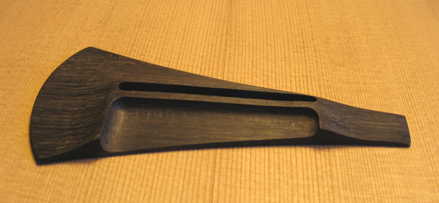
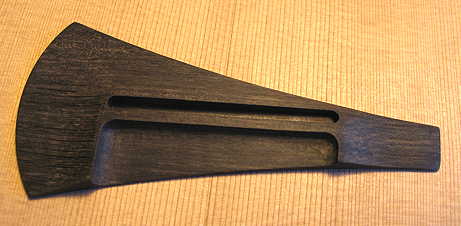
Friday, July 30th, 2010: It's now about 1:00 p.m. on Friday, and I've just finished what took me all morning to do — shaping the bridge!!! Using the Luthier's Friend sanding station in my drill press and some final hand-sanding, I turned this:
into this:
|
|
The reason it took me such a long time (around 4 hours) is that I had to make sure to stick the bridge blank on the backing board (with double-stick tape) very carefully, so the non-rectangular bridge was set at just the right angle to sand the correct upward slope onto the bridge. Also, I spent a lot of time doing practice pieces, so I would end up with the exact thickness I wanted at the ends. Doing the two ends of the bridge was fairly easy; the portion above the saddle was a bit trickier, and I had to do the last part of it (the treble end) by hand. I think it came out pretty well! After I finished the shaping, I sanded the underside of the bridge to match the slight (25') radius of the top at the bridge position. (The way I did that was to stick sandpaper on the top, mark the bottom of the bridge with white pencil marks, and just sand it back and forth on the top.) NOW I can finally move on to setting the neck angles. Stay tuned. |
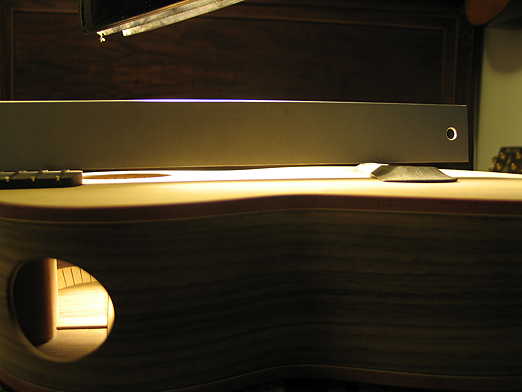
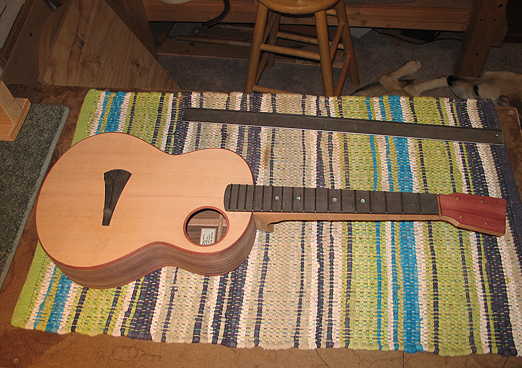
Later that day . . . . . . Well, it's now late Friday evening, and I have finally finished my second task for the day, fitting the neck. It took me longer than I had expected. No real problems, just a slow job for me! I don't have many pictures this time, as I was spending all my time just getting this thing done. If you want to see more of the process, take a look here — I pretty much followed the same procedures. My neck started out angled about 5/16" towards the treble side (that is, my neck's centerline was 5/16" to the right of the uke's centerline at the tail end), so I needed to remove wood from the treble side of the heel. (Before I could do that, I had used a gouge to cove out all but the outer 1/8" edges of the heel, so there'd be less to have to sand away.) I stuck sandpaper on the treble side of the body at the neck end and sanded until the angle was right, and the neck was centered. Next I dealt with the fact that the straightedge, when placed on top of the fretted fingerboard laid on the neck, ended up only 4/32" over the soundboard at the saddle location. Since my bridge was 9/32" tall, I needed to raise the straightedge about 6/32" (to reach the height of 10/32" above the soundboard, as I wanted the straightedge to end up around 1/32" over the bridge). That meant I needed to sand more from the bottom of the heel than the top, to provide more of a back-set to the neck. This is what took some time. I first used a chisel to remove increasingly more wood from the top of the heel to the bottom, where I removed about 1/16". Then I switched to using the "flossing" method, where I pull a strip of 100-grit sandpaper from the top of the heel down to the bottom — as you pull the sandpaper, more is sanded from the bottom of the heel, since it is in contact with the paper for a longer time than the top of the heel is. Using the same number of sandpaper pulls on each side, eventually I got the neck to the right angle. On other instruments in the past, I have used the belt/disc sander or a chisel to more quickly get the neck angle, but I wanted to be more careful this time, so I did it the slow way. But it finally got done! |
|
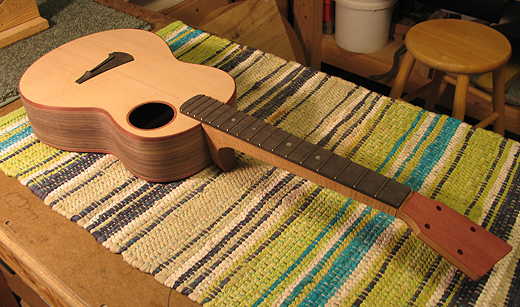
The final result!!!
|
|
|
||
I probably won't be working on the uke tomorrow, as I'm going to be going up to San Francisco to see "The Fantasticks" with my sister. But the next thing I will be working on is carving the neck, so check it out Monday, probably. |
||||
|
|
|||
Saturday, July 31st, 2010: THE FINAL "TO-DO" LIST
Have I forgotten anything??????? (Let me know, if you think of anything.) |
||||
Previous Page |
Next Page |