Making Spreaders & Finishing the Mold

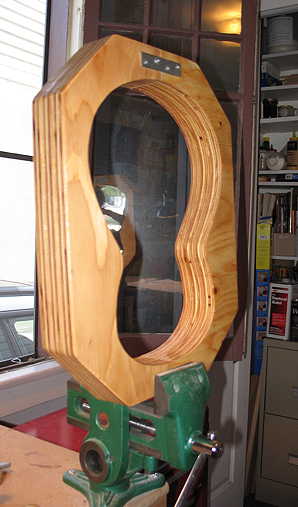
Thursday, July 8th, 2010:

Today I got a start on making my spreaders for this uke. I've never had a set method of making spreaders, but this time I decided to try out Dave Painter's simple method that he describes here. Here I've clamped up the glued-up spreader pieces. The pieces with the two slots (for the turnbuckle eyes to sit in) will be later cut in half — one half is for the waist spreader and the other half is for the upper bout spreader. The piece with the single slot is for the lower bout spreader. After I remove the clamps, I will bandsaw out the pieces to match the mold outline at the point the spreaders will contact, and I will trim the pieces down.


Another thing I did today was to put a few coats of shellac on my mold, to give it a little protection and durability. Holding it in my vise enables me to get to all the sides at once.

It's around 6:00 p.m. right now. I think what I'll do now is to take out my top and back (which I joined a few days ago), do a preliminary thicknessing, and start marking out the bracing plans on the top and back.

Then the fun really begins!


INDEX:

Return to HOME PAGE

  1. Scatterbrained — Odds 'n' Ends
  2. Soundport and Closing Up the Box
  3. On to the Binding
  4. Beginning the Neck
  5. The Neck, Day 2
  6. The Neck, Day 3
  7. The Allen Wrench Dilemma and the Peghead
  8. Bridge Shaping and Neck Fitting
  9. The Deck is Finished! The Fingerboard is Glued!
  10. Neck Carved, Finish Sanding, Wash Coat, Pore-Filling, Sanding, Sealing, Tru-Oil
  11. Paraffin Oil Polishing and Finishing it All Up!
  12. Saddle Compensation Jig
  13. REALLY Finishing It Up Now!!!


Later that evening . . . . .

Well, to the left you can see that I have finished the spreaders. I cut them out on the bandsaw, superglued some cork on to the spreader surfaces, and tried them out. Success!!!!

Stay tuned . . . Tomorrow I will begin work on the top and back.


Previous Page


Next Page