More Decisions, Demolition, and Braces
Tuesday, July 13th, 2010: Well, it's been a few days since I've posted. A few things came up, so I haven't done any building lately. First, now that I had my soundhole decision made, I spent a day or so trying to figure out how I am going to be able to clamp up and glue the bridge, when that time comes. The soundhole being so small a diameter, with a different distance to the bridge than my clamps are used to, has made this a little tricky. My hand, even though it is fairly small, cannot fit into the soundhole, so that makes manually positioning a clamping caul inside the uke, over the bridge patch (with its many braces notched into it), an impossibility. Even placing a caul on the bottom foot of a bridge clamp would be a bit tricky, as it would have to be able to swivel so I could even get it in there; additionally, once I did do that, it would be a bit fiddly to swivel it around again to position over the bridge patch and braces. I even considered investing in a vacuum clamp system to use with my compressor, but that is a bit expensive and time-consuming for me right now (I'd need to make a uke-sized vacuum clamp). Then I emailed Matt Blacka, who has made a lovely Kasha ukulele, for any tips he could give me on how to do this. He graciously answered me right back, with a fantastic, simple, "duh-moment" solution — simply drill two tiny holes through the two inner string holes, through the bridge patch and the corresponding places in the clamping caul. (The outer two string holes will be used for locating pins, to keep the bridge from moving.) Then string fishing line down through the holes and tie it to the clamping caul. When it comes time to clamp up the bridge, just pull up the caul by the fishing line, up into its proper position, hold it there, get your clamp into position, and clamp the bridge! Simple, huh? (Why don't these simple solutions ever come to my mind? Maybe I always just assume that things will be more difficult than they have to be?) So, that's what I'm going to do — problem solved! I have some Stew-Mac 7" bridge clamps that will just reach, so things are looking promising.... |
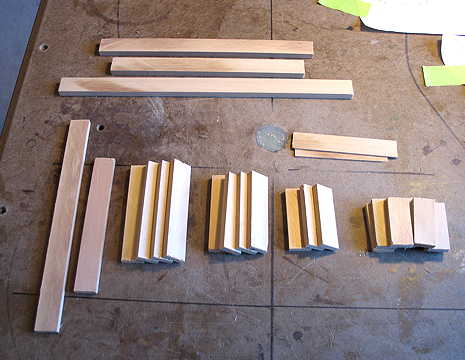
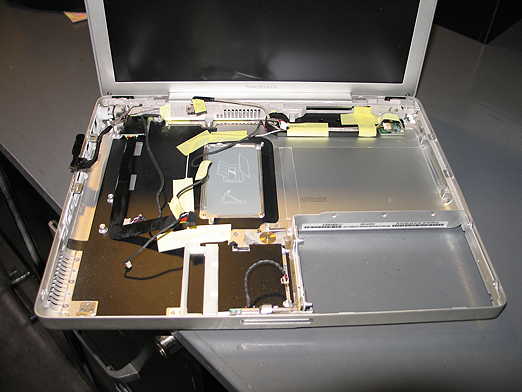
After that was decided, I spent some time yesterday putting my Powerbook laptop back together (the replacement optical drive had arrived). Lots of teeny-tiny screws to screw in and teeny-tiny connectors to attach, and cables to route!!! Anyway, I now have an optical drive that works....but now my trackpad doesn't work. I took it all apart and put it together a few times, and I can't figure out what I did wrong. But it's okay for now — I actually tend to use a mouse with it more often than I do the trackpad, so I'm good. And, now I'm really familiar and comfortable with the innards of my Powerbook, so I did learn something new. (And I didn't lose any screws, so that's an accomplishment, too.) The final distraction was that my new deck construction has actually begun!!! They did the demo yesterday, and, as I speak, they are putting up the joists. I'm really impressed so far with the quality of their work. I'm so excited about this, and about the arbor on the upper deck that they're going to add. FINALLY.....I have started doing some work on the uke again....I just finished cutting up a bevy of braces (how do you like that bit of alliteration?) for the uke. Would you believe 23 braces, plus 3 back braces?????? The top braces are kind of different from guitar bracing, in that they taper in width from 3/16" on one end to 1/8" on the other end. I cut all those braces just a straight 3/16" wide; I think I'll just hand-sand the width taper into them, glue them on, and then do the remaining shaping with a chisel and sandpaper (after, of course, I do the rosette and soundhole and final thicknessing of the top — I'm still waiting on my bloodwood to arrive, so I can't get to any of that yet). I can, however, do the back bracing now, so I think that will be my plan. Here are a few photos for today: |
|
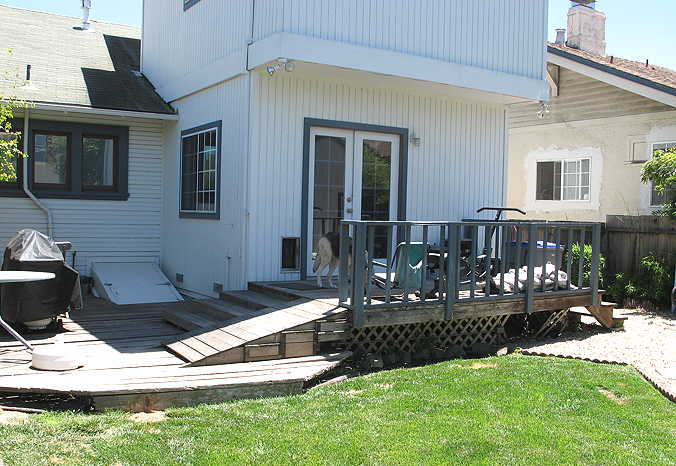
Here's my old deck. It wasn't like this originally; from the upper to the lower deck, I had added a couple of steps when my previous dog, Abby, couldn't handle the steps (she had severe hip dysplasia), and, when she couldn't handle even those, I had rigged up a ramp for her. My new deck will have none of those. |
Here's the demo they did yesterday. What was kind of funny to me, as I looked at it yesterday, was that the areas somehow looked so much smaller than they seemed with the deck!!! Weird, huh? |
|||||||
|
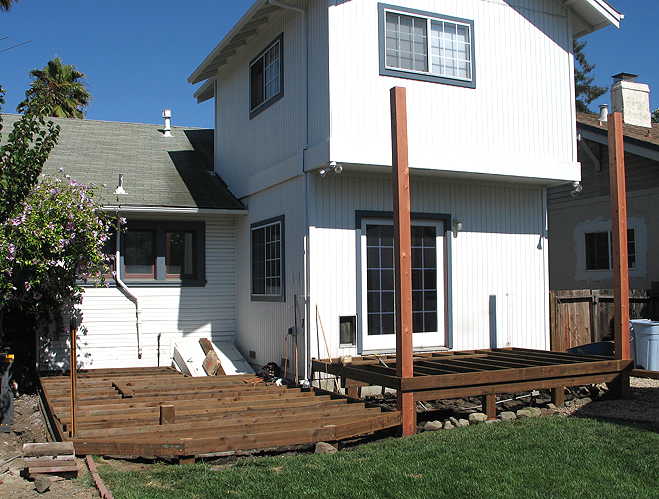
I'm back . . . . it's still Tuesday, around 5:00 p.m. . . . . I have a couple more photos to share . . . First, here's the deck now (Day 2). It's going to be made of composite decking material, in a redwood color; only the framing and joists are redwood. Those two 6 "by 6" posts you see are going to support the little sloping arbor which will cover the upper deck. It's going to have a canopy of 2" by 2" strips, and that will be covered by a smoke-gray polycarbonate roofing. That way I'll have protection from both the sun and the rain. If I want, I'll also be able to attach some roll-up shade cloths, for times when the sun is lower in the late afternoon. It will be nice to be able to use that deck more often than I have in the past!
|
|||||||
Previous Page |
|
