The Box is Complete! Now on to the Binding . . .
Friday, July 23rd, 2010:
|
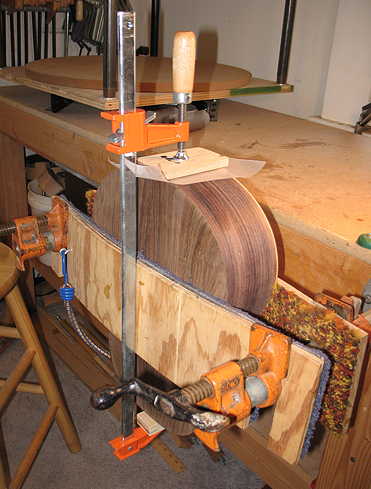
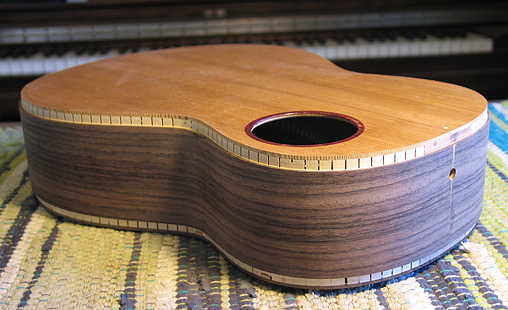
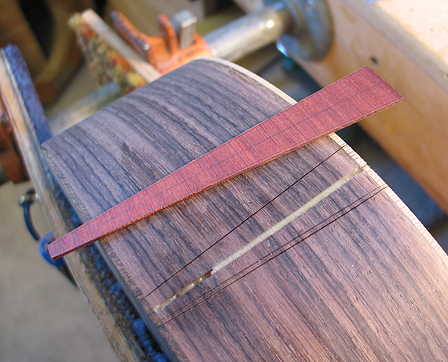
The first thing I did today (after making that little video you see to the left) was to use my bandsaw to trim the soundboard overhang. What I do is tilt the bandsaw table so that the blade won't cut into the side. After doing that, I used the belt sander (very carefully!) to make the top and back edges flush to the sides. That done, I could now move on to the job of the day: the end wedge and bindings. Making the end wedge was easy. First, I score the lines with an Exacto knife, cutting down as deeply as I can. (As you can see below, my first score line was wrong, so I had to make another one outside of that line.)
|
Then I used a Dremel in the router base to rout out the slot. I used a 1/8" downcut spiral bit to do the bulk of the slot, but switched to a 1/16" bit as I got nearer to the scored lines. (It cuts cleaner that way.)
|
|
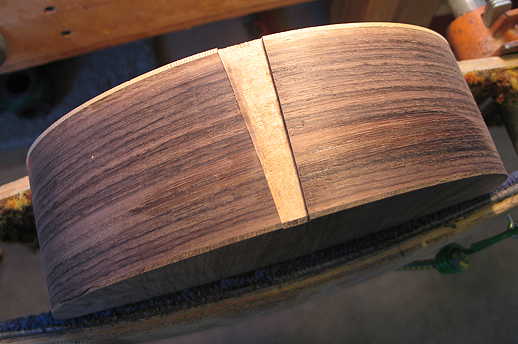
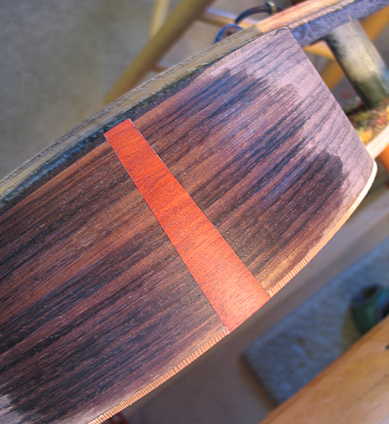
| Here I have clamped up the end wedge. | Here it is. I've dampened the side so you could see what the colors will look like under finish.
|
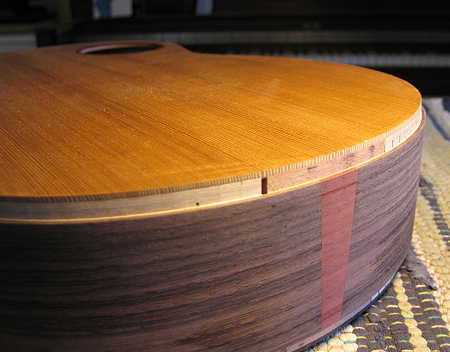
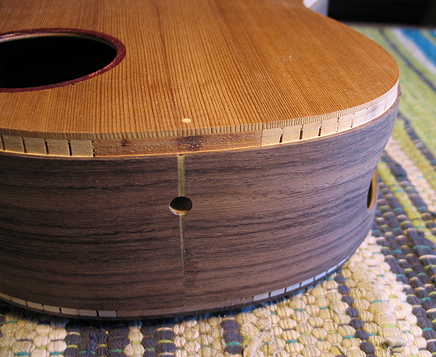
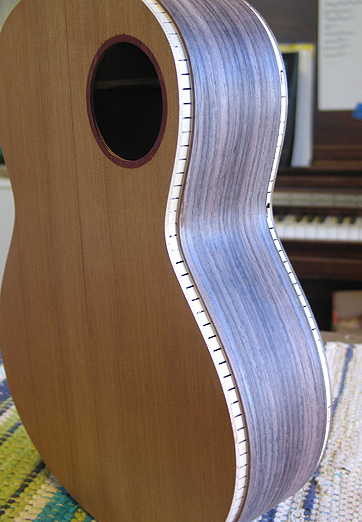
After the wedge was done, I took care of bending the bloodwood bindings. (Sorry, I don't have any photos of this.) I basically followed the same procedure as I did when bending the sides. I tape the bindings together, so the purfling strip attached to the binding doesn't delaminate, and I tape the bindings strip to a scrap piece of wood the same thickness as the bindings. (In the past, I'd crushed the bindings when I just put them by themselves in the bender, without anything to support the rest of the width of the spring steel slats.) They're still in the bender now. While the bindings were sitting in the bender, I could take care of routing the binding ledges. I used the Don Williams binding router jig once again, and it turned out really well. I first had brushed on a coat of shellac on the top, to minimize any tearout. The ledges came out really clean and consistent, so I'm happy! Here are some photos of the results:
|
||
|
|
|
||
Now, for another little video:
|
That's it for today....I'm tired, but pleased with a successful day. |
|||
Previous Page |
Next Page |