The Neck, Day 2
Tuesday, July 27th, 2010: Well, I'm feeling a bit scatterbrained again, right now, about all the different things I need to do, so here we go again. It's once again time for a list:
Whew!!!! I feel much better now. (I have learned from experience how it is much better to consciously plan your sequence of steps — and to have it on paper! — in order to avoid possible future pain and misery.) Okay....off to work!!!
|
|
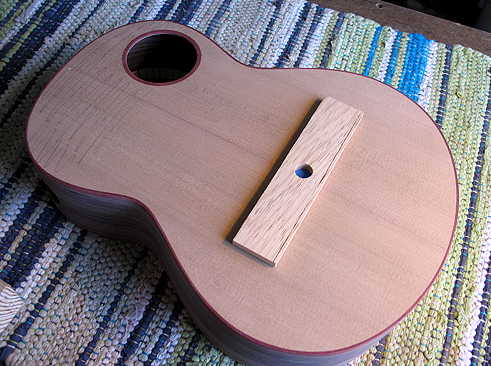
I need to flatten the upper bout, so the fingerboard will be able to lie flat. Here I have marked the upper bout with pencil. That strip of wood approximates the height and location of the bridge. The hole is a pivot point.
|
Here I am sanding the upper bout flat. The sanding board is the height of the fingerboard. I swing it back and forth across the upper bout.
|
|
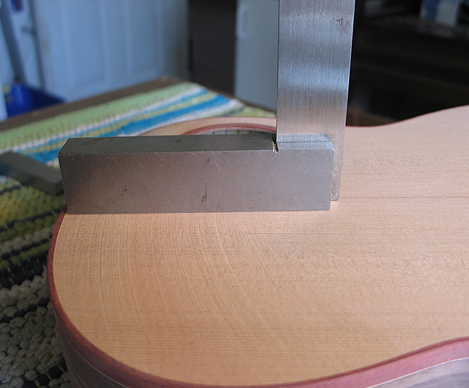
It's flat vertically.
|
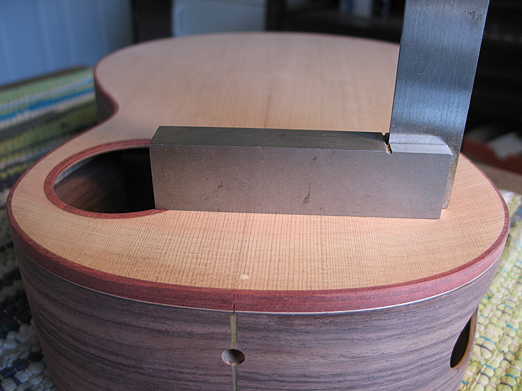
And it's flat horizontally.
|
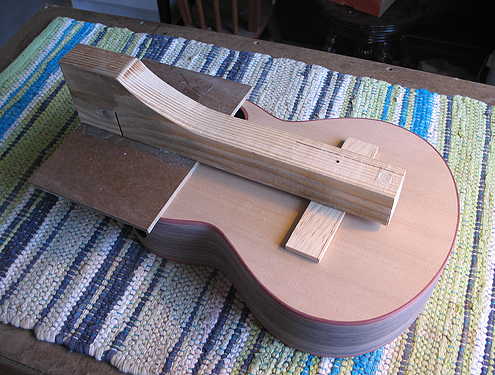
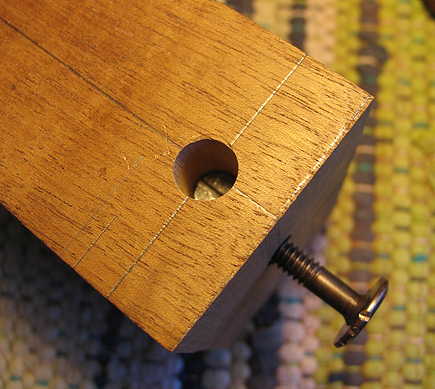
I spent the most time today doing the calculations and measurements for the barrel nut hole and bolt hole. I've never done this type of connection before, so I was a bit nervous about exactly how to go about locating everything. I drilled the 25/64" hole down far enough that the barrel nut will be at the right position to meet the bolt (down 1" on center), with a tiny space underneath for some leeway. Then I drilled the hole for the bolt a little bit larger (5/16") than the bolt (1/4-20), for some adjustment room there, also. I tried it out, bolting the neck to the body, and it seems to fit fine! (The only really tricky thing is getting my hand in there with the allen wrench to tighten the bolt — my hand JUST fits into the hole and just has enough wiggle room to manage it all!!!)
|
||
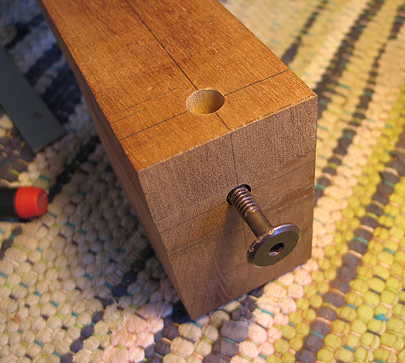
Another view of the bolt connection.
|
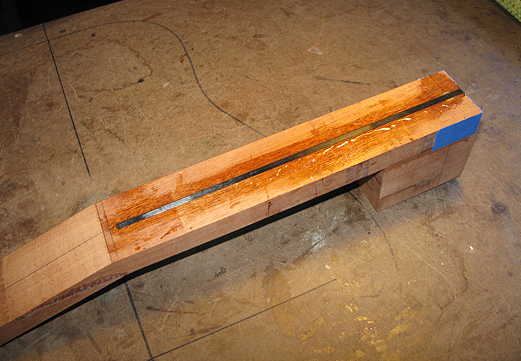
Next, I used my truss rod slot jig ( Photo 1, Photo 2 , and Photo 3 ) to rout out this 3/16" wide, 1/4" deep slot for the carbon fiber rod I'm using for neck reinforcement. (Oh, yeah, I forgot to mention that I had glued a short length of dowel to fill the space above the barrel nut.)
|
Here I've epoxied in the carbon fiber rod. I will scrape it down flat tomorrow.
|
||
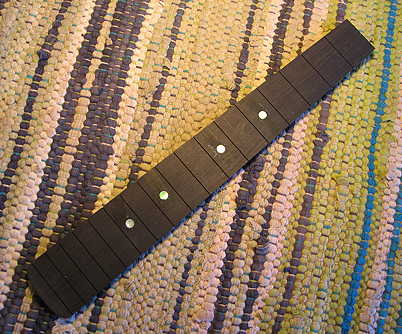
I've super-glued in the fingerboard dots. After I did that, I sanded a 16" radius into the fingerboard with a radius block.
|
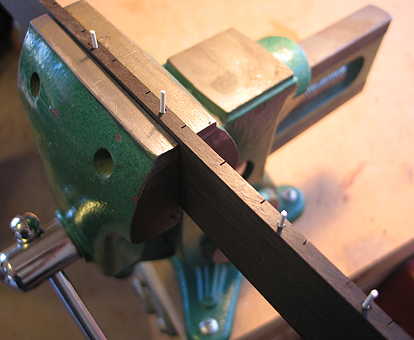
Here I've super-glued in the 1/16" plastic rods (I get them at the hobby store) for the side dots. I'll clip off the excess later.
|
Well, that's it for today. I'll tackle the rest of my "scatterbrain" list tomorrow. |
||
Previous Page |
Next Page |
