REALLY Finishing It Up Now!!!
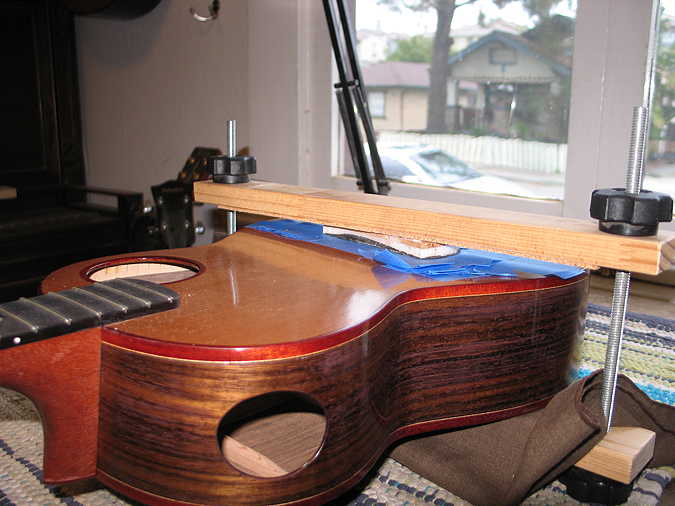
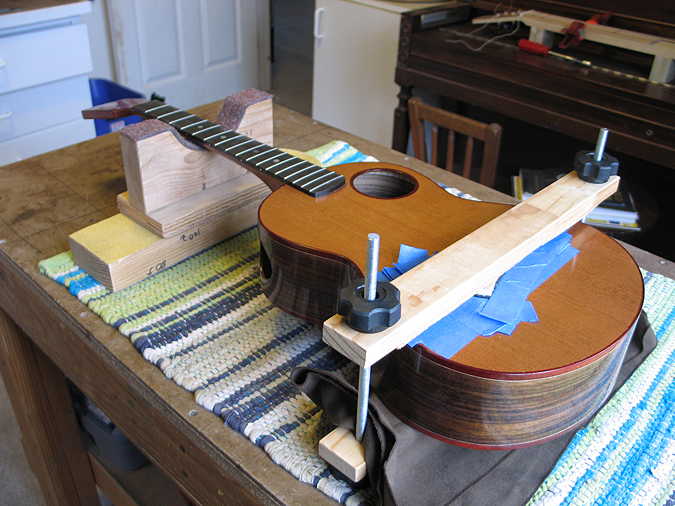
Still Saturday, October 23rd, 2010: Now that I had the saddle location figured out, I set about measuring, remeasuring, and measuring again for the placement of the bridge. Finally satisfied with the placement, I first put several layers of masking tape around the bridge, to form a ledge surrounding the bridge. I find this works for me to help hold the bridge in place. (It also helps protect the finish around the bridge from the next step, removing the finish underneath the bridge.) I lightly scribed just inside the bridge tape outline with an Exacto knife; I then used some orange safe stripper to remove the finish just up to that scribed line. That way, my bridge will sit just a teeny-tiny bit over the finish. I used a 3/8" chisel to scrape away the dissolved finish, wiped it with a damp paper towel to remove any stripper residue, and let it dry. I then lightly sanded the stripped surface. I then applied Titebond glue to the bridge, and a little to the stripped area, and glued on the bridge, holding it a while until it set. The layers of masking tape helped hold it securely in place. I then put the clamping caul on top of the bridge and applied the 2-board clamp, as you see below. I only lightly clamped it down, as I didn't want to put undue stress on the top.
|
|
Well, there it sits now. It's around 3:00 p.m. now. I think I'll let it sit for an hour or so, before I remove the clamp to see how it went! I can't wait to see how this thing is going to sound!!!
WHILE I HAVE YOUR ATTENTION....Here are some links to some really cute videos of a five-year-old ukulele player in Japan:First, his inspiration: Jason Mraz's "I'm Yours" Now, his version: Ukulele "I'm Yours" And this: Ukulele "ma-i-na-ku-ma-na" (He composed this himself.) (Watch his other YouTube videos, too!!!!) |
|
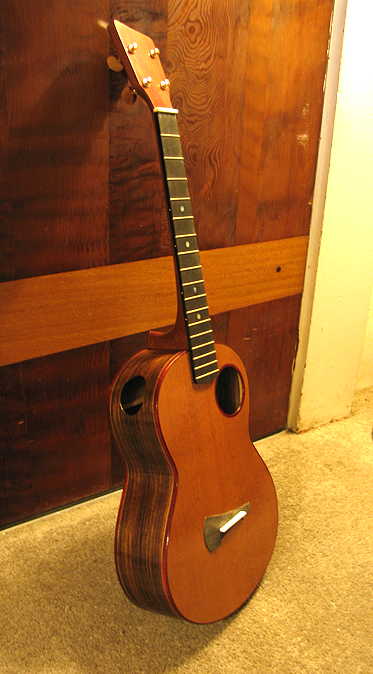
Saturday evening, October 23rd, 2010: Well, this will be it for today. I removed the clamp, and here's the outcome:
Previous Page |
|
|
||||||||