Saturday, December 29th, 2012:
Today's task was to make the bridge. It basically took me all day. It's about 4:30 p.m. right now, and I feel good about what I've accomplished today.
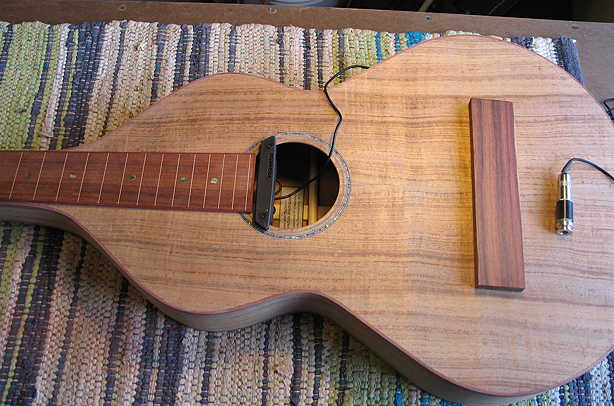
Before I started work on the bridge, I checked to see how this Fishman Rare Earth Humbucking soundhole pickup would fit the guitar. I had bought this pickup a while back, but had never installed it in a guitar. (In fact, I've never actually installed a pickup permanently in any instrument I've made, so this will be a first for me!) It came already wired to the jack, but I think I'm going to attempt to shorten the wiring (which means some practice in de-soldering and soldering, which I haven't done since I built the Strat way back in 2002!). As it is, the wire is WAY too long, and I'd rather not have all that coiled wire possibly flopping around in my guitar.
|
|
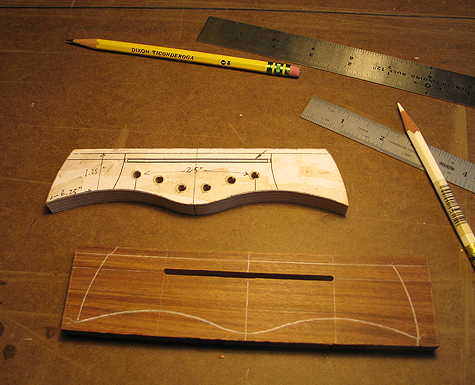
After I'd checked the pickup, I moved on to making a template of my bridge. I decided to add 1/8" to the front of the bridge, so the saddle would be set a little further back. (I'd read some threads on the saddle possibly cracking the bridge by being so close to the front edge of the bridge, as it is in the Stew-Mac plans.) I also decided to shape the bottom of the bridge differently than it was drawn on the Stew-Mac plans by putting a bit more curve and flare to the shape, making the bottom edge follow the curve of the bridge pin holes.
I glued my final bridge drawing to some 1/2" plywood and bandsawed and sanded it out. I also drilled out the bridge pin holes (3/16").
|
|
|
|
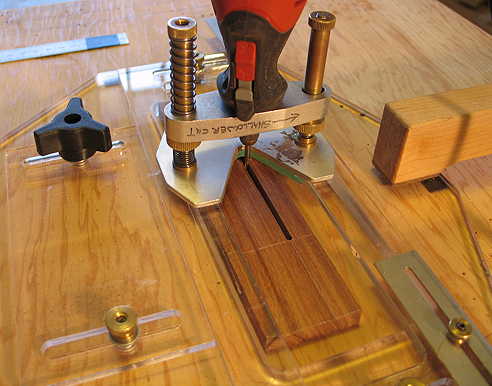
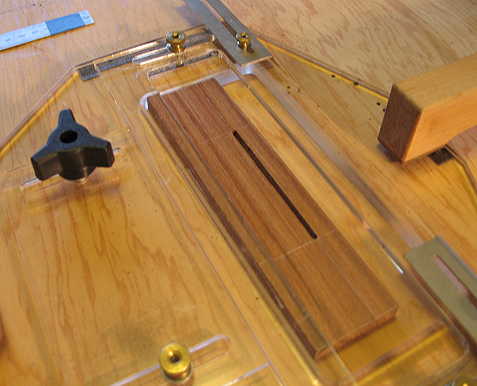
Once the template was finished, I first thicknessed my Granadillo bridge blank to 3/8", then routed out the 3/32" saddle slot, using the Stew-Mac saddle routing jig.
|
|
Here is the slot. It is 3-1/4" long and 1/4" deep. That should give me around 1/8" of the saddle poking out of the slot. The saddle will thus end up being around 1/2" above the soundboard. (At the nut, the strings will be about 1/4" above the 1/8" thick fingerboard.)
|
|
|
|
Now I could trace the outline of the bridge onto the bridge blank.
|
|
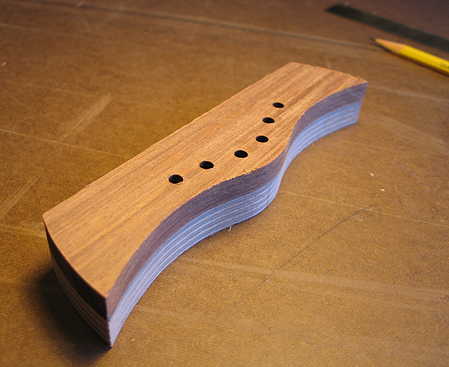
Then I first bandsawed the bridge shape close to the line, and then used my Robo-Sander to sand the bridge flush with the template. I also drilled the bridge pin holes in the blank, using the template as a guide.
|
|
|
|
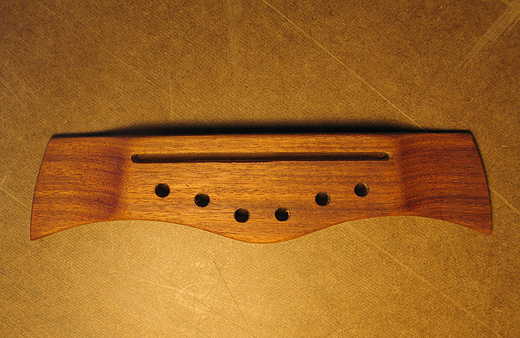
After I had the basic shape done, I used my belt sander thicknessing jig that I made this past summer, to thin down the wings of the bridge, to around 1/8" at the ends. When that was done, I then spent some time sanding and rounding the edges of the bridge. I have applied a little lemon oil to the bridge, so you can see how it will look later.
|
|
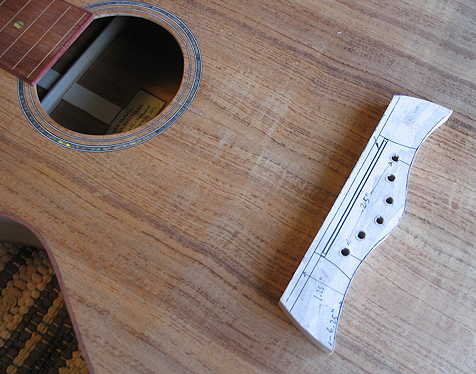
So...the bridge is all finished now. Here's what I've got so far on this Weissenborn. I think it's going to end up looking really nice! The only things I have left to do, before I start the finishing process, are to cut the nut slot (into the peghead veneer), drill the hole for the endpin jack, and do the final sanding. The end is in sight!!!

|
| |
|
|
|
|
|
|
|
|
|