Beginning the Weissenborn Project: Templates & Beginning the Mold
Wednesday, November 21st, 2012:
Now that I'm all finished with my various repair projects (described here), I have FINALLY begun the Weissenborn project!!!
By the way, here's what inspired me to undertake this particular project:
My sister and I had seen Ed play the Weissenborn in concert a while back; in fact, at that time, my sister told me, "Kathy, you should build one of those!" So, I guess I have my sister to blame for this one...
Well, I can finally begin this new project!!! I have to admit, on this one, I have very little idea about what I am doing. All I have are the Stew-Mac blueprints of the Weissenborn. I have done a little research on the web, trying to find anything I could on how to build a Weissenborn guitar; so far, I have found a few YouTube videos, a Weissenborn project blog or two, and a PDF file of Terry Buddell's Building A Weissenborn. I haven't really watched or read all of these resources through yet (been too busy with other things lately); I guess I will just figure it out as I go along!!!
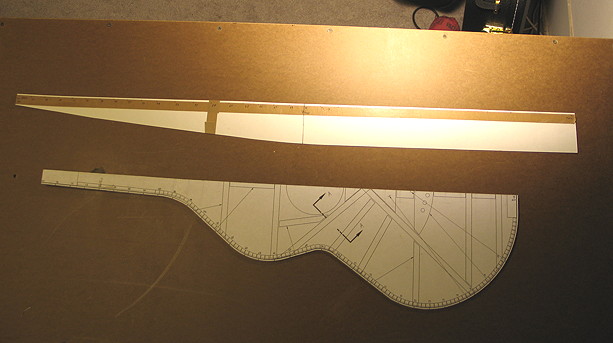
What I did today was to make my templates. First I cut out and glued a copy of the template to a piece of 1/8" tempered hardboard. That was easy.
The more time-consuming task I had today was to create a side template. The blueprint only had what the shape of the side was as you look at it from one side of the guitar; it did not have a drawing of the full-length side.
So, here's what I did: (1) On the side-view drawing on the blueprint, I marked the top edge in 1" increments, drew a perpendicular line from each point, down to the back edge, and then measured and recorded the width of the side at that point. (2) I then marked the centerline of my half-guitar template with those same 1" marks, and drew a perpendicular line from each mark down to the side. (3) I ran a piece of masking tape against the template's side, from the neck end to the tail end, and transferred the side marks from Step #2 to the tape. (4) Finally, I used the tape to create a side template of posterboard; the marks on the tape were transferred to the top edge of the side template, and perpendicular lines of each measurement from Step #1were drawn from each top mark, creating the back profile onto the side template.
Whew! Sounds more complicated than it actually was. To the right is the result of today's work.
The next task will be to make my mold. Stay tuned!!!
Friday, November 23rd, 2012:
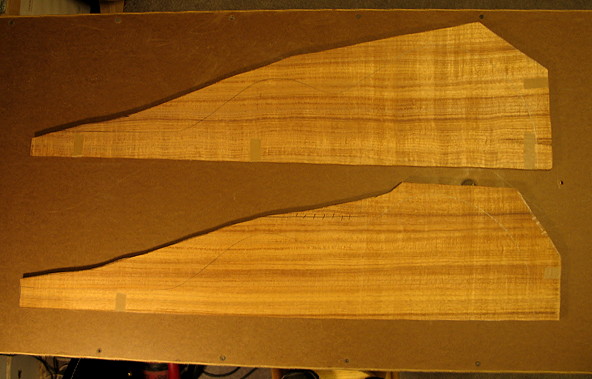
Here's what I did today. To the right: I have taped together the bookmatched halves for the top and back, roughly cut so that I can later joint and join the pieces. This is Tasmanian blackwood (also known as Australian blackwood), which I purchased from Australian Tonewoods. Originally, it was all one large bookmatched wood set; I traced the rough outlines of the top and back halves onto the wood, and then used a jigsaw to separate the two sections. Later, I will joint the edges and join them.
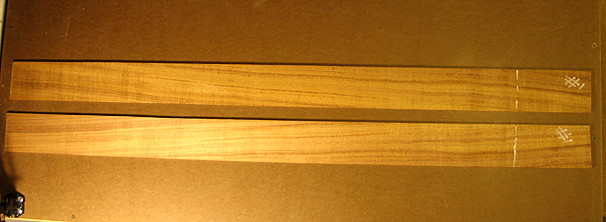
Below left: Here are the two pieces for the sides.
Below right: Next, I used my half-template to draw one piece of my mold shape onto 3/4" plywood. I then cut it out with the bandsaw and smoothed all the edges with a sanding block. This will be my template for the other three pieces. The three pieces you see on the top of the photo will be first bandsawed close to the lines; then, I will screw the template piece to each mold section and finish its shaping with the router and a flush-cut routing bit with a bearing. That way, all four pieces will be identical. I will then glue the two layers together, making my mold 1-1/2" thick. This will be tomorrow's main task.