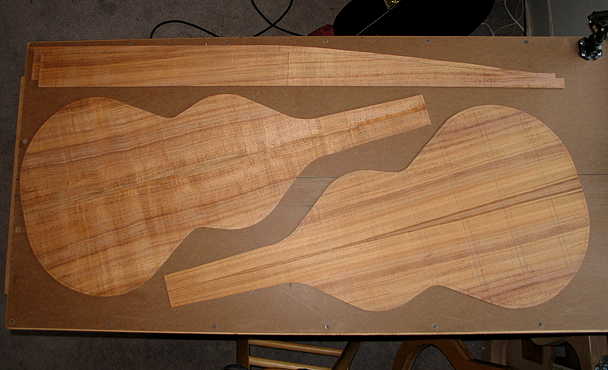
Last night, I thickness-sanded the top, back, and sides. The top, I left thick, only sanding enough to smooth out the surfaces; I will thickness-sand it to its final thickness later, after I've inlaid the rosette. The back and sides were both thicknessed to .095" (about 3/32").
After I did that, I set the mold over the top and back, to draw their shapes, and drew another line about 1/4" outside the outlines. (That is what I have trimmed the pieces to.) I marked out the back bracing positions and the centerpoint for the soundhole.
This morning, I bandsawed these pieces out. I left the sides at least 1/2" longer, for some leeway for trimming the ends later.
(The lower right piece will be the back, because of its nice striping along the centerline.)
|
|
Tuesday, around 3:15 p.m.:
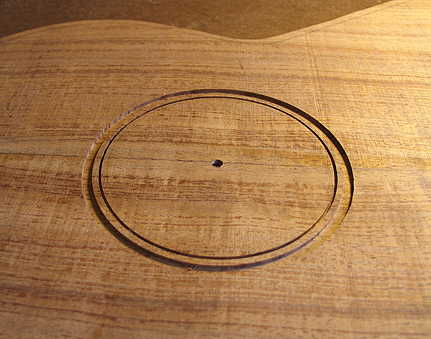
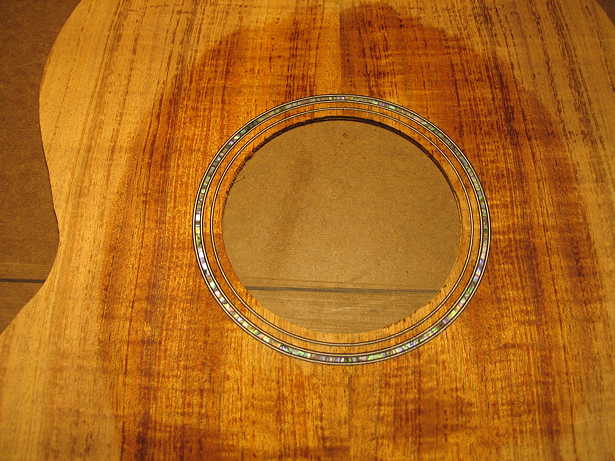
I spent about three hours working on the rosette inlay. I first used the Dremel and Stew-Mac circle cutter to rout out the two channels for the single black/white/black ring and for the Zipflex paua abalone strip flanked on both sides by a thin black/white/black strip. Here are the channels:
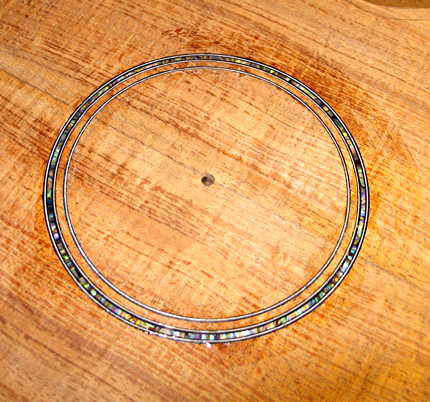
I then cut the strips to fit the rings and glued them in with Weld-on glue. I'm going to give the glue plenty of time to set, and will thickness-sand the top down tomorrow to its final thickness.
|
Wednesday, December 5th, 2012:
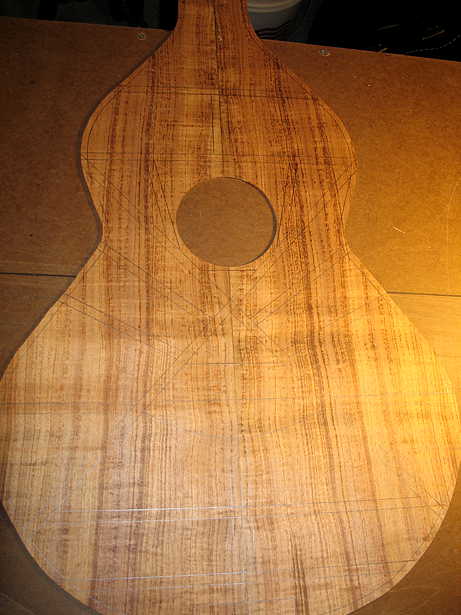
Just a couple of photos today --- wasn't able to get to the guitar until the afternoon (had a dentist appointment and grocery shopping to do). All I was able to do was to sand down the rosette and final-thickness (to about 0.11") the top. After I did that, I drew the bracing plan on the inside of the top. I also got a little start on cutting the brace stock; I'll finish that tomorrow, probably, and perhaps begin gluing braces.
|
|
Here is the rosette, with the top dampened a little bit so you can see how it might look under finish:
|