Still Friday, December 21st, 2012, about 1:00 p.m.::
I just spent about an hour adapting my holding cradle for this instrument. I had to drill a couple more holes in the platform for better positioning of the holding clamps, so it would hold the instrument more solidly. Then I set the guitar in the cradle so that all the sides were perpendicular to the platform:
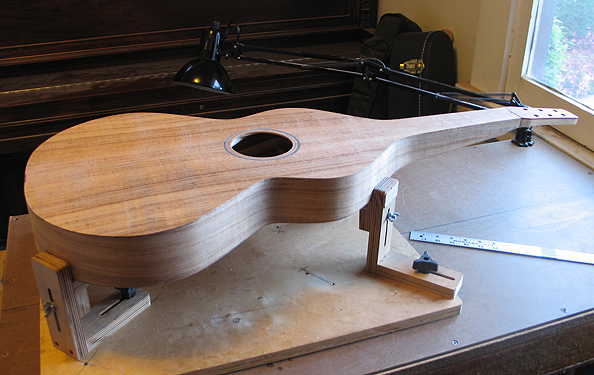
I'm a little concerned that the neck portion doesn't tip down from the weight of the router as I rout the channels (even though the guitar is set pretty tightly in the cradle), so I think I will use something on my workbench to prop up the neck as well.
I will now take the cradle out to my shed, where I will do the actual routing; I just did all this adjusting here inside my workroom because it's really, really cold outside in the shed right now and I didn't feel like being out in the cold if I didn't have to!!!
Well, I think I've procrastinated long enough . . . Here I go!!! Wish me luck!!! (This part always makes me nervous.) |
|
Friday evening:
OKAY . . . HERE'S WHAT HAPPENED . . . (Don't worry --- it wasn't any sort of disaster --- things turned out well --- it's just that I ended up doing the binding a bit differently than I had planned.)
I started out by setting up the cradle with the Weissenborn in the workshed, and started to set up and test my binding router jig.

After I set the bit into the router and did a test piece, I noticed that the jig wasn't working smoothly. When I tried to move and pull out the router arm, it was very tight and kind of jerky. I tried to fix that by putting some lubricating oil in the drawer slides, and that helped somewhat. But it still did not pull out or move smoothly, and I discovered that (I think) it was the plywood box that slides in and out of the bigger box that was holding it all up. I don't know if the wood had swollen with the change of weather, or what, but it just wasn't working smoothly enough for me to feel comfortable using it.
Another problem was that I would have to rout this larger instrument in two stages. The router would only reach about half of the instrument, and I would have to reposition the cradle to get to the other side of the instrument. |
SO... I changed my mind and decided to do the binding channels with my old binding router attachment for the Dremel --- the same attachment I used on my very first guitars. I have both the old and the new Stew-Mac binding router attachments (which you screw onto the Dremel), but I've always liked the older one better. The newer one has an adjustable roller guide, but that one was always more difficult for me to control and keep parallel to the guitar side. With the older attachment (two attachments that each have 2 binding depths), you can ensure that the cutter is parallel to the side, because you physically press the guide against the side as you rout the channel.
Here's how I use it. (I had to lay the Dremel upon a support in order to take the photo, so I'm not actually holding it here!) I use a Dremel #115 cutter bit; it routs out the channel much more smoothly than the 2-fluted carbide cutter bit that Stew-Mac sells for use with this attachment. That blue masking tape is there to remind me to have that side of the attachment facing up (because the .090" depth is on the opposite side --- if I mistakenly turn it the other way, I would end up routing only a .060" channel).
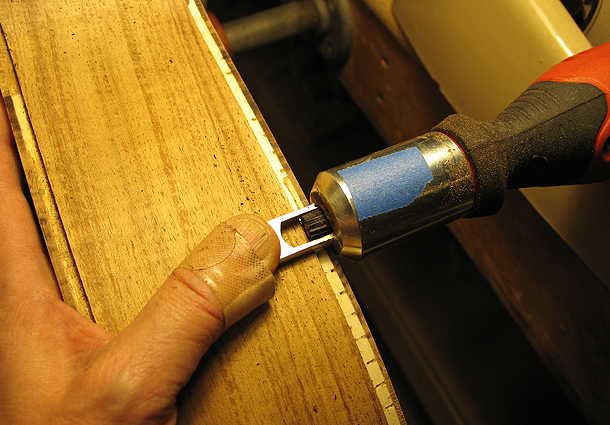
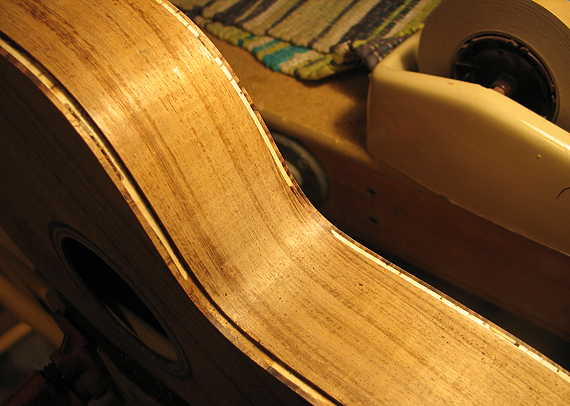
I do admit --- the Dremel doesn't have a whole lot of power --- the first routing pass always produces small billows of Tasmanian blackwood smoke (!!!). You just have to go slowly and hold the Dremel firmly as you rout. But after the first pass, I do another light pass and the Dremel cleans up the channel quite nicely. I ended up with nice, uniform, crisp binding channels. Took me a couple of hours to do all the routing.
I actually kind of liked doing the binding channels this way --- I felt more in control of the process, and felt less apt to make some disastrous slip-ups. I am finding, lately, that I am increasingly gravitating to more hands-on procedures --- like bending sides by hand on the electric bender, for example, instead of using the side-bending machine --- for that same reason. I plan to bend the bindings for this instrument by hand, also. I just feel more in control, I guess!
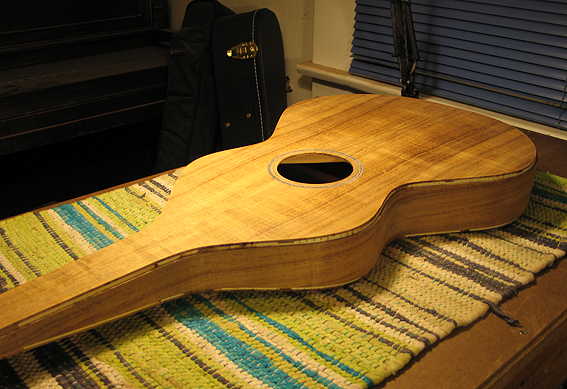
Bending the binding is next. |
|
|